


Navigating unpredictable weather shifts during an urban commute or a brisk outdoor trek often forces you to adjust outerwear on the go. When internal compartment volume is packed with laptops, textbooks, or personal gear, learning how to attach jacket to backpack ensures your hands remain free and your garments stay secure. Shoving a damp or bulky coat directly into an already crowded main bag risks wrinkling clothing and crushing delicate gear. Whether carrying an ultralight windbreaker, a heavy fleece, or a technical rain shell, securing apparel to exterior anchor points frees up valuable interior storage.
Stowing wet garments externally also prevents trapped moisture from seeping into sensitive electronics, paper documents, or clean clothing packed inside. Specialized pack features, much like utility designs seen in hiking backpack cooler options, offer versatile anchor points that keep wet gear separated and well ventilated. Applying proper fastening techniques protects technical outerwear fabrics from friction tears while maintaining comfortable carrying balance throughout your journey. Mastering a few dependable attachment methods keeps your jacket accessible whenever trail or transit conditions change suddenly.



Reliable Techniques for Securing Outerwear to Your Pack
Securing an extra garment to the exterior of a backpack solves interior capacity shortages while keeping transitional layers readily accessible. The right attachment approach depends on the external frame of your bag, the physical bulk of the outerwear, and the delicacy of the jacket fabric. Matching the appropriate strapping strategy to your pack design eliminates awkward swinging, protects water-resistant coatings, and prevents lost gear. Using exterior lash points keeps your hands free whether you are navigating urban transit or hiking a mountain trail.
Utilizing Front Elastic Bungee Systems for Quick Lashing
Elastic shock cord networks laced across the front panel of a backpack provide one of the quickest exterior storage solutions for lightweight outerwear. To secure a fleece jacket or windbreaker properly, roll the garment tightly into a compact cylinder rather than stuffing it loosely into the netting. Rolling compresses excess air from the fabric, reduces overall surface drag, and prevents sleeves from snagging on branches or turnstiles. Slide the rolled cylinder horizontally beneath the crisscrossed shock cords, centering the mass evenly across the pack face. Once positioned, draw the integrated cord lock firmly against the bundle until the elastic cord applies consistent, snug pressure.
Maintaining balanced elastic tension is vital for securing outerwear without damaging delicate insulation or technical shell fabrics. Down-filled jackets require moderate tension because overly aggressive elastic compression can pinch feather baffles, displace internal down clusters, or crease fragile face fabrics. For rain shells featuring waterproof zipper tracks, always turn the zipper inward toward the pack panel to shield delicate teeth from abrasion. Check the cord lock spring mechanism periodically to ensure that continuous walking motion does not loosen the grip over time. A properly secured bungee hold prevents slipping while allowing rapid removal when temperatures drop.
Securing Bulky Coats with Side and Bottom Compression Straps
Backpacks equipped with lateral compression straps provide robust anchor points capable of supporting heavier garments like winter parkas or softshell jackets. Before positioning the coat, loosen both the upper and lower side buckles fully to create sufficient slack behind the webbing. Fold the garment lengthwise and slide it vertically between the pack body and the loosened nylon webbing straps. Fasten both buckles securely across the coat, then pull the loose webbing ends until the garment rests firmly against the side profile of the bag. Ensure the bottom hem does not drape below the base of the pack where it could interfere with leg movement.
Bottom lash straps, frequently provided on outdoor packs for sleeping mats or gear rolls, offer an exceptional platform for carrying dense outerwear horizontally. Roll heavy garments like insulated puffers or fleece pullovers into a firm cylinder with the hood tucked securely into the central fold. Guide the rolled bundle through both bottom strap loops, centering the weight evenly between the left and right sides of the pack floor. Tighten the ladder-lock buckles incrementally until the garment is locked tightly against the reinforced base panel of your pack. This horizontal base positioning keeps upper compartments unobstructed, though you must avoid placing the bag down on wet pavement or soggy ground.
Cinching Garments Beneath Top Lids and Roll-Top Closures
Backpacks configured with floating top lids offer an outstanding natural compression space directly above the main storage compartment. To use this space effectively, fold your jacket flat across the top opening collar of the pack before pulling the lid downward over the bundle. Route the lid retention webbing straps through their corresponding buckles and pull them firmly forward to trap the jacket in a secure fabric sandwich. Equalize the tension on both sides so the pack lid does not skew sideways during transit. This placement protects the coat beneath the weather-resistant lid fabric, shielding it from light drizzle while keeping it ready for sudden storms.
Roll-top backpacks utilize a central vertical compression strap that works just as effectively for securing jackets against the top rim. Fold the outerwear to mirror the horizontal width of the rolled closure, lay it directly over the rolled seam, and bring the over-the-top webbing strap across its center. Fasten the central buckle and pull the webbing snug to press the garment flat against the sealed top seam. Much like organizing gear inside structured frame backpack designs, anchoring external apparel along the central vertical axis prevents asymmetrical pulling against your shoulders. This streamlined positioning also reduces drag for bicycle commuters riding in windy weather.
Fastening Through Daisy Chains, Lash Tabs, and Carabiners
Technical daypacks and tactical commuter bags frequently feature rows of bartacked webbing known as daisy chains or PALS loops along their exterior panels. These reinforced textile loops provide customizable anchor points for accessory carabiners, elastic cords, or utility webbing straps. To anchor a jacket, clip an accessory wiregate carabiner through the inner collar hanging loop, but avoid relying solely on that single connection point. Heavy wind resistance or rapid bodily movement can easily rip a lightweight locker loop if the bulk of the jacket is allowed to swing freely. Use the carabiner primarily as a secondary safety leash while securing the main body of the garment with straps.
Creating an auxiliary retention web by threading accessory paracord through adjacent daisy chain loops yields an exceptional customized harness for bulkier coats. Weave the cord through opposing loops in an alternating crisscross pattern, slide the folded coat beneath the network, and cinch it using a standard plastic cord stopper. This modular method works exceptionally well when navigating crowded public transit terminals where loose clothing can snag on turnstiles. Inspect all metal clip edges carefully before fastening to confirm that sharp burrs do not press into coated technical fabrics. Combining dedicated loops with gentle compression provides reliable security without putting undue stress on garment seams.
The Grab Handle Loop and Sleeve Hitch Technique
When your backpack lacks exterior compression straps, elastic netting, or webbing loops, simple knot-based techniques provide a dependable zero-hardware solution. The most straightforward approach involves threading both sleeves of your jacket upward through the top grab handle of the pack. Once both sleeves are threaded through, tie them together in front of the handle using a clean square knot or a secure double overhand knot. This hitch allows the torso of the jacket to drape flat against the front face of the pack, keeping the bulk contained without stealing interior volume. It requires no additional hardware and can be untied in seconds.
Another practical variation involves laying the jacket over the top of the pack and wrapping the sleeves around the shoulder harness before tying them across the front. Crossing the sleeves beneath the sternum strap anchor points keeps the jacket from swaying backward, holding the center of mass close to your body. However, be cautious not to allow thick knots or bundled fabric to sit directly against your collarbones or trapezius muscles. Uneven bunches of fleece or nylon under your shoulder straps can create painful pressure points during extended walking sessions. Adjust the drape so that the fabric rests smoothly along the outer edges of the harness without restricting arm swing.
Hardware Caution and Role of Secondary Attachments
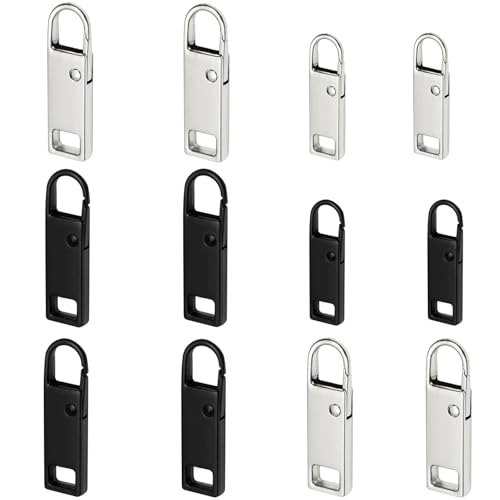
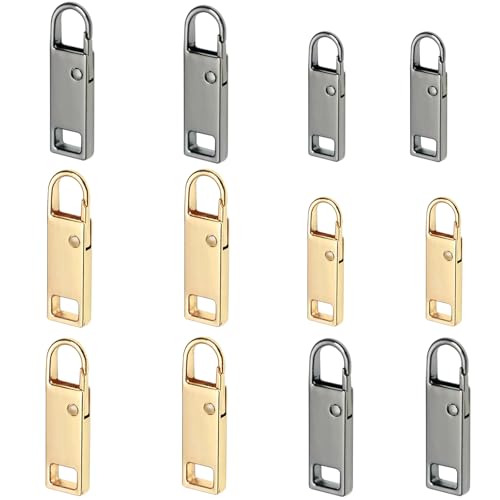
Many backpack owners customize their everyday carry setup with modular utility additions such as replacement zipper pulls or identification accessories. Items like the Urmspst 20PCS Zipper Pulls or the Urmspst Zipper Pull Replacement (Upgraded) provide enhanced grip on stubborn slider tracks, especially in cold weather when wearing gloves. However, you should never attempt to anchor the dead weight of a heavy jacket directly to a zipper pull tab or slider body. Suspension loads place intense lateral leverage on the slider mechanism, which can spread the slider body, bend the pull tab, or derail the zipper teeth under trail stress.
Zipper hardware should strictly serve its primary purpose of opening and closing access panels quickly around your externally stowed clothing. Decorative accessories, such as the Furneet My Social Battery Slider Pin or the Octory 6 PCS Mini Set Cute Cartoon Mickey Iron patches, should be installed only on flat, non-load-bearing fabric surfaces. Keep metal pin posts, clasp backings, and rigid embellishments far away from compression zones where cinched straps could drive metal points into technical jacket shells. If you want to personalize your setup, choose smooth embroidered elements like the U-Sky Sew or Iron on Embroidered Patches that lie flat and do not create snag points against strapped gear.
Protecting Technical Fabrics and DWR Treatments
Modern outerwear depends on specialized microporous membranes and durable water repellent (DWR) chemical finishes that require careful consideration when fastened externally. Continuous mechanical friction between coarse backpack fabrics and lightweight shell nylon can rapidly wear down protective water-repellent treatments. When strapping a technical rain shell to your bag, fold the jacket so that the inner liner faces outward toward the compression straps. This protective folding strategy ensures that inevitable strap abrasion contacts only internal facing materials rather than stripping the crucial weatherproofing finish off the exterior shell.
External stowage is often necessary when carrying a saturated rain shell that would otherwise soak dry electronics inside your bag. While allowing a wet jacket to drip-dry externally is convenient, wet fabrics readily pick up airborne trail grit, road dust, and exhaust soot. Once you arrive at your destination, rinse the jacket with cool tap water to remove abrasive particulates before they work into the microscopic fabric pores. Even owners of affordable hiking backpacks should practice clean gear habits to extend the working lifespan of both apparel and pack hardware. Following basic textile care rules preserves waterproof performance and keeps your gear ready for harsh downpours.
Managing Weight Distribution and Torso Ergonomics
Lashing extra gear to the outside of a backpack alters the overall center of mass, directly influencing how comfortably the bag carries across your torso. Placing a dense, heavy jacket far out on the exterior face creates a backward rotational torque that pulls your shoulders rearward. This imbalance forces your upper body into a forward slouch to compensate, placing excessive strain on the neck, trapezius, and lower lumbar muscles. Keeping external loads drawn as tight and flat against the pack body as possible reduces this leverage, helping maintain natural upright posture during long walking commutes or steep trail ascents.
After locking down your jacket, take a brief moment to rebalance and tune your shoulder harness system before setting off. Tighten the primary shoulder strap adjusters so the pack sits high and snug against your upper back rather than sagging toward your hips. Fasten the sternum strap across your mid-chest to pull the shoulder straps slightly inward, preventing the straps from rubbing your armpits as your arms swing. If your pack includes top load-lifter adjusters, snug them forward to bring the upper weight closer to your cervical spine. Proper harness tension transforms an awkward exterior load into a stable, well-integrated unit that moves naturally with your body.
Choosing the right technique to secure outerwear to your pack keeps your gear organized, your hands free, and your internal compartment spacious. Whether you rely on front shock cord netting, sturdy lateral compression webbing, or a straightforward sleeve hitch through the grab handle, maintaining firm retention and protecting delicate shell fabrics ensures hassle-free travel. By balancing the external load close to your spine and checking strap security before departure, you can conquer fluctuating weather with complete confidence.






Write Your Review
No reviews yet. Be the first to share your experience!