


Securing bulky overnight sleep systems to an overloaded pack often turns a scenic hike into an exhausting physical battle against rearward leverage. When main pack cavities run out of volume, knowing how to hang sleeping bag on backpack exterior attachment points keeps essential gear accessible without throwing off your natural walking gait. Hikers venturing onto technical trails with external frame hiking packs frequently encounter severe pendulum sway if their compression sack is anchored loosely to lower gear loops. Balancing torso ergonomics, strap tension, and weight transfer ensures that your sleep system stays firmly positioned against the pack frame rather than dragging down on your shoulders.
Exterior gear rigging demands deliberate consideration of weather exposure, trail abrasion, and center of gravity placement. A sagging bundle tied to base lash loops pulls directly against your lumbar spine, forcing the trapezius muscles to work overtime on steep trail inclines. Utilizing tight webbing straps, specialized compression sacks, and dedicated daisy chains prevents fabric damage while maintaining a tight, streamlined pack silhouette. Understanding the mechanics of external attachment keeps delicate sleep insulation protected from branches and moisture throughout unpredictable wilderness treks.


Essential Techniques for Attaching a Sleeping Bag to Your Backpack
Fastening an exterior sleep bundle requires an understanding of load mechanics, pack balance, and fabric protection. Hikers often struggle with gear sway or damp insulation when bulky items are lashed haphazardly to pack frames. By mastering proper strap tension, positioning, and weatherproofing, you can transport your sleep system securely across demanding terrain.
The Mechanical Physics of Pack Balance and Leverage
Carrying trail loads comfortably requires positioning dense gear close to the spine and transferring weight to the hips. Sleeping bags occupy substantial volume while remaining lighter than dense items like food canisters and hydration bladders. Lash points positioned far from the back panel create a cantilever effect that pulls the pack backward. This rearward torque forces shoulder straps to bite into the trapezius muscles and misaligns your walking posture.
Mounting a sleep bundle at the bottom of a pack shifts the center of gravity downward. While a lower balance point aids stability on flat terrain, a sagging bundle frequently strikes your legs on steep ascents. Securing the bundle tightly against the pack base prevents dynamic bouncing that drains physical energy with every stride. Hikers tackling rough routes must ensure the sleep sack sits high enough to maintain unobstructed leg clearance.
Top mounting positions the sleeping bundle above the main compartment and directly underneath the pack lid. This configuration keeps weight centered along the upper spine, supporting an upright posture on moderate trails. Backpackers using frameless packs often favor this method because it prevents the lower base from collapsing out of shape. Choosing between top and bottom attachment depends on your pack structure, trail grade, and personal comfort.
Identifying Built-in Pack Hardware and Attachment Points
Modern hiking packs feature external anchor points engineered specifically for modular gear attachment. Base compression loops, located beneath the front panel or under the bottom floor, serve as the primary mounting zone. These loops typically utilize three-quarter-inch or one-inch nylon webbing paired with side-release buckles or ladder-lock adjusters. Backpackers inspecting their gear will also notice vertical daisy chain webbing arrays running down the exterior panel.
Daisy chains feature reinforced bar-tacked loops that offer multiple anchor heights for auxiliary webbing straps. These loops distribute pulling stress across pack seams, preventing fabric tears when lashing bulky cylindrical items. Many versatile designs found on budget trail backpacks include these practical lash arrays alongside dual ice axe loops. Those lower loops can cradle sleeping bag compression sacks when used with aftermarket lashing straps.
Side compression straps offer another viable exterior mounting location for compact sleep systems. Running across the pack sides, these straps stabilize main compartment volume while holding gear against the sidewalls. Hikers choosing side attachment must counterbalance the load by mounting gear of similar weight on the opposite side panel. Uneven side weighting causes asymmetrical spinal strain and leads to premature fatigue on lengthy backcountry trips.
Compressing the Sleep Bundle Before Rigging
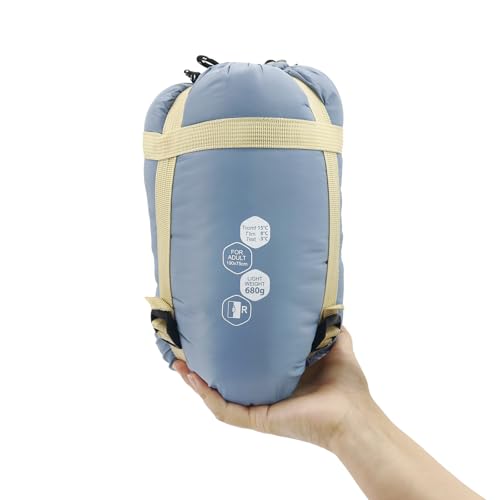
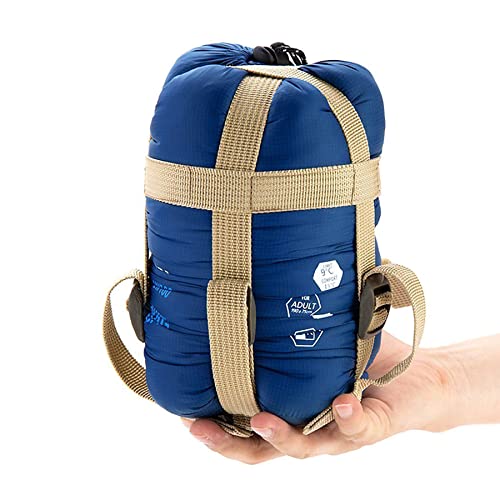
Lashing an uncompressed sleeping bag to a backpack invites snagging, swinging, and sudden balance shifts. Down and synthetic insulation must be compressed into a dense cylinder to establish a stable anchor surface. Utilizing dedicated compression gear, such as the Frelaxy Compression Sack constructed with 210T tear-resistant polyester, allows hikers to draw bulky insulation into manageable dimensions. Four perimeter compression straps help compress the contents evenly into a tight roll rather than an awkward shape.
Warm-weather sleeping bags naturally pack down smaller than multi-layer cold-weather systems. The NewDoar ultralight sleeping bag features 380T ripstop nylon that easily shrinks within its included heavy-duty compression sack. Similarly, envelope-style models like the ECOOPRO warm weather sleeping bag roll down into an eleven-inch cylinder that occupies minimal exterior space. Compact bundles create minimal wind resistance and drastically reduce the risk of catching on trailside branches.
Insulation sacks should be compressed firmly without straining delicate zipper tracks or fabric seams. Storing a lightweight sleeping sheet, such as the compact Frelaxy sleeping bag liner, inside the main compression sack keeps all sleep components unified. Cinching the side compression straps alternately in a crisscross sequence prevents the stuff sack from bulging unevenly at one end. A uniform, cylindrical shape ensures that pack webbing lays flat across the surface for maximum friction grip.
Step-by-Step Bottom Mounting with Webbing Straps
Fastening a sleeping bag beneath the pack floor requires a methodical tightening sequence to prevent slippage on the trail. Loosen both bottom webbing straps fully and set the loaded backpack upright on a flat surface. Slide your compressed sleeping bag through the open webbing loops, centering the cylindrical mass symmetrically between the pack corners. Ensure that the stuff sack drawstrings and cord locks face toward the pack body so they cannot snag on brush.
Pull each strap snug by alternating between the left and right buckles rather than cranking one side down completely. This balanced tightening seats the cylindrical sack flat against the reinforced base fabric of the backpack. Once tension is established, grab the sleeping bag firmly with both hands and attempt to twist it back and forth. Any internal movement indicates that the webbing requires further tightening or that the buckles are slipping under tension.
Loose webbing tails pose a tripping hazard and can easily snag on trail debris during technical descents. Fold excess webbing lengths into neat bundles and secure them using elastic keepers or simple half-hitch knots behind the buckle frames. Verify that the mounted roll does not hang below your lumbar contact pad or brush against the back of your legs. Maintaining adequate clearance prevents uncomfortable friction and keeps your walking stride unobstructed.
Securing the Sleep System Beneath a Floating Top Lid
Mounting your compressed sleep bundle under a floating top lid pocket offers superior weight distribution for rough trails. Floating lids connect to the main pack body via adjustable front and rear webbing straps, allowing the lid to rise as gear volume expands. To rig this setup, cinch the main pack collar opening tightly and lay the compressed sleeping bag horizontally across the aperture. Lower the top lid over the sleeping bundle so the fabric hood encapsulates the cylindrical sack completely.
Fasten the primary front lid buckles and cinch the tension straps down evenly until the lid compresses the sleeping bag against the internal contents. The tension created between the lid and the pack collar locks the bundle securely in place without requiring extra hardware. Check that the sleeping bag does not project backward, which could impair head mobility when looking up steep hills. A properly balanced top bundle stays positioned directly above your shoulder blades, channeling weight straight down into the hip belt.
Backpackers who transition between multi-day hiking setups and compact hiking daypacks appreciate the versatility of top lid compression. This positioning keeps expensive sleeping insulation well away from damp ground, mud splashes, and abrasive rocks during trail rest breaks. When setting your pack down, the sleeping bag rests safely on top of the pack rather than absorbing dirt from the trail floor. The top placement also speeds up camp setup by allowing immediate access to shelter gear before unpacking the main compartment.
Rigging with Accessory Straps and Avoiding Hardware Pitfalls
Packs lacking integrated bottom webbing straps require aftermarket utility straps to create dependable attachment points. Select non-elastic nylon or polyester utility webbing equipped with aluminum cam buckles or heavy-duty acetal ladder locks. Thread the accessory straps through the lower daisy chains or reinforced lash squares, forming secure cradle loops beneath the pack body. Avoid relying on lightweight carabiners clipped merely to stuff sack haul loops, as single-point connections swing violently during movement.
Elastic shock cords and bungee arrays should never be used as the primary retention system for overnight sleeping bags. Bungees stretch dynamically with every footstep, allowing heavy bundles to bounce and create rhythmic instability on uneven terrain. This constant movement stretches pack seams, strains attachment stitching, and can suddenly launch gear if a hook slips off under tension. Static webbing straps maintain unyielding friction grip, ensuring that your load moves as a single, cohesive unit with the backpack harness.
Inspect all plastic hardware, bar-tack stitching, and buckle teeth before committing to an external lashing setup. Sun exposure and prolonged tension can cause brittle plastic buckles to crack unexpectedly under trail stress. Carrying a spare dual-adjust buckle or a simple roll of utility cord provides insurance against hardware failure in remote wilderness areas. Testing your attachment straps under full tension at home prevents unpleasant surprises when packing up camp in wet or windy weather.
Weatherproofing and Environmental Protection
Exterior gear mounting exposes critical sleep insulation directly to pouring rain, trail mud, and aggressive brush. Sleeping bag shells crafted from 20D or 380T nylon provide water resistance against light spray, but sustained downpours will penetrate untreated seams. Enclosing your sleeping bag inside a water-resistant stuff sack with taped seams creates an essential primary barrier against moisture ingress. Outdoor adventurers often line their compression sacks with heavy-duty plastic bags to guarantee dry bedding at the end of a wet day.
Standard backpack rain covers are designed to fit around the main pack body, frequently leaving bottom-mounted gear exposed underneath. If you choose bottom lashing, purchase an oversized rain cover that extends fully over the lower sleeping bundle. The elastic hem of the rain cover must tuck securely beneath the sleeping bag to prevent road spray and mud from soaking the underside. Water pooling inside an ill-fitting rain cover can saturate insulation without the hiker noticing until camp is reached.
Bushwhacking through dense timber presents another serious hazard to externally attached sleeping gear. Sharp branches, thorns, and jagged rock faces can easily shred delicate lightweight fabrics during tight trail negotiations. Position tough, abrasion-resistant compression sacks on the outside to shield thinner sleeping bag shells from physical tearing. If persistent heavy rain or dense overgrowth is forecast, rearranging internal pack space to fit the sleeping bag inside the main compartment remains the safest strategy.
Trail Stability Testing and Harness Adjustments
Performing a comprehensive stability test before leaving the trailhead confirms whether your exterior gear rigging is secure. Hoist the loaded backpack onto your shoulders, buckle the hip belt over the iliac crest, and tighten the shoulder straps to position the load. Jump gently in place and perform several torso twists while checking for shifting weight or audible strap creaking. A properly attached sleeping bag remains completely motionless against the pack frame throughout dynamic movement.
External gear weight alters harness geometry, requiring minor adjustments to your load-lifter and sternum straps. Tightening the load-lifter straps at a 45-degree angle pulls top-mounted sleeping bundles forward, transferring leverage directly into the pack suspension. Cinching the sternum strap across the mid-chest keeps shoulder pads from drifting outward under the rearward pull of bottom-mounted gear. These minute harness tweaks prevent muscular cramping across the neck and upper back during long trail hours.
Webbing straps naturally experience minor slippage after encountering dynamic shock loads from walking. Stop after the first mile of hiking to inspect your bottom or top attachment buckles and retighten any slack webbing. Cooler evening temperatures and morning dew can also relax synthetic fibers, slightly loosening strap tension around the stuff sack. Establishing a habit of checking exterior attachment points during routine water breaks keeps your sleeping bag securely anchored throughout the journey.
Mastering exterior gear attachment transforms how you organize gear for challenging backcountry excursions. By compressing sleep systems into tight cylinders, utilizing static webbing straps, and maintaining proper center of gravity alignment, you can conquer rugged trails with absolute confidence. Protect your insulation from unpredictable weather, inspect your attachment hardware routinely, and enjoy comfortable nights under the stars with dry, dependable gear.







Write Your Review
No reviews yet. Be the first to share your experience!