


Heading out into the backcountry for three days demands a careful balance between load stability and basic self-reliance. When planning what to bring on 3 day backpacking trip, your pack selection and packing strategy determine whether your trail miles feel manageable or punishing. Carrying an excessively heavy bag strains the trapezius muscles and lumbar spine, whereas leaving behind critical shelter or hydration components can compromise safety. Exploring modern trail systems often pairs well with durable gear choices, such as utilizing structured frame hiking backpacks to support multi-day loads securely across varying terrain.
A successful 3-day itinerary generally requires between 40 and 60 liters of carrying capacity to handle two nights of camp gear, warm layers, and shelf-stable nutrition. Traditional field knowledge, reflected in historical outdoor literature like The American Boy’s Handy Book, highlights the enduring importance of outdoor preparation and basic tool competency. Today, technical textiles, lightweight synthetic insulations, and ergonomic suspension harnesses make it easier than ever to assemble a balanced multi-day kit. Understanding how each essential item contributes to your shelter, nutrition, and personal safety ensures you hit the trailhead prepared for sudden weather shifts and backcountry challenges.

Comprehensive Strategy on What to Bring on a Three-Day Backpacking Trip
Packing for a multi-day backcountry excursion requires a systematic approach to gear selection, weight distribution, and environmental preparedness. A three-day, two-night trip sits in a unique sweet spot where hikers need complete wilderness independence without the crushing supply bulk demanded by week-long expeditions. Every piece of equipment placed into your pack must serve a concrete purpose, whether by offering reliable nighttime insulation or ensuring continuous clean hydration along arid ridgelines. Approaching your kit as an integrated system helps prevent excessive pack weight while maintaining total self-sufficiency in remote backcountry zones.
Determining Backpack Capacity and Suspension Fit
Choosing the correct backpack capacity forms the foundation of your entire wilderness gear strategy. For a standard three-day itinerary, most backpackers rely on an internal frame pack offering between 45 and 60 liters of volume. This capacity bracket provides adequate space for a freestanding tent, a compressible sleeping bag, and three full days of food without requiring exterior gear strapping. Overfilling an undersized daypack forces bulky equipment onto outside lash points, which compromises your center of gravity and increases snag hazards along brushy trails.
Backpack sizing depends on your exact torso length rather than your overall standing height. To determine your torso measurement, locate your C7 vertebra at the base of your neck and measure down along your spine to the top edge of your iliac crest. A properly fitted harness transfers approximately eighty percent of total pack weight directly onto your hips via a dense, contoured hip belt. Load-lifter straps running from the top of the pack frame should angle upward at roughly forty-five degrees to keep the load balanced against your upper back.
Choosing Shelter Architecture and Ground Protection
Your shelter serves as your primary defense against sudden rainstorms, high winds, and dropping nighttime temperatures. Freestanding double-wall tents remain the most popular choice for multi-day trips due to their straightforward setup on rocky soil and superior interior condensation control. Non-freestanding trekking-pole shelters offer significant weight savings for gram-conscious hikers, but they demand precise staking and firm soil conditions to maintain structural stability. Whichever design you select, practice pitching your shelter at home before attempting to assemble it in fading trail light.
Securing your shelter requires dependable stakes suited to the local terrain you expect to encounter. Lightweight aluminum Y-beam stakes deliver exceptional holding power in packed dirt and loose gravel without adding noticeable weight to your pack. A durable groundsheet or footprint adds an extra layer of puncture protection beneath your tent floor, guarding thin silicone-coated nylon fabrics from sharp root tips and jagged granite. Cut your footprint slightly smaller than the perimeter of your tent floor to prevent rainwater pooling between the groundsheet and the tent fabric.
Building an Insulated Sleep System for Restful Recovery
Physical restoration in the backcountry hinges directly on the thermal performance of your sleep system. When selecting a sleeping bag or backpacking quilt, choose a temperature rating roughly ten degrees lower than the coldest expected overnight trail temperature. Down insulation delivers the best warmth-to-weight ratio and compresses into a remarkably compact bundle, though it loses insulating ability if thoroughly saturated with moisture. Synthetic insulation remains heavier and bulkier, but it retains usable heat even when exposed to damp coastal fog or persistent humidity.
A sleeping pad provides critical conductive insulation between your resting body and the frigid ground. Look closely at the pad ASTM R-value, which measures its structural resistance to conductive heat loss. For comfortable three-season camping across late spring, summer, and early autumn, target an insulated pad with an R-value of 3.0 or higher. Line the bottom of your main pack compartment with a heavy-duty trash bag or waterproof dry sack to guarantee that your sleeping gear remains dry during unexpected river crossings or downpours.
Designing a Trail Layering System for Shifting Weather
Clothing choices for a three-day trek must emphasize versatile moisture management and modular thermal layering. Never pack cotton garments, as cotton absorbs moisture, dries slowly, and rapidly siphons body heat away in chilly breezes. Synthetic polyester or merino wool base layers excel at pulling sweat away from your skin during intense uphill ascents. Merino wool also resists odor buildup over multi-day wear, making it an outstanding choice for consecutive days on the trail.
Your mid-layer provides active warmth while hiking through brisk morning air or taking brief trail breaks. A breathable grid fleece or a lightweight synthetic insulated jacket delivers an optimal balance of breathability and packable warmth. For evenings around camp when your body stops generating heat, an ultralight down jacket or high-loft synthetic puffy traps crucial warmth inside your torso. Packing a lightweight thermal beanie and a pair of liner gloves ensures immediate warmth if sudden alpine temperature inversions occur.
Outer shell layers defend your insulating garments from piercing wind and torrential rain. A waterproof, breathable rain jacket featuring fully taped seams and an adjustable hood is essential equipment for any multi-day wilderness journey. Pairing your shell with durable, quick-drying outerwear like lightweight hiking pants provides abrasion resistance against trailside rocks while allowing perspiration to vent during steep elevation changes. Pack one clean pair of thermal long underwear reserved strictly for sleeping to keep your nighttime environment fresh and warm.
Caloric Calculations, Camp Cookware, and Safe Food Storage
Sustaining physical endurance over three full days of hiking requires deliberate caloric calculation. An active backpacker traversing varied terrain typically burns between 3,000 and 4,500 calories per day depending on pack weight and elevation gain. Focus on high-density foods that offer at least 100 to 125 calories per ounce, such as nut butters, dehydrated meals, nuts, and dark chocolate. Divide your food into labeled daily ration bags to prevent unintentional overconsumption during the initial forty-eight hours.
Your backcountry cook kit should remain compact, reliable, and fuel-efficient. A canister stove paired with an eight-ounce isobutane fuel canister easily handles boiling water for two nights of hot dinners and morning hot drinks. In areas populated by wildlife, carrying an approved hard-sided bear canister or an animal-resistant food sack is essential for preventing habituation. Store all scented items, including lip balm, toothpaste, and food trash, inside your secured container at least one hundred feet downwind from your campsite.
Water Filtration, Purification, and Hydration Logistics
Access to safe drinking water is the most vital survival element on any wilderness itinerary. Never consume untreated surface water from backcountry streams or alpine lakes, as invisible waterborne pathogens can cause severe gastrointestinal distress. Hollow-fiber membrane squeeze filters provide rapid, chemical-free filtration for clear mountain runoff. Always carry chlorine dioxide purification tablets as a dependable, lightweight backup in case your primary mechanical filter cracks or clogs in silty water.
Designing an efficient hydration setup balances on-the-go sipping convenience against pack balance. Carrying a wide-mouth dirty-water bladder alongside two one-liter rigid or collapsible bottles offers great flexibility for camp filtration and trail carrying. Rigid wide-mouth bottles resist freezing and puncture damage, while flexible flasks compress down to save precious volume as your water supply diminishes. Maintain a total carrying capacity of at least three liters to handle dry campsites or lengthy stretches between dependable water sources.
Wilderness Navigation, Illumination, and Battery Backup
Reliable route-finding tools ensure you remain confident when navigating unmarked intersections, alpine passes, or faint game trails. Always pack a physical topographic paper map of your route protected inside a waterproof zip-top bag alongside a magnetic sighting compass. While digital smartphone mapping applications with downloaded offline maps provide incredible situational awareness, cold temperatures and hardware malfunctions can instantly disable mobile devices. Knowing how to orient a physical map and take a magnetic field bearing remains an indispensable backcountry skill.
A dependable hands-free headlamp is mandatory for cooking dinner after dusk, setting stakes in the dark, or managing nocturnal trail emergencies. Choose a headlamp delivering between 200 and 400 lumens with multiple brightness settings to conserve battery runtime. Keeping electronic navigation and emergency devices charged requires a compact portable power bank of approximately 10,000 milliampere-hours. A satellite two-way communicator provides invaluable peace of mind by allowing emergency SOS signaling outside cellular reception zones.
First Aid Protocols, Hygiene, and Leave No Trace Sanitation
A personalized backcountry first aid kit addresses common trail injuries before minor irritations evolve into trip-ending complications. Blister management supplies, including precut leukotape, hydrocolloid bandages, and antiseptic wipes, should form the cornerstone of your medical kit. Include a multi-day supply of personal prescription medications, anti-inflammatory pain relievers, antihistamines, and anti-diarrheal tablets. Keep your entire medical pouch easily accessible inside an exterior pack pocket rather than buried beneath heavy camp gear.
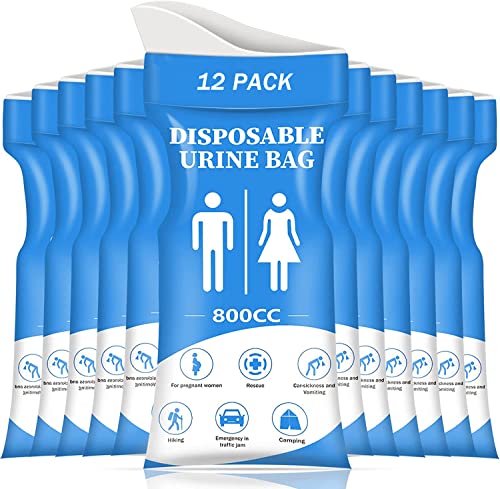
Proper waste disposal preserves wilderness water purity and respects Leave No Trace ethics. Carry an ultralight backcountry trowel to dig catholes six to eight inches deep, positioned at least 200 feet away from any water source, trail, or campsite. Pack out all used toilet paper, sanitary wipes, and hygiene products inside opaque, sealable disposal bags. A small bottle of concentrated hand sanitizer helps maintain cleanliness before handling food and after using the cathole.
Pack Geometry, Center-of-Gravity Loading, and Route Readiness
How you arrange equipment inside your backpack directly influences your center of gravity, balance, and physical fatigue. The bottom of your pack should house lightweight, bulky items that you will not touch until establishing your evening camp. Your sleeping bag, sleeping pad, and nighttime clothing belong here, creating a stable, shock-absorbing base for the rest of your equipment. Compressing these items firmly into the base prevents the lower pack from sagging backward away from your lumbar spine.
The heaviest gear items must be positioned in the middle of your pack, resting as close to your spine as possible. Your dense food canister, cook kit, and extra water reservoir should sit between your shoulder blades and upper lumbar region. This placement keeps the pack mass aligned with your natural upright posture, reducing the tendency to lean forward excessively while trekking uphill. Surrounding heavy items with soft layers, such as your camp puffy jacket, prevents hard objects from poking uncomfortably through the back panel.
Reserve the top compartment and exterior stretch pockets for gear requiring immediate trail access throughout the hiking day. Your rain shell, water filtration kit, first aid supplies, and midday trail snacks should sit right beneath the top lid or inside flexible mesh outer pockets. When assessing carrying gear, even budget-friendly trail packs benefit significantly from disciplined load distribution that keeps weight centered and balanced. Always use side compression straps to stabilize remaining internal volume and prevent interior load shifting during technical terrain descents.
Assembling a reliable gear inventory for a three-day backcountry trek transforms challenging wilderness terrain into a rewarding outdoor experience. By methodically addressing your shelter, sleep system, trail nutrition, hydration, and pack loading geometry, you establish total self-sufficiency in remote backcountry zones. Keep your pack weight manageable by leaving non-essential luxury items at home while never compromising on core navigation, first aid, or storm protection. With careful preparation and calibrated gear choices, your multi-day trail adventure will deliver memorable vistas and restorative nights under the stars.





Write Your Review
No reviews yet. Be the first to share your experience!