


Nothing derails a promising mountain excursion faster than bruised toenails on steep descents or friction blisters burning through damp socks. Footwear serves as the structural foundation for every step across rocky talus, muddy ascents, and uneven trail systems. Learning what to know when buying hiking boots helps trail walkers navigate the confusing landscape of leather uppers, internal shanks, waterproof barriers, and proprietary sizing lasts. Hikers carrying heavy loads often pair sturdy boots with flexible clothing like lightweight hiking pants to maintain full lower-body mobility over high trail mileage. Taking the time to evaluate anatomical foot shape alongside trail terrain ensures long-term comfort while preventing debilitating foot fatigue.
Modern outdoor footwear ranges from agile synthetic speed hikers to rigid nubuck backpacking boots built for severe alpine conditions. Selecting the right footwear requires balancing torsional rigidity, midsole cushioning lifespan, and outsole lug traction against pack weight demands. Many trail enthusiasts struggle with sizing inconsistencies across outdoor brands, often discovering that standard street shoe sizes cause severe instep pressure on prolonged treks. Understanding how volume profiles, bellows tongue heights, and heel retention systems interact allows buyers to invest confidently in footwear that protects their joints across variable backcountry terrain.


Essential Criteria and Technical Mechanics for Buying Hiking Boots
Selecting backcountry footwear requires analyzing the biomechanical relationship between foot anatomy, trail surfaces, and pack weight. Backcountry hikers must look beyond aesthetic designs to inspect how upper materials, shanks, and outsoles stabilize the foot. A properly chosen boot supports natural gait dynamics while shielding joints from jagged rocks and uneven terrain. Clarifying your typical hiking distance, trail difficulty, and seasonal climate will guide every technical choice in this guide.
Anatomical Fit and Sizing Dynamics
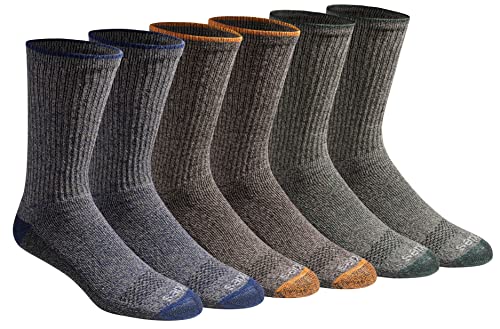
Proper sizing is the baseline for blister prevention and trail comfort. Backcountry travelers frequently make the mistake of selecting boots based strictly on standard street shoe sizing. Feet naturally swell by a half size or full size over sustained mileage, especially in warmer conditions. A proper fitting requires trying on boots in the late afternoon when your feet reach maximum daily expansion. Always wear the exact sock density and moisture-wicking liners you plan to use on trail.
The finger-width clearance test provides a reliable initial check for internal boot length. Push your unlaced foot forward until your toes touch the front of the toe box clearance zone. You should be able to slide one finger down behind your heel into the heel pocket without forcing it. If the space is narrower than a finger, downhill descents will repeatedly jam your toes against the front bumper, causing black toenails. Excessive heel space, conversely, allows your foot to slide and creates severe friction hot spots.
Internal boot volume and last shape matter just as much as overall length. Boot lasts dictate whether a model features a wide forefoot, a high instep arch, or a snug heel pocket. Hikers with wide metatarsal splay need a roomy toe box to prevent bunion compression, while those with narrow heels require snug cups to prevent vertical lift. Lacing the boot securely and stepping onto an incline board confirms whether your foot remains locked in place during downhill strides.
Upper Construction: Full-Grain Leather Versus Modern Synthetics
Upper materials directly dictate a boot’s weight, abrasion resistance, weather defense, and break-in commitment. Heavy full-grain leather uppers, typically ranging from two to two-and-a-half millimeters in thickness, provide unmatched defense against abrasive granite, talus, and scree. Stiff leather uppers resist punctures, repel trail moisture when treated, and mold to foot contours over time. However, traditional leather requires a deliberate conditioning period before long treks to prevent painful collar bite around the ankles.
Nubuck and split-grain leather options offer a practical balance for moderate trail enthusiasts. Nubuck provides full-grain durability with a buffed exterior that flexes more readily out of the box. Split-grain leathers are frequently paired with nylon mesh panels to shed weight while accelerating airflow across the foot. These hybrid combinations reduce leg fatigue over long trail days while retaining adequate abrasion resistance. Pairing these uppers with protective trail mobility pants creates a dependable barrier against trail brush and briars.
Lightweight synthetic uppers, composed of high-denier nylon and synthetic leather overlays, have become exceptionally popular for day hiking. Synthetic materials absorb very little ambient moisture, dry rapidly after water crossings, and require virtually zero initial break-in time. While synthetic boots offer instant agility, they exhibit a shorter lifespan when subjected to off-trail scree compared to heavy full-grain leather. Deciding between leather and synthetic builds ultimately depends on whether you prioritize long-term ruggedness or immediate lightweight comfort.
Waterproof Membranes Versus Ventilated Non-Waterproof Mesh
Weather protection represents a critical design choice that heavily impacts interior moisture regulation. Waterproof-breathable liners like Gore-Tex membranes or proprietary brand booties are integrated beneath the outer upper to block exterior liquid while venting perspiration vapor. These membrane systems excel on muddy trails, marshy alpine meadows, and during cold, wet weather where external moisture creates chilling hazards. They keep feet warm and protected during rain showers, shallow stream crossings, and seasonal shoulder-season hiking through snowpack.
Waterproof membranes operate on humidity gradients, which creates distinct functional limits in warm climates. When hiking through high-heat arid deserts or during humid summer months, the vapor pressure differential drops, hindering the membrane’s ability to exhaust sweat. Internal sweat can accumulate inside the boot lining, soaking socks and softening foot skin into a condition called maceration. Once softened skin experiences trail friction, blisters develop rapidly despite the boot successfully blocking external puddles.
Water clearance height is another critical factor that hikers frequently misunderstand when evaluating waterproof footwear. Waterproof protection only extends as high as the gusseted bellows tongue connects to the boot shaft. Submerging your foot past this entry line allows water to pour over the collar and flood the interior chamber. Once flooded, waterproof boots retain water and dry very slowly on multi-day backcountry journeys. Non-waterproof ventilated mesh boots, by contrast, drain quickly, breathe freely, and dry out within hours of continuous walking.
Midsole Cushions and Torsional Shank Rigidity
The chassis beneath your foot dictates both impact dampening and underfoot stability across variable terrain. Midsoles primarily utilize either compression-molded ethylene vinyl acetate (EVA) or dense poured polyurethane (PU). Molded EVA foam delivers plush, sneaker-like shock absorption that feels immediately soft underfoot, making it ideal for day hikers carrying light gear. However, EVA gradually packs out and compacts over several hundred trail miles, losing its rebound cushioning and flattening under heavy loads.
Dense polyurethane midsoles provide firm, resilient, and compression-resistant support that resists heavy pack compaction. Multi-day backpackers shouldering sturdy frame hiking backpacks rely on polyurethane to maintain structural support under sustained load. While polyurethane feels noticeably stiffer during initial strides, it preserves joint alignment and prevents arch collapse over extensive journeys. Hikers should note that polyurethane requires regular usage and dry storage, as prolonged closet confinement can induce chemical hydrolysis and crumble the foam.
Internal shanks and rock plates embedded between the midsole and outsole supply critical torsional rigidity. Shanks made from thermoplastic polyurethane (TPU), nylon composite, or hardened steel prevent the boot from twisting laterally when edging across off-camber slopes. To test torsional stiffness, hold the heel with one hand and the toe with the other, then attempt to twist the boot like a towel. A rigid chassis resists twisting, shielding your foot from excessive muscular strain and protecting soles from sharp rock bruising.
Outsole Rubber Formulations and Tread Geometry
Outsole grip determines your footing confidence across slippery river stones, muddy switchbacks, and loose scree. Rubber compounds balance sticky surface adhesion against long-term abrasion durability on abrasive stone. Softer rubber formulations, such as proprietary sticky compounds and Vibram Megagrip, grip securely onto wet granite and smooth river boulders by conforming microscopically to the stone surface. Harder rubber compounds resist tread wear on abrasive sandstone trails but offer slightly less friction on slick, rain-soaked logs and wet stone.
Tread lug depth, lug shape, and channel spacing dictate how effectively a boot handles soft or loose terrain. Aggressive four to six millimeter lugs bite deep into soft mud, wet forest loam, and loose gravel to prevent dangerous slips. Wide spacing between perimeter lugs allows the boot to shed sticky mud automatically with each stride rather than packing into a slick surface. Directional lugs positioned beneath the forefoot provide forward propulsion during steep ascents, while widely splayed patterns provide lateral stability across tilted terrain.
An undercut heel brake with distinct braking lugs provides essential control during steep downhill descents. This sharp, defined drop between the midfoot arch and the heel block acts like a mechanical brake when stepping down loose dirt and gravel slopes. Without a prominent heel breast, feet can easily slide forward uncontrollably on steep declines. Inspecting the outsole profile before purchasing ensures the boot features the mechanical braking bite necessary for the elevation profiles of your intended routes.
Shaft Collar Heights and Ankle Stabilization Realities
Choosing between low-cut trail footwear, mid-cut boots, and high-cut backpacking boots involves balancing mobility against physical protection. Low-cut trail shoes maximize ankle range of motion and reduce overall per-pair footwear weight, conserving metabolic energy over long distances. Mid-cut boots extend just above the ankle joint, offering moderate lateral rollover defense, collar cushioning, and trail debris deflection. High-cut boots wrap securely around the lower leg, providing extensive stability and preventing scree, sand, and mud from entering the footwear shaft.
Many hikers incorrectly assume that a tall boot collar mechanically prevents all ankle rollover sprains. True ankle stabilization comes from the combination of a stiff heel counter, a torsionally rigid shank, and a secure midfoot lockdown. The upper collar provides proprioceptive tactile feedback, alerting your nervous system to adjust joint balance when your foot starts tilting on uneven ground. When carrying heavy packs over off-trail routes, high-cut collars deliver vital structural support that shields lower legs from boulder impacts and brush abrasion.
Lacing Systems, Hardware, and Custom Tension Adjustments
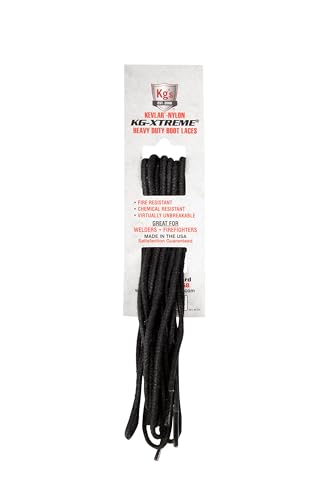
Lacing hardware plays a crucial role in isolating tension between the forefoot and the ankle collar. Quality boots feature metal eyelets, webbing loops, and locking lace hooks positioned at the instep flex notch. Locking hardware allows hikers to maintain independent tension zones, keeping the forefoot comfortably relaxed while cinching the ankle collar firmly. High-strength replacement laces, such as reinforced round boot laces, resist abrasion and prevent accidental loosening when moving through wet brush and abrasive rock scrambles.
Custom lacing patterns can resolve specific trail fit discomfort without requiring footwear replacement. A surgeon’s knot, created by wrapping the laces twice around each other at the instep, locks tension securely to stop heel lift on steep ascents. Hikers experiencing painful instep pressure or extensor tendon irritation can use window lacing to skip eyelets directly over the sensitive dorsal arch. Adjusting your lacing tension after the first mile of walking compensates for sock compaction and ensures optimal foot security throughout the hike.
Insole Compatibility and Volume Adjustment Strategies
Factory footbeds supplied with most hiking boots are flat, basic foam cutouts designed primarily for initial showroom comfort. These factory inserts provide very little structural arch contouring or heel cup stabilization for active foot mechanics. Upgrading to structured aftermarket insoles or custom orthotics helps align the foot skeleton, reducing plantar fascia strain and distributed trail impact forces. Structured footbeds also feature deep heel cups that cradle fatty heel pads, naturally dampening shock on hard-packed surfaces.
Inserting an aftermarket insole alters the internal volume profile of your hiking boot. High-profile supportive footbeds raise the heel and take up vertical room across the instep and toe box. Hikers with low-volume, narrow feet can utilize thin volume-reducing shims beneath standard insoles to eliminate excess internal movement. Conversely, hikers with high insteps must confirm that a thicker footbed does not force their dorsal bones tightly against the upper tongue padding.
Progressive Break-In Schedules and Trail Verification
Taking brand new, untested boots directly on a strenuous multiday backpacking excursion is an invitation for severe trail misery. Modern synthetic boots require relatively brief conditioning periods, but their interior foams and footbeds still need time to mold to your foot shape. Heavy full-grain leather boots require a structured, progressive break-in schedule to soften stiff collar leather and flex the midsole comfortably. Beginning with short walks around the house allows you to detect localized pressure points before entering the backcountry.
Advance your break-in regimen by walking two to three miles on paved neighborhood paths and local park trails while carrying a moderate pack. This gradual progression allows upper leather fibers to crease naturally along your foot’s flex points without pinching delicate skin. Never apply destructive softening shortcuts like baking boots in ovens, submerging them in boiling water, or applying heavy petroleum oils that weaken structural glues. Allow boots to dry naturally at room temperature away from radiators and campfires to safeguard outsole cementing adhesives.
Verifying your footwear fit on local trail inclines confirms that heel slippage and toe collisions have been fully resolved. Once your boots demonstrate reliable traction, consistent heel retention, and comfortable volume distribution over several conditioning walks, they are ready for rugged backcountry routes. Matching technical boot features to your intended terrain and pack weight ensures reliable comfort and lasting foot protection on every trail adventure.



Write Your Review
No reviews yet. Be the first to share your experience!