


Steep mountain switchbacks and rocky trail descents can place heavy repetitive stress on lower joints, especially when carrying a multiday pack. Dialed-in poles transfer a significant portion of that downward force into your upper body, but incorrect length ruins posture and accelerates arm strain. Knowing how to choose trekking pole height ensures that your arms remain in an efficient biomechanical position to absorb shock across uneven terrain. Pair your adjusted poles with supportive hiking pants for joint comfort to keep your legs moving smoothly through technical trail sections.
Locking shafts at an improper setting forces your shoulders into unnatural elevation during climbs or leaves you leaning dangerously forward on steep drops. Tri-fold and telescoping models offer versatile length adjustments, allowing hikers to modify their stance between flat trail cruising, strenuous climbs, and descent braking. If you travel frequently to reach distant trailheads, packing compact collapsible sticks into a bag vetted by a carry-on backpack volume guide simplifies transit before you set your trail height. Dialing in the proper shaft extension before you step onto the trail ensures every contact point supports your stride without wobbling.




Determining Proper Trekking Pole Height Across Varied Terrain
Setting your trekking poles to the exact correct height transforms how your body manages trail impact, balance, and endurance. When shafts are sized accurately, your upper body absorbs a meaningful portion of each footstrike while keeping your spine aligned naturally. Sizing poles improperly causes rapid forearm fatigue, strained shoulder stabilizers, and poor downhill braking control. Establishing a reliable baseline measurement gives you the foundation to adapt your gear to changing trail conditions.
Every hiker possesses unique physical proportions, including forearm length, torso height, and natural stride mechanics. While general height charts offer an effective starting baseline, terrain gradient and trail footwear thickness also influence your actual requirements. Modern adjustable poles allow hikers to fine-tune their shaft length in seconds to maintain optimal leverage. Understanding the mechanical relationship between pole extension and body posture keeps you moving efficiently over long mountain routes.
The 90-Degree Elbow Rule on Level Ground
The standard method for sizing hiking poles begins on a flat, level surface while wearing your preferred trail shoes. Stand upright with your shoulders relaxed and your upper arms resting naturally against your sides. Bend your elbows until your forearms extend straight forward parallel to the ground, forming a clean 90-degree angle. Grasp the pole handles comfortably with the carbide tips resting vertically on the floor beside your feet.
If your forearms angle downward toward the trail, the shafts are adjusted too short and will force you to stoop forward. When your forearms point upward toward your chest, the poles are set too long and will push your shoulders into tension. Adjust the locking mechanisms until your hands rest securely on the grips while maintaining that exact right angle at the elbow joint. This neutral alignment keeps wrist tendons relaxed and allows arm muscles to absorb ground feedback without strain.
Height Sizing Ranges and Shaft Dimensions
Most hikers can quickly identify their target pole dimensions using standard body height ranges. Walkers under five feet four inches typically require an operating length between 100 and 110 centimeters. Hikers standing between five feet four inches and five feet eight inches generally settle around 110 to 120 centimeters on flat ground. Those between five feet nine inches and six feet find balanced support between 120 and 125 centimeters, while taller individuals over six feet usually need 125 to 135 centimeters.
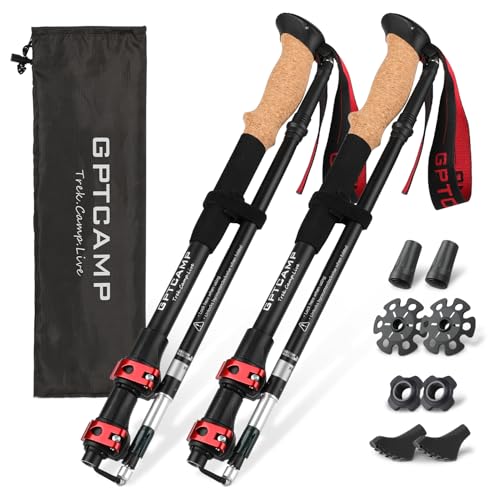
Manufacturers often build their gear around these ergonomic brackets to help buyers choose the right setup. The Covacure Trekking Poles Collapsible provide dedicated sizing options, offering a 100 to 120 centimeter option for individuals five feet eight inches or shorter and a 115 to 135 centimeter pair for taller hikers. Similarly, the CONTOOSE Collapsible Hiking Poles for Women features a 100 to 115 centimeter span for users under five feet seven inches alongside a longer 115 to 135 centimeter alternative. Meanwhile, versatile telescoping designs like the GPTCAMP Collapsible Hiking Trekking Poles cover a broad 31 to 51 inch span to accommodate a wide variety of adult heights in a single build.
Shortening Poles for Steep Ascents
When trails angle steeply upward, the physical ground rises closer to your chest with every forward step. Continuing to hike uphill with poles locked at your flat ground setting forces your elbows to flare outward and pushes your hands above your heart. Shortening each shaft by 5 to 10 centimeters restores your optimal 90-degree elbow bend on steep switchbacks. This adjustment brings the hand grips down into a powerful pushing position where your triceps and lats can propel your body upward.
Placing shortened poles slightly ahead of your feet creates stable pivot points that assist your leg muscles on grueling climbs. You can maintain a brisk climbing rhythm by pairing your adjusted shafts with lightweight hiking pants that do not bind across the knees on high step-ups. If the ascent features rolling terrain with short dips, constantly opening lever clamps can become tedious. Models like the Shxing Carbon Fiber Trekking Poles, 7.1 oz Each incorporate extended EVA foam sleeves below the main grip, letting you choke down temporarily on steep ramps without changing the lock setting.
Lengthening Poles for Mountain Descents
Descending technical trails places immense decelerating impact on knees, quadriceps, and ankle ligaments. As the trail drops away below you, poles adjusted for flat ground will cause you to lean precariously forward to reach the ground. Lengthening both shafts by 5 to 10 centimeters allows the carbide tips to plant ahead of your lead foot while keeping your torso upright. This forward placement creates a sturdy braking tripod that dissipates joint shock before your heel strikes the earth.
To maximize downhill braking support, rest the palms of your hands directly over the rounded caps of the grips. Pushing downward through the top of the handles engages your core and transfers heavy trail shock through the pole shafts instead of your kneecaps. When descending with a heavy load supported by framed hiking backpacks, this extra shaft length prevents dangerous forward momentum from pulling you off balance. Always test each lock under vertical body weight before stepping down steep rock drops to ensure the shafts do not slip.
Sidehill Traversing and Contour Trails
Navigating narrow contour trails cut into steep mountain slopes creates an uneven stance between your uphill and downhill sides. In this scenario, maintaining identical pole lengths forces your uphill shoulder into an uncomfortable shrug while your downhill arm reaches awkwardly into empty space. Setting your poles asymmetrically resolves this imbalance by shortening the uphill shaft and lengthening the downhill shaft. This configuration allows both arms to remain near the neutral 90-degree elbow angle as you move across the slope.
On switchback routes where the uphill slope alternates sides every few minutes, adjusting mechanical locks repeatedly is impractical. Hikers traversing frequent switchbacks benefit greatly from handles with extended lower foam sleeves or grooved grip profiles. You can simply grip the primary handle with your downhill hand while choking down on the lower foam sleeve with your uphill hand. This fluid hand repositioning provides instant balance on loose scree without stopping to readjust telescoping sections.
Telescoping versus Tri-Fold Adjustment Mechanics
The internal architecture of your trekking poles directly affects how you calibrate and maintain your target height. Classic three-section telescoping designs, such as the Hiking Poles, Ultra-Light Telescopic Trekking, slide inside one another and offer adjustability along multiple shaft joints. When adjusting three-section telescoping poles, expand both the middle and lower sections equally to match the printed measurement markings. Splitting the extension across both sections maintains structural balance and preserves shaft rigidity under heavy trail strikes.
In contrast, tri-fold collapsible poles utilize folding lower segments connected by an internal tension cord, reserving height adjustment for the top section. Models such as the covacure Hiking Poles, 7075 Aluminum Tri-fold fold down to less than 14 inches for convenient transit and extend telescopically from 39.4 to 47.2 inches. Tri-fold systems eliminate the need to balance multiple sections, since only the upper segment adjusts to set your height. Regardless of design, hikers must ensure that internal push pins or tension cords lock completely before securing the height adjustment clamp.
Observing Maximum Extension Lines and Lock Tension
Every adjustable trekking pole features a marked boundary line labeled as “STOP” or “MAX” printed near the bottom of each telescoping tube. Extending any shaft section beyond this indicator leaves too little overlap between the inner and outer aluminum or carbon tubes. Operating a pole past its limit line creates severe leverage at the clamp collar, leading to bent metal, cracked carbon, or catastrophic collapse under body weight. If you reach the stop line and still need more length, your poles are simply too small for your frame and must be exchanged for a taller size.
Maintaining proper cam lever clamping force is equally crucial once you set your desired shaft length. External lever locks rely on friction, which can diminish if trail dust collects on the shaft or temperatures drop. Use the tool-free thumbscrew on the lever collar to tighten the clamp until closing the lever requires firm palm pressure. Never force a lever shut if the resistance feels extreme, as overtightening can crack the composite clamp housing.
Wrist Strap Alignment and Ergonomic Support
Wrist straps are not simple safety leashes to prevent dropping poles down a cliff; they are integral load-bearing components. To utilize straps properly, bring your hand upward through the bottom opening of the strap loop before grasping the handle. Lower your hand so the webbing rests snugly across the back of your wrist and palm, supporting your downward weight. This technique allows you to propel yourself forward with an open, relaxed grip rather than tightly clutching the handle all day.
Setting your wrist strap to the proper tension directly complements your shaft height setting. If the strap is too loose, your hand slides down the grip and lowers your effective elbow angle away from the 90-degree baseline. Adjust the strap wedge or buckle so your hand remains comfortably anchored at the ergonomic summit of the grip. In technical terrain where a sudden slip could twist your wrist, loosening the straps slightly permits a quick release to protect your joints during a tumble.
Ultralight Shelter Pitching Height Requirements
Many modern backpackers rely on trekking poles as structural ridge poles to pitch ultralight tarps and trekking-pole shelters. These non-freestanding shelters require exact pole heights, commonly between 115 and 135 centimeters, to achieve proper canopy tension and storm resistance. If your poles lack the necessary extension range, the tent fabric will sag, reducing internal headroom and accumulating rain or snow. Checking your shelter specifications against your pole adjustment range ensures your gear performs both on the trail and in camp.
When pitching shelters that require tip-up installation, verify that your carbide tips seat securely into reinforced grommets without puncturing the fabric. For handle-up configurations, confirm that your pole grips fit neatly into the apex pockets of the canopy. Models constructed from 7075 aviation-grade aluminum provide the lateral rigidity needed to resist heavy wind gusts without bowing overnight. Always verify that your cam locks are fully tightened before setting shelter tension, as a slipping lock can cause the shelter to collapse in a storm.
Field Verification and Trail Diagnostics
Before taking your first stride from the trailhead, conduct a quick vertical load test on both poles. Plant the tips firmly into the dirt, rest your full upper body weight onto the grips, and check for any creeping slippage at the locking collars. If the shafts slide downward even slightly, open the cam lever and tighten the tension screw by half a turn before continuing. Performing this simple check prevents hazardous surprises when you rely on your poles to arrest an unexpected stumble.
Listen to your body throughout the day to diagnose subtle sizing errors before they turn into chronic trail discomfort. Persistent aching across your upper trapezius muscles or neck usually indicates your poles are set too long for the grade. If you experience lingering lower back fatigue or find yourself bending at the waist, your poles are likely adjusted too short. Taking a few seconds to fine-tune your shaft length keeps your posture upright, protects your knees, and maximizes endurance on every trail adventure.








Write Your Review
No reviews yet. Be the first to share your experience!