


Trekking poles provide crucial stability across rugged mountain terrain, but there are countless trail segments where you need both hands completely free. Scrambling through talus fields, navigating exposed ledges, or checking a handheld GPS requires stowing your gear quickly without breaking your hiking rhythm. Knowing how to carry trekking pole on backpack setups ensures that sharp carbide tips and lightweight shaft sections remain secure instead of rattling around or snagging on thick brush. A loose pole can easily scratch a hiking partner or throw off your pack balance during a demanding ascent.
Hikers use multiple mounting strategies ranging from built-in ice axe loops and compression webbing to dedicated storage sleeves and elastic tie cords. If you carry technical gear on sturdy trail backpacks, integrating external tie cords prevents shifting shafts from throwing off your center of gravity. Choosing the ideal carry method depends on whether you use three-section telescoping poles or compact Z-folding shafts, as each folding style changes your pack profile. Taking time to anchor your equipment properly protects pack fabric from sharp points and keeps your transition between hiking and scrambling completely seamless.




Methods and Equipment for Carrying Trekking Poles on Your Backpack
Stowing walking sticks on an outdoor pack requires balancing security, accessibility, and trail safety. Hikers who transition between steep climbs, technical scrambles, and flat terrain need reliable systems to secure their gear without dropping their packs every time trail conditions change. The right carrying method depends on your pack design, the collapsed length of your poles, and how frequently you need to deploy them. Understanding the differences between exterior loops, elastic tie cords, and dedicated storage pouches ensures your equipment stays intact through rough backcountry terrain.
Securing Poles Using Built-In Loops and Side Compression Straps
Standard multi-day hiking packs commonly feature lower gear loops paired with horizontal side compression straps. These lower loops were originally designed for mountaineering ice axes, but they adapt cleanly for three-section telescoping poles. You slide the pole tips downward through the lower loop until the mud or snow baskets catch on the webbing. Once the basket stops the shaft, you rotate the pole 180 degrees upward to capture the shaft against the pack body.
Securing the upper shaft requires tucking the poles beneath the top compression strap on the side panel. Cinching this upper strap tightly pulls the poles against the pack frame, preventing the handles from swinging outward during aggressive steps. If your pack features dual side straps, route the poles through both straps to eliminate lateral movement. This vertical alignment preserves your center of gravity while keeping your arms unobstructed through narrow trail passages.
Telescoping poles should always be fully collapsed and their external cam levers locked before mounting them to your pack. Leaving cam locks loose allows telescoping sections to slide open as you walk, creating an unexpected snag hazard against branches. Tightening the thumbscrews on your lever clamps ensures that shaft sections remain rigid under strap compression. A properly locked pole assembly stays silent and steady across miles of uneven terrain.
Adding Aftermarket Elastic Tie Cords to Pack Attachment Points
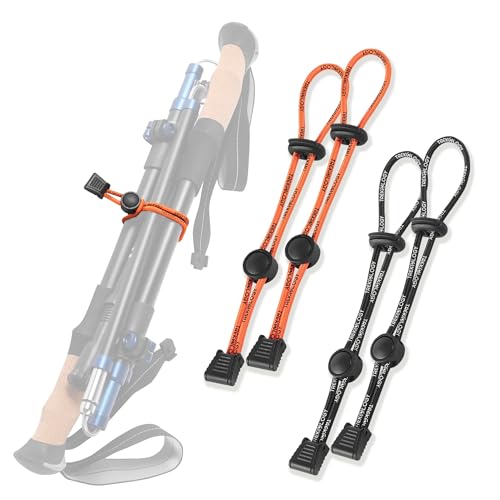
Many streamlined daypacks and ultralight frameworks omit dedicated tool loops to reduce overall pack weight. Hikers can resolve this limitation by installing aftermarket cord hardware on existing daisy chains or external gear loops. Accessory sets such as the luzen 2Pcs Black Backpack Hiking Pole Ropes offer an elastic band with an adjustable plastic buckle designed specifically for hiking stick transport. These cords measure approximately 19 centimeters, providing sufficient stretch to capture dual pole shafts simultaneously.
Installing these elastic tie cords takes only a few seconds through any exposed webbing loop or shoulder strap anchor. You loop the cord through the pack anchor point, wrap the elastic band around your collapsed poles, and cinch the plastic toggle tight. The spring tension in the cord absorbs trail vibrations, preventing hard plastic buckles from loosening as you navigate rocky switchbacks. This modular cord setup allows you to create custom attachment points on packs that lack built-in pole loops.
Positioning two elastic tie cords along one side of your pack creates a reliable two-point retention system. The lower cord holds the shaft above the baskets, while the upper cord pins the handles beneath your shoulder level. This dual-point anchoring prevents the poles from pivoting like a pendulum during steep descents. Hikers can also release the elastic buckles with one hand, enabling rapid pole deployment without removing the backpack.
Utilizing Shoulder Strap Pouches for Rapid Access
Trail runners and fastpackers frequently stow and deploy poles multiple times during a single outing. Taking off a pack repeatedly interrupts running cadence and wastes valuable trail time on undulating routes. Front-mounted harness carriers solve this problem by mounting directly onto your running vest or pack shoulder straps. Accessories like the Danuosie Trekking Poles Carry Bag provide a lightweight storage pouch weighing only 53 grams that clips to existing shoulder harness loops.
The Danuosie pouch measures 15.35 by 4.72 inches and accommodates compact folding poles within 14.5 inches in collapsed length. Its reinforced four-inch top opening features a stiffened collar that resists sagging, allowing you to slide folded poles into the sleeve blindly while moving. Built-in snap buttons and a side hook secure the upper opening to your shoulder strap, while an adjustable bottom drawstring stabilizes the base. A mesh panel at the bottom drains pooled water quickly during stream crossings or heavy downpours.
Mounting poles vertically along your chest keeps weight distributed close to your core and prevents pack sway. This orientation protects delicate carbon fiber and thin-gauge aluminum shafts from scraping against low boulders during hand-over-hand scrambling. Hikers must ensure their pack harness has compatible webbing loops or sew small attachment straps to secure the carrier properly. Once installed, chest-level stowage provides the fastest transition between running flat trails and power-hiking steep climbs.
Transporting Hiking Sticks in Dedicated Protective Storage Bags
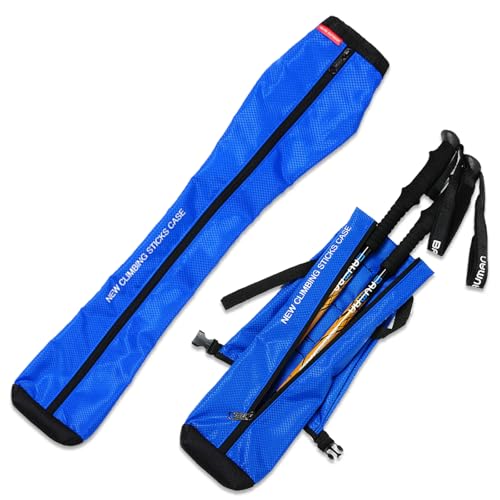
Carrying poles externally without protection can expose delicate locking mechanisms and nearby gear to trail grit and abrasion. Full-length storage cases isolate muddy carbide tips and protect fabric from sharp hardware during travel and pack transit. The Cosmos Trekking Poles Carry Bag Portable Hiking measures roughly 28 by 5 inches and uses durable 1680D fabric with a water-resistant interior lamination. This design fits standard retractable poles with handles measuring under 4.5 inches and includes an adjustable shoulder strap for exterior pack transport.
Larger cases like the Chris.W Portable Trekking Pole Carrying Bag offer a total length of 30 inches to accommodate longer retractable walking sticks. Its tapered geometry spans from a seven-inch top opening to a 4.5-inch middle width, providing sufficient volume for a complete pair of poles. The fold-over buckled closure secures pole handles inside the pouch, preventing dirt from contaminating external lever locks. An integrated shoulder strap enables hikers to lash the entire protective sleeve directly across pack compression webbing.
Dedicated storage bags also prevent sharp tips from tearing car upholstery, tent fabrics, or duffel bags during backcountry transit. External zippered compartments, such as the outer mesh pockets on the Cosmos bag, provide convenient storage for replacement rubber tips and mud baskets. Hikers can lash the entire encased kit to the side of their pack using horizontal compression straps. This protective barrier ensures that mud, pine needles, and trail silt remain contained away from clean technical gear.
Matching Stowing Methods to Telescoping and Folding Pole Designs
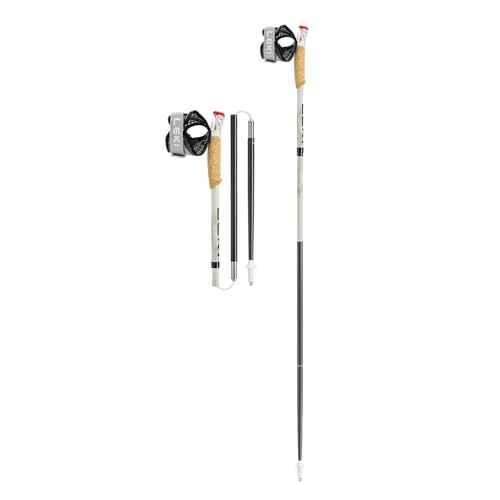
Pole geometry plays a direct role in determining the most effective pack attachment location. Three-section telescoping poles collapse down to roughly 24 to 28 inches, making exterior side mounting the natural choice. These longer collapsed shafts align cleanly with the vertical frame profile of standard trekking packs without extending below the bottom panel. Stowing long telescoping shafts inside a pack main compartment usually wastes internal volume and risks puncturing lightweight dry bags.
Folding Z-style models feature three or four hinged sections connected by an internal tension cord, yielding a dramatically smaller packed profile. A product like the Travel Folding Trekking Hiking Pole with Carrying collapses down to a compact 13-inch package while extending up to 53 inches on the trail. Engineered from aerospace-grade 7075 aluminum alloy with EVA foam grips, this folding stick stows easily inside exterior water bottle pockets or internal hydration compartments. Its 13-inch folded length makes it ideal for airline carry-on travel packs where external attachments are prohibited.
Compact storage bags specifically cater to these shorter folding designs without adding excess bulk. Products such as the Xxerciz Trekking Poles Carrying Bag measure 19 by 6.5 inches and fit folding hiking poles collapsed under 19 inches. Built from water-resistant fabric with a wide drawstring opening, this pouch slips neatly into side stretch pockets or secures beneath side straps. Choosing a case matched to your pole architecture prevents empty fabric slack from snagging on trailside vegetation.
Tip Orientation and Trail Safety for Group Hiking
Proper tip orientation is a vital safety consideration whenever you strap poles to the outside of a backpack. Trail etiquette and outdoor safety guidelines strongly favor carrying poles with tips pointed downward toward the ground. Pointing bare tungsten carbide tips upward creates an eye-level puncture hazard for hikers walking behind you on steep switchbacks. Upward tips also snag easily on overhead tree limbs, throwing off your balance or pulling your pack backward.
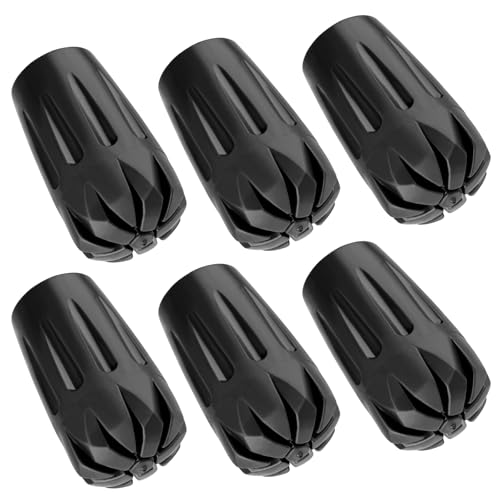
Carbide tips should always be capped with rubber road tips or protective storage feet when strapped to your pack. Sharp metal points can rapidly slice through ultralight pack fabrics, stretch-mesh pockets, or rain covers during vigorous hiking. Rubber feet protect your gear and prevent accidental punctures to your pack fabric while scrambling through boulder fields. If you misplace your rubber road feet, wrapping tip ends in a thick cloth or spare bandana provides temporary protection.
Basket positioning also prevents poles from slipping through lower retention loops on rough terrain. Inserting shafts so that mud baskets rest firmly above lower pack webbing prevents gravity from pulling the poles downward. If your poles lack baskets, use cinching cords like the luzen straps to grip the lower bare shaft tightly. Inspecting this lower connection before starting a hike ensures your gear stays attached over logs and talus drops.
Securing Poles on Daypacks Lacking Dedicated Hardware
Minimalist daypacks and budget outdoor rucksacks frequently lack technical gear loops or dual compression straps. Hikers utilizing budget hiking backpacks often need to improvise secure mounting points using side stretch pockets and upper haul handles. You can slide collapsed pole tips into a side water bottle pocket and secure the upper shafts using an aftermarket carabiner or elastic cord. This configuration keeps poles upright without requiring dedicated mountaineering hardware on the pack body.
When using side stretch pockets, balance the opposite side of your pack with an equivalent water bottle or heavy item. Uneven lateral weight distribution pulls your shoulder harness off center, causing trapezius fatigue and lumbar discomfort over high mileage. Routing the upper pole shafts through a top carry handle or side grab loop stabilizes the vertical line. Cinching an adjustable strap around the pack collar keeps the handles tight against the main compartment.
Specialized replacement cases like the Xxerciz Trekking Poles Carrying Bag Lightweight offer an alternative way to adapt simple packs. Measuring 19 by 8.5 inches, this 1680D nylon pouch features an adjustable shoulder strap that can loop around your pack top lid. Its wide drawstring closure accommodates folding poles collapsed under 15 inches while keeping dirt isolated from your clean pack exterior. External zipper pockets provide extra storage for spare road tips and trail accessories during day trips.
Maintenance and Inspection of Pack Attachment Systems
Routine inspection of your pack mounting hardware prevents gear loss and unexpected field failures. Elastic shock cords naturally stretch and degrade over time when exposed to ultraviolet radiation and trail moisture. Check the plastic toggles and cord elasticity on mounting lanyards before every major wilderness trip to confirm firm clamping force. Replacing stretched shock cords promptly ensures that heavy poles remain immovable against your pack frame.
Drying wet poles and carrying pouches after a rainy outing protects metal components from corrosion and seized joints. Aluminum shafts and external cam lever screws can develop galvanic oxidation if stored inside damp sleeves for extended periods. Disassemble telescoping sections occasionally, wipe away fine silt, and allow fabric bags to air out thoroughly before storage. Clean shafts slide smoothly and clamp securely whenever you transition back to active pole use.
Testing your pack attachment before heading onto technical terrain ensures complete hands-free security. Give your collapsed poles a firm upward and downward tug while they are strapped to your pack to verify zero slippage. If the poles rattle or wobble, tighten the compression straps or shorten the elastic lanyard loops. A well-secured trekking pole setup protects your expensive equipment, safeguards fellow hikers, and keeps your balance centered across challenging backcountry trails.




Write Your Review
No reviews yet. Be the first to share your experience!