


Walking with an improperly sized mobility aid often leads to compensatory shoulder hiking, unnatural spine curvature, and premature joint fatigue. Determining what length walking cane do i need requires measuring the exact distance between the floor and your wrist crease while wearing supportive footwear. When your cane rests at the proper height, your elbow maintains a natural bend of roughly 15 to 20 degrees, which allows you to transfer up to 25 percent of your body weight away from an injured or aching leg. Choosing the correct length directly protects your musculoskeletal alignment, whether you are rehabilitating after knee surgery or navigating daily arthritis pain.
Beyond basic height, pairing an accurate cane measurement with suitable daily gear, such as supportive knee mobility apparel, can significantly reduce joint strain during extended walks. An adjustable aluminum shaft offers quick height customization through brass push-button pins, while traditional wooden models require precise measurement before cutting. Taking the time to dial in your cane height restores walking confidence, smooths your natural gait cadence, and minimizes fall risks across uneven indoor and outdoor surfaces. Always speak with a physical therapist or medical clinician if you require individualized gait analysis or balance testing.


Complete Guide to Walking Cane Sizing, Posture Alignment, and Gait Mechanics
Establishing the proper height for your walking cane requires matching the top of the handle to your natural wrist position while you stand upright in supportive footwear. When the handle sits level with your distal wrist crease, your arm rests in an optimal position to bear partial body weight without straining your shoulder, neck, or lower back. A properly sized shaft ensures an elbow flexion angle of roughly 15 to 20 degrees, giving you adequate mechanical leverage during each step. This balance between joint relief and posture stability forms the foundation of safe daily mobility.
The Core Anatomical Formula: Measuring Floor to Wrist Crease
Measuring from the floor up to your distal wrist crease provides the most reliable anatomical guideline for setting cane height. Stand upright against a flat wall with relaxed shoulders to ensure your spine remains in neutral alignment throughout the measurement. If you measure while looking down or hunching forward, you will likely cut or adjust the shaft too short. Having a friend or family member place a flexible tape measure from the floor directly to your wrist crease eliminates postural distortion and ensures accuracy.
An alternative anatomical landmark frequently referenced by physical therapists is the greater trochanter, which is the prominent bony projection on the side of your upper hip. In most adults, the level of the greater trochanter sits almost parallel to the wrist crease when arms hang naturally at the sides. Comparing both measurements helps confirm you have arrived at the proper cane height before making permanent cuts or buying fixed-length equipment. Relying solely on overall body height charts can be misleading because individual torso and limb lengths vary substantially.
The Critical Role of Footwear and Shoe Heel Thickness
Always take your cane measurements while wearing the shoes you plan to wear most frequently during daily walking routines. The heel height and sole thickness of walking sneakers, dress shoes, or orthopedic footwear alter your standing distance from the floor by up to an inch or more. Measuring in bare feet or stocking feet will result in a cane that feels noticeably short once you put on thick-soled athletic shoes. If your daily footwear rotation includes varying heel thicknesses, an adjustable telescoping cane provides the flexibility needed to adapt quickly.
Seasonal footwear shifts also demand regular checks on your cane alignment to maintain consistent walking biomechanics. Transitioning from flat summer sandals to rugged, thick-soled winter walking shoes can alter your elbow flexion angle and place extra strain on your upper body. Keeping your measurement aligned with your most supportive everyday walking footwear ensures proper posture and joint protection year-round. Taking this simple precaution prevents sudden gait disruptions and keeps your steps stable across varying floor conditions.
Verifying the 15 to 20 Degree Elbow Flexion Angle
Once your cane is placed beside your foot, the angle of your elbow provides the ultimate visual check of an accurate fit. Your elbow should rest at an approximate 15 to 20 degree bend when your hand rests comfortably on the top of the handle. This mild flexion acts as a natural shock absorber as you transfer weight onto the shaft during each step. A locked, completely straight elbow transmits jarring ground reaction forces directly into your wrist, forearm, and shoulder joints.
Conversely, an excessive elbow bend exceeding 30 degrees severely compromises your mechanical leverage and muscular efficiency. When your arm bends too deeply, your bicep and shoulder muscles must work significantly harder to bear your body weight, causing premature arm fatigue. A physical therapist can measure this angle precisely with a goniometer, but a subtle, relaxed bend in the elbow is easily recognized in a full-length mirror. Checking your elbow angle while holding the cane confirms that the handle height matches your functional movement needs.
Adjusting Push-Button Telescoping Pins and Anti-Rattle Locking Collars
Most modern aluminum canes utilize a telescoping shaft secured by a spring-loaded brass detent pin and multiple adjustment holes. To change the length, press the detent pin inward and slide the internal tube up or down until the pin clicks firmly into the desired hole. Always visually inspect the pin to ensure it extends completely through the outer tube wall before placing any body weight on the handle. A partially engaged pin can slip under load, creating an immediate tripping hazard.
Many adjustable canes also incorporate a threaded anti-rattle locking collar located directly below the adjustment holes. Rotating this collar clockwise tightens the internal joint, eliminating annoying metallic clicks and wobbles as you walk. Securing this locking ring not only creates a quiet, solid feel underfoot but also reinforces the structural connection between the telescoping tubes. Make it a habit to check the tightness of the collar periodically, as daily vibration can cause it to loosen gradually over time.
Sizing and Trimming Traditional Non-Adjustable Hardwood Canes
Solid hardwood canes offer classic aesthetics and rigidity, but they require permanent cutting to match your precise wrist height. Before making any cuts, measure your wrist-to-floor distance carefully and mark the cane shaft clearly while accounting for the thickness of the rubber tip. Remember to remove the rubber ferrule from the bottom of the cane before measuring and cutting, as the rubber adds roughly a half-inch to the overall length. Leaving the tip on during measurement will result in a cane that ends up shorter than intended.
Wrap a strip of masking tape around the cut mark to prevent the wood grain from splintering when using a fine-toothed hand saw or miter saw. Cut slowly and squarely across the shaft to ensure the bottom edge sits completely flat against the inside base of the rubber tip. Once cut, smooth the rough wood edges with medium-grit sandpaper and firmly reseat the rubber tip onto the newly cut end. Because wood cannot be lengthened after cutting, double-checking your initial marks is critical to avoid shortening the cane too much.
Symptoms and Biomechanical Hazards of a Cane That Is Too Tall
Using a cane that is adjusted too high forces your shoulder into an unnatural elevated shrug every time the tip touches the floor. This repetitive upward movement strains the trapezius muscles and cervical spine, leading to persistent neck stiffness and upper back tension. An excessively tall cane also reduces your ability to push downward effectively, diminishing the amount of body weight you can unload from your lower joints. Over several weeks, this awkward posture disrupts your natural walking balance.
A cane that is too long also pushes your arm outward away from your torso, widening your base of support unnaturally and compromising your walking efficiency. This outward flare impairs your forward momentum and can cause you to trip over the base of the cane during fast strides. If you notice your shoulder hiking upward toward your ear or find yourself leaning backward while walking, lower the cane by one or two notches immediately. Restoring proper shaft length will immediately relieve neck tension and realign your upper body.
Warning Signs and Physical Strain Caused by a Cane That Is Too Short
When a cane is adjusted too short, you must stoop forward and flex your spine to reach the handle during each step. This forward hunch places significant compressive stress on the lumbar spine and quickly leads to lower back aches and fatigue. Walking stooped over also impairs your visual awareness of tripping hazards by tilting your head and gaze toward the floor. In addition, reaching downward prevents your arm from locking in a stable position to bear weight safely.
A cane that lacks adequate height forces your body weight forward onto your toes, disrupting normal heel-to-toe gait mechanics. This uneven load distribution increases joint pressure across your knees and hips, worsening the very discomfort you are trying to alleviate. If you find yourself bending forward at the waist or feeling muscle strain in your lower lumbar area after short walks, your cane is set too low. Lengthening the shaft until your posture returns to an upright position will quickly resolve these compensatory strains.
Proper Hand Placement: The Contralateral Walking Rule
One of the most frequent mistakes mobility users make is holding the cane on the same side as their injured, weak, or painful leg. Clinical gait biomechanics dictate holding the cane in the hand opposite the affected limb, a practice known as contralateral placement. For example, if your right knee is recovering from surgery or experiencing severe arthritis, you should hold the cane firmly in your left hand. Holding the cane contralaterally preserves normal human gait cadence and mirrors natural arm swing patterns.
When you step forward with your painful leg, the cane in the opposite hand moves forward simultaneously to provide a stable, dual-point base of support. This coordinated movement allows you to lean partial weight onto the cane handle, directly offloading joint pressure from the vulnerable limb. Holding the cane on the injured side disrupts reciprocal body mechanics, encourages an unnatural limp, and forces your torso to tilt sideways. Unless a physical therapist gives you specific clinical reasons to do otherwise, always maintain opposite-hand cane placement.
Step-by-Step Gait Mechanics and Partial Weight Offloading
Executing a stable walking pattern requires moving the mobility aid and your affected limb in unison. Begin by placing the cane roughly one short stride forward and slightly outward to the side, maintaining roughly four to six inches of lateral clearance from your foot. Step forward with your injured or weaker leg at the exact same moment, planting both the cane tip and your foot together. This creates a secure tripod effect that spreads ground forces across a wider base.
Push downward through the cane handle as you bear weight on the recovering leg, allowing the cane to absorb roughly 15 to 25 percent of your body weight. Next, step smoothly past the cane with your stronger, unaffected leg, placing your good foot securely on the ground. Throughout your daily walks, wearing comfortable clothing such as flexible lightweight walking pants helps ensure unhindered leg movement and natural hip extension. Practicing this rhythmic sequence deliberately on flat surfaces quickly establishes a smooth, confident walking habit.
Stair Navigation Mechanics: Up with the Good, Down with the Bad
Navigating staircases safely requires adhering to a strict physical therapy memory rule: up with the good, down with the bad. When ascending stairs, always grip the sturdy wall handrail with one hand while holding your cane in the other. Step up first with your stronger, unaffected leg, using its muscular strength to lift your entire body weight onto the higher step. Once your strong foot is securely planted, bring your weaker leg and the cane up onto the same step together.
When descending stairs, reverse the order completely to protect your joints from sudden gravitational impact. Lower the cane and your weaker, affected leg down onto the lower step first, maintaining a firm grip on the handrail. Lowering the cane and weaker leg first allows your strong leg to bend slowly, controlling your descent with steady eccentric muscle strength. Finally, bring your stronger foot down onto the same step beside the cane. Never attempt to take two steps at once, and pause on each riser to maintain complete balance.
Handle Ergonomics: Derby, Offset, and Palm-Molded Contours
The shape and contour of a cane handle determine how evenly your downward force is distributed across your palm and wrist joints. Traditional curved crook handles concentrate downward force over a narrow area, which can compress the ulnar nerve and cause hand numbness during extended use. In contrast, classic Derby and Fritz handles feature a flattened horizontal surface that spreads body weight more evenly across the palm. These flat-top handles allow fingers to wrap naturally, providing improved grip security for seniors managing mild hand weakness.
Offset handles feature a curved neck that positions the grip directly above the vertical center line of the cane shaft. This centered geometry directs downward body weight straight down through the rubber tip, reducing wrist torque and improving forward stability. For users with severe rheumatoid arthritis, osteoarthritis, or carpal tunnel syndrome, anatomical palm-molded grips provide custom-contoured support that cradles the hand. Choosing the correct handle style ensures that long walking sessions remain comfortable without aggravating hand and finger joints.
Base Selection and Stability: Single-Point, Quad Bases, and Articulating Tips
Matching your cane base to your personal mobility requirements is just as important as setting the correct shaft length. Standard single-point canes provide exceptional agility and lightweight maneuverability, making them ideal for individuals who need only minor balance assistance or mild joint offloading. Single-point canes fit easily into narrow pathways, navigate tight corners effortlessly, and cause minimal tripping hazards during brisk strides. However, single-point canes cannot stand upright on their own and will fall if leaned carelessly against walls or counters.
Quad canes feature a four-pronged metal base that provides a broader footprint and stands upright independently on flat floors. Small-base and large-base quad designs offer enhanced stability for individuals with significant balance deficits or neurological conditions like Parkinson’s disease. However, quad canes are noticeably heavier and can become dangerous tripping hazards if placed carelessly on narrow stair treads. Alternatively, self-standing articulating pivot bases provide flexible multi-angle traction on uneven outdoor surfaces while offering freestanding convenience indoors.
Weight Capacity Ratings: Standard Duty versus Reinforced Bariatric Canes
Every mobility aid carries a certified weight capacity rating that must never be exceeded during daily use. Standard aluminum and wooden canes typically support user weights between 250 and 300 pounds under normal walking conditions. These ratings reflect static and dynamic load testing conducted by manufacturers to ensure the shaft will not bend or buckle during partial weight-bearing. Always consult manufacturer specifications to verify that a cane matches your body weight before using it as a daily support aid.
Individuals requiring higher structural load support should select heavy-duty bariatric walking canes, which commonly support 400 to 500 pounds or more. Bariatric canes feature reinforced tubular steel or heavy-gauge aluminum shafts, heavy-duty dual push-button pins, and wider base footprints. Using a standard cane when bariatric support is required poses serious safety hazards, including shaft bowing, sheared adjustment pins, and sudden structural collapse. Verifying load ratings ensures long-term structural integrity and peace of mind on every walk.
Inspecting Rubber Ferrules and Maintenance Checks
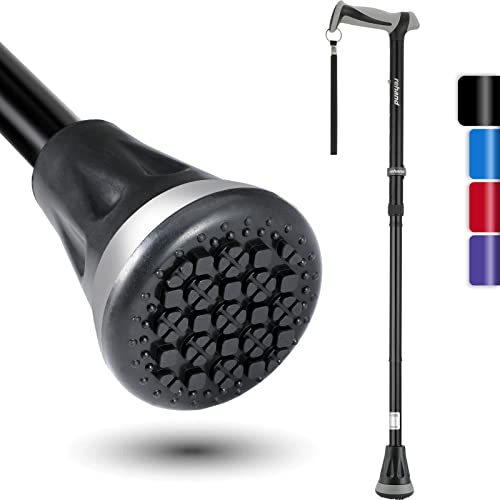
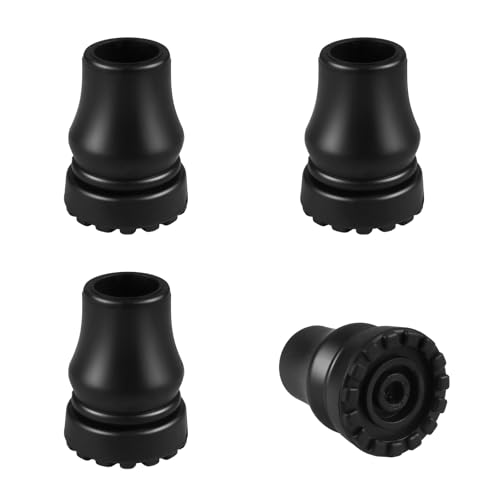
The rubber tip, or ferrule, attached to the bottom of the cane is your sole point of contact with slick surfaces. Inspect the rubber ferrule every week to check the depth of the bottom tread grooves and look for signs of cracking or uneven wear. Once the tread wears smooth, the cane loses friction rapidly, significantly increasing the likelihood of dangerous slips on wet tiles or hardwood floors. Replacing worn tips immediately restores dependable traction and protects indoor flooring from metal scratches.
Inside every quality replacement tip is a built-in steel reinforcement washer designed to prevent the bottom of the metal shaft from cutting through the rubber. If you notice the metal shaft poking through or feel excessive wobble, replace the tip right away. Replacement tips must match the outer diameter of your cane shaft, with common tubing sizes measuring five-eighths or three-quarters of an inch. Regularly cleaning dirt, gravel, and grit from the tread grooves ensures that your cane tip maintains optimal ground contact wherever you walk.
When to Transition from a Walking Cane to a Walker or Rollator
Walking canes are engineered specifically to provide unilateral balance support and offload between 15 and 25 percent of lower-extremity body weight. When chronic joint degeneration, neurological decline, or severe balance impairment requires greater stability, a single cane is no longer adequate. Warning signs include frequent stumbling, severe lateral swaying, profound fear of falling, or the need to lean heavily with both hands on household furniture. If a single cane fails to prevent balance loss, continuing to rely on it can lead to dangerous falls.
Transitioning to a four-wheeled rollator or standard medical walker provides bilateral upper-extremity support and a substantially wider base of stability. Walkers allow users to offload significantly higher percentages of body weight while providing built-in seating for resting during long outings. If you find your walking speed slowing drastically or feel constantly unsteady on your feet, schedule a comprehensive mobility assessment with a licensed physical therapist or physician. A professional clinical evaluation will determine the precise mobility aid needed to preserve your independence and safety.





Write Your Review
No reviews yet. Be the first to share your experience!