


Walking with an improper walking aid often forces an awkward forward lean or unnatural shoulder shrug that increases joint fatigue. Determining what length cane do i need is the primary step to establishing dependable balance and restoring a natural walking cadence. When a walking stick rests at the correct anatomical height, it offloads significant body weight from painful knees or hips while promoting erect posture. Pairing a well-fitted mobility aid with appropriate supportive gear, such as knee strain apparel, helps maintain daily joint comfort during rehabilitation or routine neighborhood walks.
An incorrect stick height can trigger chronic lower back soreness, wrist nerve irritation, or elevated trip risks across thresholds. Standard sizing guidelines align the top of the handle with the user’s natural wrist crease while wearing typical daily footwear. This precise orientation preserves a healthy fifteen to twenty degree elbow bend, ensuring optimal muscular leverage when bearing partial weight. Reviewing reliable height adjustment mechanisms and accurate measurement techniques provides the stability needed for safe daily movement.


The Complete Anatomical Guide to Cane Height and Mobility Sizing
Finding the right cane length requires matching the device directly to your unique physical proportions rather than relying on standard height charts. Most adults need a walking cane that measures between thirty-two and thirty-eight inches from the bottom of the rubber tip to the highest point of the grip. Sizing your aid correctly ensures that your skeleton bears weight efficiently while preserving natural muscular balance. A cane adjusted to your exact wrist height provides the physical leverage required to offload painful joints safely throughout the day.
Anatomical Measurement Landmarks: Floor to Wrist Crease Formula
The primary clinical benchmark for sizing any walking stick is the distance between the floor and the distal crease of the user’s wrist. To perform this measurement correctly, stand upright with your shoulders relaxed and your arms resting naturally at your sides. If you hike your shoulders upward or lean forward during the measurement, the resulting stick height will cause persistent muscle tension. Looking straight ahead rather than down at your feet helps preserve a neutral spinal alignment during the sizing process.
Another reliable anatomical landmark used by rehabilitation specialists is the greater trochanter of the femur. This prominent bony ridge sits on the outer side of the upper hip and generally aligns directly with the natural wrist crease when a person stands erect. Aligning the cane handle with this level preserves an elbow flexion angle of fifteen to twenty degrees. This slight bend allows your arm and shoulder muscles to bear downward weight with optimal mechanical leverage.
Biomechanical Consequences of an Incorrect Cane Length
Using a walking cane that is too tall forces the shoulder on the support side to hike upward with every single stride. This continuous elevation creates chronic tension in the upper trapezius muscles, frequently triggering neck stiffness and tension headaches. Furthermore, an excessively high handle places the cane tip too far forward on the floor. This over-extension reduces downward stability and significantly increases the likelihood of the tip slipping out from under you on smooth tile.
A cane that sits too low creates equally severe biomechanical issues by encouraging a stooped, forward-leaning posture. Walking with a hunched spine places continuous strain on the lumbar vertebrae, resulting in persistent lower back ache. A short cane also forces you to lean laterally toward the support side, which disrupts your natural vertical center of mass. This lateral trunk lean undermines dynamic balance and increases the likelihood of tripping over minor floor thresholds.
Step-by-Step Measurement Protocols: Solo and Assisted Methods
Having a partner assist you with the measurement process produces the most precise and dependable sizing results. Stand naturally with your back near a wall, keeping your feet shoulder-width apart while wearing your typical daily walking shoes. Your assistant should position a standard tape measure from the floor directly up to the crease on the inside of your wrist. Recording this measurement to the nearest half-inch provides the target handle height needed for either an adjustable or fixed-length cane.
If you must measure your required stick height alone, you can achieve an accurate result by using a household broomstick or dowel. Stand upright against a stable wall with your normal walking footwear on and let your arms hang loosely downward. Use a pencil or a piece of masking tape to mark the wall exactly where your wrist crease rests beside your hip. Stepping away from the wall allows you to measure from the floor to your pencil mark without twisting your torso or compromising your posture.
Adjusting Push-Button Telescoping Aluminum Canes
Most modern mobility aids utilize lightweight anodized aluminum shafts equipped with spring-loaded brass detent pins. These telescoping mechanisms feature a row of pre-drilled adjustment holes placed along the lower shaft at one-inch intervals. To modify the length, depress the brass push-button with your thumb while sliding the inner tube to your desired setting. You must ensure that the spring-loaded pin pops completely through the chosen hole until an audible click confirms positive mechanical engagement.
A threaded anti-rattle locking collar sits directly below the telescoping joint on quality aluminum models. After securing the push-button pin, firmly hand-tighten this textured plastic or aluminum compression ring. Tightening the collar eliminates mechanical play between the inner and outer tubing segments, preventing annoying clicks or rattles during weight bearing. A firmly tightened locking ring also adds supplemental structural rigidity that reinforces the push-button against unintentional slippage under load.
Sizing and Trimming Traditional Solid Wood Canes
Solid hardwood canes made of ash, hickory, or oak offer timeless aesthetic appeal but require permanent trimming to achieve proper fit. Because wood cannot be extended once cut, verifying your target length multiple times before making an incision is essential. Begin by subtracting the thickness of your replacement rubber tip from your overall floor-to-wrist measurement. Overlooking the base height of the rubber ferrule can leave the trimmed cane slightly taller than intended.
Wrap a strip of painter’s tape tightly around the shaft at your measured cut line to prevent wood splintering along the outer grain. Use a fine-tooth handsaw or miter saw to produce a completely square cut across the bottom of the dowel. After smoothing the cut edges with medium-grit sandpaper, reinstall the rubber tip firmly over the bottom of the wooden shaft. High-quality mobility tips contain an internal steel washer that prevents the trimmed wooden edge from punching through the rubber base.
Handle Geometry and Its Influence on Usable Height
The physical shape of the cane handle directly influences the height at which your hand rests during daily ambulation. Traditional crook or tourist handles feature a curved arch where the user’s hand naturally grips slightly below the absolute apex of the curve. Derby and Fritz handles present a flatter horizontal platform that allows the palm to rest directly on top of the grip surface. Because of these geometric variations, measuring from the floor to the exact point of palm contact ensures an accurate personalized fit.
Offset handle canes feature a distinct curved neck that centers the user’s downward weight directly over the vertical shaft axis. This structural orientation reduces wrist strain and provides exceptional stability for individuals who must bear significant weight on their mobility aid. Many offset models also feature soft foam or textured rubber grips that cushion the sensitive palm area during prolonged walking. If you manage carpal tunnel syndrome or hand arthritis, an offset design can significantly enhance grip comfort and control.
Base Stability Options and Stair Clearance
Standard single-point canes feature a single rubber ferrule that provides outstanding agility and rapid swing maneuverability. These lightweight single-point models excel in narrow indoor hallways and crowded retail aisles where wide bases might catch on furniture. Quad canes incorporate a four-legged metal platform that offers enhanced base stability and convenient self-standing capability. However, when using a quad cane, you must ensure that the flat side of the four-legged base faces inward toward your body to prevent tripping.
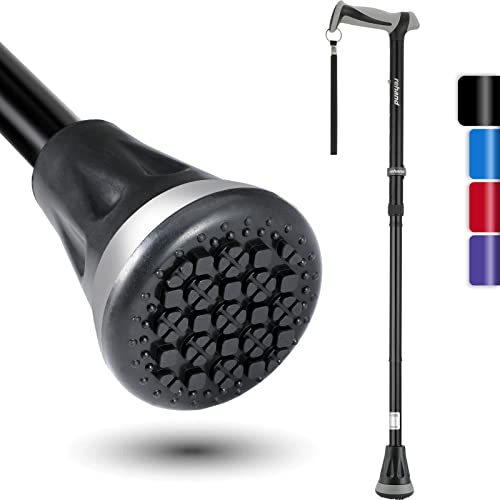
Articulating pivot-base canes utilize a multi-point flexible rubber foot that mimics the natural movement of an ankle joint. This pivoting mechanism maintains flat ground contact across uneven sidewalks, outdoor ramps, and mild inclines where standard tips might lift partially off the ground. While pivot bases and quad canes provide excellent standing stability, single-point canes remain much safer on stairs. Wide quad platforms often overhang standard stair tread depths, creating severe tipping hazards during ascent or descent.
Functional Gait Mechanics: Contralateral Placement and Stair Navigation
Biomechanical gait efficiency requires holding your cane in the hand opposite your injured, weak, or painful lower limb. Holding the mobility aid on the strong side preserves a natural reciprocal arm swing, where the cane and affected leg move forward in unison. This contralateral placement broadens your base of support and transfers fifteen to twenty-five percent of your body weight away from the compromised joint. Holding a cane on the injured side disrupts normal walking cadence and frequently exacerbates hip and knee strain.
Navigating stairs requires following the established physical therapy sequence known as up with the good, down with the bad. When ascending steps, place your stronger unaffected leg onto the higher step first, then bring the cane and injured leg up together. When descending, lower the cane and your weaker leg to the bottom step first before stepping down with your strong leg. If a sturdy handrail is available, hold the rail with one hand and carry your cane in the other hand for superior fall protection.
Travel Portability, Rubber Traction, and Drop Prevention
Active individuals who commute, dine out, or travel frequently often benefit from collapsible folding mobility aids. High-quality folding canes break down into three or four compact segments connected by heavy-duty internal elastic shock cords. These travel models fold down to less than fourteen inches, allowing them to tuck discreetly under vehicle seats or into luggage. If you frequently travel by air, consulting a carry on travel dimensions guide helps ensure your packed mobility aid complies with airline overhead restrictions.
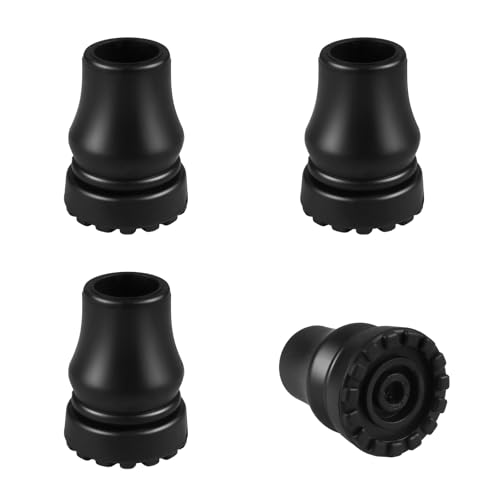
Traction safety depends entirely on the physical condition of the flexible rubber ferrule mounted at the base of the cane. Inspect the bottom tread pattern every week to verify that the grooves remain deep and clear of embedded dirt or debris. If the rubber appears hard, cracked, or worn down past the tread sipes, replace the tip immediately to avoid dangerous slip hazards on wet tile. In addition, wrist tether straps and table resting clips help keep your mobility aid within reach without painful bending.
Certified Load Capacities and Clinical Transition Triggers
Verifying the certified weight capacity of your mobility aid is critical for user safety and long-term durability. Standard aluminum and solid hardwood walking canes typically feature static load ratings ranging between two hundred fifty and three hundred pounds. Bariatric models utilize reinforced heavy-wall aluminum or welded steel construction certified to support four hundred to five hundred pounds safely. Exceeding manufacturer weight thresholds risks unexpected shaft buckling, push-button failure, or joint fracture during sudden dynamic stumbles.
A walking cane is designed strictly for unilateral balance assistance and partial weight offloading rather than full bilateral weight support. If you experience bilateral leg weakness, frequent freezing episodes, or severe vestibular disorientation, a single cane is no longer sufficient for fall prevention. In these situations, transitioning to a four-wheeled rollator or standard walker provides the continuous bilateral base of support required for safety. Always consult a licensed physical therapist or physician for a formal clinical gait evaluation and personalized mobility equipment prescription.
Taking the time to measure your wrist crease accurately ensures that your walking cane delivers dependable stability rather than unwanted joint aches. Whether you choose an adjustable telescoping aluminum model or trim a classic hardwood shaft, verifying a fifteen to twenty degree elbow flex confirms an optimal ergonomic fit. Pair your properly sized cane with routine ferrule inspections and safe contralateral gait habits to maintain daily walking independence. With the right stick length supporting your stride, you can navigate your home and community with renewed comfort and physical confidence.





Write Your Review
No reviews yet. Be the first to share your experience!