


Maintaining upright spinal alignment and confident footing begins with setting your equipment to the correct height. When walkers ask what size nordic walking pole do i need, the answer depends on their standing height, elbow flexion geometry, and individual mobility goals. Using poles that sit too tall or too low disrupts natural arm swing, places unwanted strain across the neck and shoulders, and reduces the joint offloading benefits that make fitness walking so effective. Choosing the right length allows the arms and core to absorb impact away from vulnerable knees and hips with every rhythmic stride.
Nordic walking differs significantly from using a standard medical cane or trekking stick because it uses continuous propulsion and active arm extension. Selecting the right shaft length ensures you achieve an ideal ninety-degree elbow angle while keeping your wrist and forearm aligned for smooth forward propulsion. Whether you choose rigid one-piece carbon shafts custom-cut to your frame or compact telescoping aluminum models, dialing in your exact fit transforms ordinary walks into a full-body stability workout. For those who travel often, compact multi-piece poles pack down effortlessly into luggage that complies with standard carry-on travel luggage guidelines without adding unnecessary bulk.

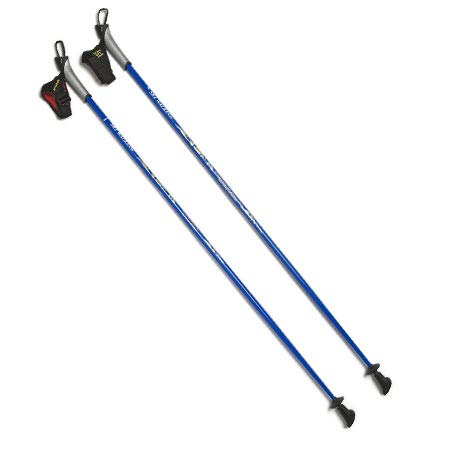


Complete Guide to Sizing and Selecting Nordic Walking Poles
Finding the right pole dimensions establishes the mechanical foundation for your posture, stride cadence, and upper-body drive. Whether your objective is low-impact joint rehabilitation, senior balance support, or athletic conditioning, proper pole length dictates how effectively your muscles engage with every step.
The Standard Height Formula for Nordic Walking Poles
Setting your equipment to the proper length begins with a proven mathematical formula used by walking instructors worldwide. To find your base pole length, multiply your overall standing height in centimeters by 0.68, or multiply your height in inches by 0.68. If you stand five feet eight inches tall, which equals 68 inches, multiplying 68 by 0.68 gives approximately 46.2 inches, or roughly 115 centimeters. This calculation positions the handle at the exact elevation where your arm can drive backward efficiently without overreaching.
Many manufacturers provide pre-calculated size charts based directly on this 0.68 ratio. If your calculation falls directly between two standard pole sizes, your fitness level and physical goals determine whether to round up or down. Beginners, older adults recovering from orthopedic procedures, and individuals prioritizing stability usually round down to the shorter size. A slightly shorter pole reduces shoulder stress and makes learning the planting motion much easier during early workouts.
Fitness walkers seeking vigorous aerobic training or upper-body strength development may round up to the longer measurement. A taller shaft increases the push angle, requiring greater engagement from the triceps, lats, and core muscles during each stride. However, sizing up prematurely can force the elbow into unnatural extension, leading to wrist fatigue. Sticking close to the standard 0.68 multiplier creates a balanced foundation for joint relief and natural cadence.
Standing Elbow Angle: The Physical Fit Verification
Mathematical formulas provide an excellent starting benchmark, but your physical anatomy dictates the final fit. To perform the physical sizing test, put on the cushioned walking shoes you wear most often and stand upright on a flat, level floor. Grasp the pole grip firmly while slipping your hand through the dedicated strap system, holding the shaft vertically with the tip resting against the ground beside your foot. Relax your shoulders completely, pulling your shoulder blades gently back and down without hunching forward.
Look at the bend in your elbow while holding the pole in this vertical position. Your forearm should rest parallel to the floor, forming a clean ninety-degree right angle with your upper arm. If your hand sits higher than your elbow, causing an acute angle, the pole is too tall and will strain your shoulders. If your hand drops below your elbow toward your hips, the pole is too short and will cause you to stoop forward.
This ninety-degree elbow angle differs substantially from standard single-point medical walking cane measurements. Medical canes are sized from the floor to the user wrist crease, producing a shallower fifteen to twenty-degree elbow bend designed for vertical downward weight offloading. Nordic poles require a fuller ninety-degree angle because the arms actively swing forward and push backward rather than simply bearing static downward pressure. Verifying this right angle guarantees both propulsion power and joint protection.
Height Chart for Fixed and Telescoping Poles
Understanding standard sizing increments helps buyers choose between fixed-length models and adjustable shafts. Walkers between four feet ten inches and five feet one inch tall generally require a pole length of 100 centimeters, or roughly 40 inches. Those measuring five feet two inches to five feet four inches match well with a 105-centimeter shaft, while individuals from five feet five inches to five feet seven inches typically need 110 centimeters. Walkers standing five feet eight inches to five feet ten inches align with 115 to 120 centimeters.
Taller individuals between five feet eleven inches and six feet one inch usually require 120 to 125 centimeters, while users six feet two inches and above need 130 centimeters or longer. Brands like American Nordic Walking System offer rigid one-piece shafts from Swix and Exel built across 32 discrete height sizes, ensuring an exact custom fit without moving parts. These one-piece options eliminate telescoping joints entirely, which helps prevent vibration during repeated pavement contact.
Adjustable models like York Nordic telescoping poles provide a continuous adjustment range from 32 inches to 54 inches, covering user heights from five feet four inches up to six feet two inches. Meanwhile, specialized heavy-duty options such as the York Nordic Big and Tall Motivator walking poles extend to support users up to seven feet tall. Telescoping ranges allow multiple family members to share equipment or let you fine-tune length as your technique improves.
Fixed One-Piece vs Telescoping Shaft Mechanics
Choosing between fixed one-piece poles and telescoping collapsible shafts involves weighing mechanical rigidity against packability. Quality one-piece carbon fiber poles provide maximum stiffness, quiet operation, and exceptional shock dampening with every stride. Because they have no internal sliding joints or external clamps, one-piece shafts never slip out of adjustment or rattle during vigorous workouts. Physical therapy patients and seniors with balance concerns often prefer one-piece designs for their solid, unyielding structural feedback.
Telescoping poles use locking mechanisms to secure adjustable aluminum or carbon sections at your chosen height. Modern designs frequently feature external flip-locks, which use lever tension to clamp shaft sections firmly together. Flip-locks are generally easier to inspect visually and simpler to tighten with cold hands than older internal twist-locks. However, twist-lock models like TheFitLife telescopic trekking poles offer a clean, streamlined exterior that will not snag on clothing or brush.
External clamps require routine tension checks to ensure the shafts do not slip under moderate downward load. Push-button locking mechanisms, found on specialized options like the York Nordic Motivator poles, use positive detent pins that lock directly into machined holes for solid weight support up to 500 lbs. If you prioritize convenient transport in car trunks or backpacks, collapsible shafts offer clear advantages over rigid single-piece poles.
Grip Ergonomics, Quick-Release Straps, and Hand Sizing
Proper sizing extends beyond pole length to include how the handle and strap fit your hand. Authentic Nordic walking poles feature specialized glove-style mesh straps that wrap securely around the palm and wrist rather than loose webbing loops. These ergonomic glove straps keep the pole anchored directly against the base of your thumb and thenar eminence. This snug connection allows you to open your fingers completely at the back of each stride while maintaining full control over the pole.
Many high-end brands provide glove straps in distinct hand sizes ranging from Small to Extra Large to prevent chafing or restricted circulation. Quick-release push-button connectors, like those featured on York Nordic poles, allow you to detach your hand from the grip instantly to answer a phone or grab a water bottle without unfastening the velcro strap. Natural cork and contoured rubber grips offer moisture absorption and reduce hand fatigue over long walking sessions.
For walkers managing arthritis, carpal tunnel syndrome, or thumb joint pain, specialized grip designs can make a dramatic difference. Contoured grips with dedicated thumb rests support the carpometacarpal joint, spreading pressure evenly across the palm rather than concentrating it on the thumb saddle. A properly sized grip prevents tight clenching, keeping hand muscles relaxed so you can focus on rhythmic arm swings.
Biomechanical Consequences of Incorrect Pole Length
Walking with poles that do not match your height creates noticeable biomechanical imbalances that undermine your fitness and comfort. When poles are adjusted too tall, your elbows are forced into an acute bend, causing your shoulders to shrug upward toward your ears. This continuous shoulder elevation overworks the upper trapezius and levator scapulae muscles, frequently leading to persistent neck stiffness, tension headaches, and rotator cuff irritation. Taller poles also force you to plant the tips too far forward, creating an unnatural braking action that slows your forward momentum.
Poles that are adjusted too short create the opposite set of biomechanical issues. Short poles cause users to hunch forward at the waist, rounding the thoracic spine and placing unnecessary compressive stress on the lower back. Leaning forward reduces your lung capacity, restricts deep breathing, and prevents your arms from achieving a full backward push. Furthermore, undersized poles fail to transfer weight off your lower extremities, diminishing the joint relief you want for sensitive hips and knees.
Pairing properly fitted poles with stable stride mechanics offloads significant downward force from the patellofemoral joints. Many active walkers also choose supportive knee mobility apparel to maintain joint warmth and flexible tracking during brisk outdoor fitness walks. When your equipment is dialed in correctly, your spine stays upright, your pelvis remains neutral, and each arm swing propels you forward smoothly without jarring impact.
Rubber Paws, Carbide Tips, and Surface Height Variables
The type of tip attached to the bottom of your walking pole subtly alters its effective operating length. Nordic walking poles feature durable tungsten carbide tips designed to bite securely into dirt paths, gravel trails, grass, and hard-packed snow. For paved urban surfaces, concrete sidewalks, and indoor tracks, manufacturers provide detachable angled rubber feet known as asphalt paws. These rubber paws cushion ground strikes, dampen shaft vibrations, and grip smooth surfaces securely.
Adding or removing rubber paws changes the total length of your pole by roughly one-half to three-quarters of an inch. When adjusting a telescoping shaft for pavement walking, set your height with the rubber paws already installed on the carbide tips. The angled sole of a Nordic rubber paw must always point backward toward your heels, creating a secure grip angle when the pole is planted behind you at approximately 45 degrees.
If you transition from hard pavement to soft dirt trails or sandy paths, removing the rubber paws exposes the sharp carbide spikes. On softer outdoor ground, the metal tip will sink slightly into the soil, effectively reducing the pole height by a small margin during walking. Telescoping poles allow you to extend the shaft by one or two centimeters to compensate for this ground sinkage when navigating natural trails.
Rehabilitation, Balance Support, and Clinical Guidelines
Nordic walking poles have gained widespread recognition in physical rehabilitation for patients recovering from hip replacements, stroke, or Parkinsonian gait changes. Using two poles establishes a four-point contact base that enhances proprioception, widens your base of support, and reduces fall anxiety. Heavy-duty options like the York Nordic Motivator poles provide certified weight support up to 500 lbs, accommodating bariatric users and those needing firm balance assistance. The dual-pole rhythm encourages upright posture and symmetric stride length, helping correct compensatory limp patterns.
However, it is vital to distinguish bilateral fitness poles from single medical canes and wheeled walkers. While Nordic poles offload significant joint stress and steady your balance during active walking, they are not intended to support full non-weight-bearing loads. Individuals with severe vestibular disorders, profound leg weakness, or advanced balance instability should consult a physical therapist or physician before adopting fitness poles. A clinician can assess your dynamic balance, evaluate your gait safety, and prescribe whether bilateral poles, a quad cane, or a rollator best matches your needs.
Pre-Walk Safety Verification and Shaft Maintenance
Before heading out on any walking session, performing a quick equipment safety check ensures dependable support and prevents unexpected slippage. If you use telescoping poles, verify that all flip-lock levers or twist-locks are securely tightened and that both poles are set to identical height markings. Apply firm downward body weight onto the grips while standing on a non-slip surface to confirm the locking mechanisms hold without collapsing. Check that the glove straps click firmly into the handles and release cleanly when the quick-release button is pressed.
Inspect the bottom rubber paws regularly for signs of excessive tread wear, hardening, or cracking. Worn rubber tips can slip unexpectedly on wet pavement or polished surfaces, so replace them promptly when the tread sipes wear smooth. Periodically disassemble telescoping sections to wipe away fine road grit, moisture, and dirt with a dry cloth, avoiding oil lubricants that cause locking clamps to slip. Taking a few moments to verify your equipment ensures that every step remains stable, comfortable, and energetically rewarding.







Write Your Review
No reviews yet. Be the first to share your experience!