


Walking with steady confidence requires proper mechanical alignment between your body and your mobility aid. When recovering from joint surgery or navigating mild balance issues, asking what size walking cane do i need is the foundational first step toward preventing unnecessary falls. Many adults attempt to use a walking cane straight out of the box without adjusting the shaft length to match their anatomical proportions. That mistake often leads to shoulder hiking, wrist strain, and awkward walking patterns that increase physical fatigue. Pairing a properly sized cane with supportive joint wear helps reinforce lower body stability while relieving stress across painful hips, knees, and ankles.
A properly fitted walking cane offloads up to twenty-five percent of your body weight from an injured or arthritic lower limb. Achieving this biomechanical relief depends entirely on establishing the correct handle height relative to your natural posture. Modern mobility aids feature telescoping aluminum shafts, secure push-button detents, and ergonomic grips tailored for daily stability. Learning how to measure your stature accurately ensures that your cane functions as a dependable extension of your arm rather than an awkward tripping hazard.



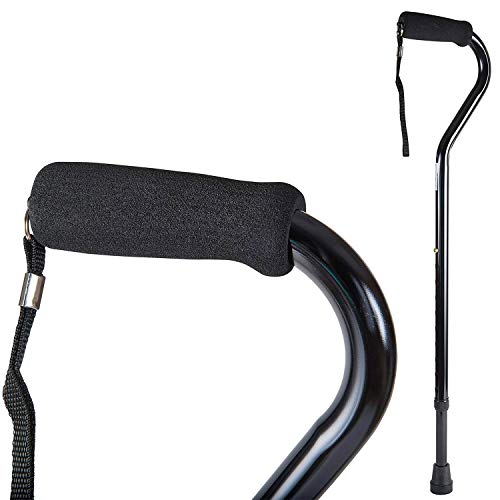

How to Determine Proper Walking Cane Sizing and Fit
A walking cane should serve as a stable support pillar that encourages an upright, natural walking rhythm. If the shaft extends too high, your shoulder lifts toward your ear, causing muscular tension along the trapezius and upper back. If the shaft sits too low, your spine rounds forward, throwing your center of gravity off balance and aggravating lumbar discomfort. Understanding what size walking cane do i need begins with matching the physical dimensions of the mobility aid to your personal skeletal landmarks.
The Floor-to-Wrist Crease Measurement Protocol
The most dependable method for determining proper cane height uses the distance from the floor to the crease of your wrist. To perform this measurement accurately, put on the specific walking shoes you wear most frequently throughout the day. Stand tall on a level, uncarpeted hard floor with your arms hanging naturally at your sides in a relaxed posture. Look straight ahead and keep your shoulders level rather than slumping forward or pulling your shoulder blades back artificially.
Have a partner measure the vertical distance from the floor up to the prominent interior crease of your wrist joint. If you must measure alone, back up gently against a wall and hold a pencil or small ruler horizontally at your wrist crease to mark the surface lightly before measuring down with a tape measure. This floor-to-wrist measurement corresponds directly to the required distance between the bottom of the cane rubber tip and the top crest of the handle. Many people mistakenly measure from their hip crest, which places the handle too high and compromises natural forearm leverage.
Why Elbow Flexion Angle Determines Joint Relief and Posture
When you rest your palm on a properly sized cane handle, your elbow should bend naturally at an angle between 15 and 20 degrees. This slight elbow flexion is not an aesthetic preference; it serves as a critical biomechanical shock absorber for your upper extremity. A fully locked, straight arm forces ground reaction forces directly into your wrist, elbow, and shoulder joints with every footfall. Conversely, an excessive elbow bend greater than 30 degrees demands constant muscular effort from your biceps and triceps, leading to rapid arm fatigue.
Maintaining a 15- to 20-degree elbow bend allows your latissimus dorsi, pectoralis major, and triceps muscles to engage effectively during the stance phase of walking. This muscular engagement is what enables the user to transfer approximately 15% to 25% of their body weight away from a painful hip, knee, or ankle. When testing your cane height, observe your forearm in a full-length mirror while placing downward pressure on the grip. If your shoulder lifts upward as you push down, the cane is set too high and needs to be lowered by one notch.
Sizing Adjustments for Footwear Variations and Surface Changes
Footwear thickness directly alters your effective distance to the floor and must be taken into account when sizing your cane. A person wearing thick-soled athletic sneakers stands nearly an inch taller than when wearing thin-soled dress shoes or low-profile indoor slippers. Because of these daily variations, relying on a fixed-length cane cut for one specific pair of shoes can cause subtle gait alterations in other settings. Sizing should always reflect your daily walking routine, prioritizing the shoes you wear when walking the longest distances outside.
If you transition frequently between supportive outdoor sneakers and indoor house shoes, an adjustable telescoping cane provides the necessary flexibility. Choosing apparel that allows unhindered joint motion, such as lightweight mobility apparel, ensures that your stride remains natural when adjusting to minor height variations. Seasonal footwear like winter snow boots with heavy lugged outsoles may require raising the cane shaft by a full push-button increment to maintain the correct elbow angle. Always recheck your elbow flexion whenever you switch to footwear with a substantially different stack height.
Push-Button Telescoping Adjustments versus Cut-to-Fit Shafts
Modern mobility canes predominantly utilize telescoping tubular shafts made from lightweight aluminum alloys. Devices like the DMI walking cane feature an adjustment range from 30 to 39 inches in one-inch increments, accommodating a broad spectrum of adult heights. Similarly, the Medline offset walking cane adjusts from 29 to 38 inches, while the REHAND folding models provide eight distinct height settings spanning from 31 to 38 inches to fit users from five feet to six feet five inches tall. Canes such as the KINGGEAR model offer a 31- to 36-inch range, and compact options like the supregear and Comfkey folding canes adjust from 33 to 37 inches.
To adjust a push-button cane safely, depress the spring-loaded brass detent pin and slide the internal tube until the pin snaps completely through the target hole. After the pin locks into place, inspect the hole visually to confirm that the detent protrudes fully through the exterior tubing wall. Most quality aluminum models include a threaded anti-rattle locking ring or collar located just above the adjustment holes, such as the collar seen on DMI and Comfkey models. Tightening this locking nut firmly stops irritating clicking noises and eliminates mechanical play between the telescoping tube segments.
Handle Ergonomics and Effective Palm Elevation
Handle geometry plays a significant role in establishing the functional height of your cane and managing localized joint stress. Traditional crook or tourist handles force the wrist into an extended posture, which can compress the carpal tunnel and cause hand numbness during extended walks. In contrast, curved offset handles, such as those found on Medline, DMI, and KINGGEAR models, route the shaft forward before curving back under the hand. This design centers the user’s downward weight directly over the vertical axis of the cane tip, improving balance and reducing wrist strain.
Handle grip materials and contours also alter how your palm rests against the cane. Ergonomic grips with widened palm shelves, like the dual-material PP and soft TPR handles on REHAND canes, spread downward pressure over a wider surface area of the thenar eminence. Padded EVA foam handles, featured on KINGGEAR and Medline canes, provide cushioning that absorbs subtle impact shocks for individuals managing severe arthritis. Because contoured and padded handles have varying thicknesses, you should always measure your cane height to the top surface where your palm actually rests rather than to the metal neck below.
Base Types and How Footprints Influence Shaft Length
The type of base attached to the bottom of your walking cane affects both its stability and its total overall length. Standard single-point walking sticks use a simple molded rubber tip, known as a ferrule, which provides a compact footprint and responsive maneuverability. Replacing a worn rubber tip with an aftermarket quad base or an articulating pivot platform can raise the effective cane height by one-half to one full inch. Failing to re-adjust the telescoping shaft after installing a larger base will unintentionally force your elbow into an over-flexed posture.
Freestanding multi-prong bases offer distinct advantages for individuals who struggle with cane drops. For instance, the KINGGEAR cane incorporates a 4.3-inch wide four-tipped silent quad base, while REHAND models utilize a rotating, four-pronged pivoting base designed to maintain flat surface contact on uneven ground. These multi-tipped designs allow the cane to stand upright on its own, eliminating the painful bending required to retrieve a fallen stick from the floor. However, users must exercise caution around stairs and curbs, as wide quad bases can catch on stair risers or hang over narrow step edges.
Structural Weight Capacities and Tubing Durability
Validating the structural load rating of a walking cane is just as important as verifying its vertical height. Standard aluminum walking aids, including the Medline offset cane and the KINGGEAR quad cane, are rated by manufacturers to support up to 300 pounds. Other models, such as the DMI walking cane, are certified for up to 250 pounds, while ultra-lightweight travel sticks like the supregear cane specify a maximum weight capacity of 198 pounds. It is vital to recognize that these ratings represent partial weight offloading rather than full bariatric body support.
For travel convenience, many popular canes feature collapsible designs that fold down into multiple sections. The supregear model folds into four sections measuring approximately 10 inches in length, while the Comfkey stick utilizes a five-part folding mechanism for compact storage inside totes or backpacks. Internal heavy-duty elastic shock cords hold these segments together under tension, allowing quick assembly. Before placing downward weight on any folding cane, always verify that every joint sleeve has fully seated into its corresponding tube segment without any visible gap.
Troubleshooting Sizing Errors and Biomechanical Gait Faults
Recognizing the physical warning signs of an improperly sized cane helps you correct biomechanical errors before they cause chronic joint pain. If your cane is too tall, you will likely notice your shoulder hiking upward, your wrist bending backward, and a tendency for the cane tip to land too far ahead of your stride. If the cane is too short, you will find yourself leaning your torso sideways and rounding your back, which quickly causes lumbar muscle spasms. A cane adjusted to the correct height allows you to walk with upright spinal alignment, relaxed shoulders, and a smooth, reciprocal arm swing.
A widespread mistake among new cane users is holding the device on the same side as the painful or recovering leg. Biomechanically, you must hold the cane in the hand opposite your injured or weaker limb to preserve normal reciprocal gait mechanics. When you step forward with the affected leg, move the cane forward simultaneously to share the downward load and widen your base of support. For navigating stairs, follow the trusted physical therapy sequence: step up with your stronger leg first when ascending, and lead with the cane and weaker leg together when descending.
Clinical Indicators for Upgrading Mobility Equipment
While a properly sized walking cane provides valuable support for mild balance deficits and unilateral leg recovery, it has distinct functional limitations. A single cane is designed to offload only a fraction of your body weight and cannot provide bilateral stability for individuals experiencing severe balance impairments. If you experience frequent near-falls, noticeable leg buckling, or profound dizziness when standing, relying solely on a single-point or quad cane may no longer ensure your safety. Progressive neurological conditions like Parkinson’s disease or advanced peripheral neuropathy often outpace the support capabilities of a standard cane.
When walking requires excessive mental concentration or creates persistent fear of falling, it is appropriate to consider transitioning to a two-wheeled walker or four-wheeled rollator. Bilateral mobility devices provide a much wider base of support, distribute weight evenly across both arms, and offer integrated resting seats for endurance limitations. Always consult a licensed physical therapist or physician for a clinical gait assessment if you notice your mobility declining. A healthcare professional can evaluate your gait velocity, measure your exact joint angles, and prescribe the safest mobility aid for your personal physical needs.
Taking the time to accurately measure your floor-to-wrist distance, verify your 15- to 20-degree elbow bend, and lock your telescoping pins securely ensures that your cane delivers optimal daily balance. With the correct height and handle profile in place, you can move through indoor rooms and outdoor spaces with renewed physical stability and reduced joint pain. Conducting regular inspections of your rubber tips and adjustment collars ensures that your mobility aid remains safe, silent, and supportive every step of the way.





Write Your Review
No reviews yet. Be the first to share your experience!