


Walking with unsteady footing or recovering from lower-limb joint surgery often brings sudden anxiety about stability and posture. Determining how high is a cane supposed to be plays a decisive role in restoring natural walking rhythm and offloading painful pressure from vulnerable hips, knees, and ankles. Holding a mobility aid at an improper level forces your body into awkward compensations, which quickly undermines balance rather than protecting it. Establishing the correct measurement ensures your cane functions as a dependable extension of your arm rather than an awkward tripping obstacle.
Achieving proper cane geometry allows users to transfer between 15% and 25% of their body weight away from a compromised leg during everyday strides. Pairing proper cane height with supportive knee mobility apparel can significantly reduce joint inflammation and fatigue during daily rehabilitation walks. When your walking aid fits your body precisely, your upper spine remains upright and your gait retains a smooth, symmetrical cadence. Taking a few moments to measure your frame accurately prevents chronic discomfort and builds lasting confidence on every indoor and outdoor surface.

Biomechanical Sizing and Safe Cane Setup
A walking cane is supposed to reach the level of your wrist crease when you stand naturally in your regular walking shoes. At this exact height, your arm should rest comfortably with a 15- to 20-degree bend at the elbow when gripping the handle. This anatomical alignment allows your arm muscles to absorb shock and transfer downward force without hiking your shoulder or stooping your back. Setting your mobility aid to these precise body landmarks creates the biomechanical foundation for safe, upright, and pain-free movement.
Anatomical Landmarks for Accurate Cane Height Measurement
Measuring your cane requires standing on a level, hard floor while wearing the footwear you wear most frequently throughout the day. Athletic sneakers, orthopedic shoes, and thick-soled walking shoes add different heights to your stance, which directly shifts your ideal handle level. You should stand upright with your shoulders relaxed, allowing both arms to hang loosely at your sides without tension. Avoid locking your knees or tilting your torso, as even slight postural shifts will distort your final measurement numbers.
The primary anatomical target for the top of the cane handle is the distal crease on the inside of your wrist. When your arm hangs naturally at your side, this natural skin fold sits roughly level with the greater trochanter, which is the bony protrusion on the side of your hip. Aligning the highest point of the cane grip with this wrist crease guarantees that your hand rests at the exact elevation needed for optimal leverage. Bypassing guesswork and using these bone landmarks ensures your body weight transmits vertically through the cane shaft.
Enlisting the help of a family member, caregiver, or friend produces the most accurate measurement results at home. While you stand tall and gaze straight ahead, your partner can use a flexible tape measure to calculate the distance from the floor to your wrist crease. Attempting to measure this distance alone forces you to bend forward or crane your neck, which alters your arm position and skews the reading. If you must measure without assistance, stand beside a wall, rest your arm naturally, and use a pencil to lightly mark your wrist level on the wall behind you.
The Biomechanics of the 15 to 20 Degree Elbow Bend
Placing your hand on a properly sized cane naturally creates a slight flexion of 15 to 20 degrees at the elbow joint. This gentle angle functions as a dynamic shock absorber, dampening the impact forces that travel up your arm each time the cane tip strikes the ground. A slight bend also allows the triceps, biceps, and shoulder stabilizers to engage efficiently during forward propulsion. Without this mechanical spring action, the repetitive shock of walking travels directly into your wrist, elbow, and shoulder joints.
A completely straight arm creates severe mechanical disadvantages and accelerates upper-body fatigue during daily ambulation. When your elbow remains locked at zero degrees, your arm cannot flex to absorb minor floor irregularities or sudden steps down. This rigid alignment transfers concussive forces directly into the glenohumeral joint and the delicate nerves of the wrist. Furthermore, a straight arm limits your ability to push downward effectively when you need to offload weight from a painful lower extremity.
Conversely, an excessive elbow bend exceeding 30 degrees severely compromises your physical leverage and tires out your arm muscles. Holding an oversized bend requires continuous muscular contraction from your biceps and forearm flexors just to maintain contact with the handle. This sustained tension quickly leads to cramping, wrist fatigue, and hand weakness over modest walking distances. Maintaining that sweet spot between 15 and 20 degrees maximizes load-bearing efficiency while preserving natural muscular endurance.
Physical Consequences of an Improperly Sized Cane
Using a cane that is adjusted too tall forces your shoulder blade to hike upward on the side holding the device. This chronic elevation pinches the upper trapezius and levator scapulae muscles, causing persistent neck tension, upper back aches, and tension headaches. A tall cane also prevents you from placing the tip securely beneath your center of gravity, causing the base to plant too far forward or outward. This awkward placement reduces lateral stability and creates a noticeable limp that strains the unaffected side of your body.
A cane that is adjusted too low introduces an entirely different set of postural and orthopedic problems. When the handle sits below your wrist crease, you must lean forward and tilt your pelvis to maintain a grip on the aid. This forward stoop puts severe compressive loads on your lumbar spine, often triggering lower back spasms, sciatic nerve irritation, and hip pain. Walking in a bent posture also shifts your eyes toward the floor, reducing your awareness of environmental obstacles and significantly elevating your fall risk.
Incorrect cane sizing disrupts the symmetrical cadence of your gait and impairs balance recovery during unexpected slips. An uneven stride pattern forces your body to expend substantially more metabolic energy just to cover everyday distances. Over time, compensating for a poorly fitted mobility aid can lead to secondary joint degeneration in your knees, hips, and lower back. Correcting your handle height immediately restores postural symmetry, reduces muscular compensation, and protects your joints from preventable overuse injuries.
Step-by-Step Height Adjustment on Telescoping and Wooden Canes
Adjustable aluminum canes utilize spring-loaded brass push-button detents along the lower shaft to provide height flexibility in one-inch increments. To modify the length, depress the dual brass pins firmly while sliding the inner telescoping tube upward or downward. Once you reach the desired hole, ensure the pins fully protrude through the aperture with an audible click to confirm mechanical locking. Never use a telescoping cane if the pins remain partially depressed or recessed beneath the aluminum tubing wall.
Most modern aluminum mobility aids feature a threaded locking collar or anti-rattle silencer nut positioned just above the adjustment holes. After locking the brass pins in place, turn this threaded nut firmly by hand until it binds snugly against the outer shaft. This compression collar eliminates the loose play, clicking noises, and structural vibrations that often erode user confidence during gait cycles. Inspect this collar periodically, as daily vibrations can cause the ring to loosen slightly over weeks of regular walking.
Solid hardwood canes lack push-button mechanisms and require permanent trimming to match your personal body dimensions. To size a wooden cane, remove the bottom rubber ferrule and mark the exact cut line on the timber shaft based on your floor-to-wrist measurement. Use a fine-tooth handsaw to make a clean, flat cut perpendicular to the shaft, taking care not to splinter the surrounding wood fibers. Reinstall a tight-fitting rubber traction tip over the freshly cut end to ensure full surface contact with the floor.
Proper Hand Placement and Contralateral Walking Technique
The golden rule of cane mechanics requires holding the mobility aid in the hand opposite your weak, painful, or recovering leg. Holding the cane on the unaffected side is known clinically as contralateral placement, and it mirrors the natural biomechanics of human locomotion. During normal walking, your opposite arm swings forward in synchrony with your advancing leg to maintain rotational balance. Placing the cane on the sound side preserves this reciprocal movement pattern while offering immediate support when the vulnerable limb bears weight.
Attempting to hold the cane on the same side as your injured limb creates an awkward, unnatural waddle known as an ipsilateral gait. This improper technique forces you to lean heavily over your bad leg, increasing shear stress across the damaged knee or hip joint. Holding the cane on the injured side also narrows your base of support, making you far more vulnerable to tipping sideways during turns. Using the opposite hand broadens your physical base, stabilizing your pelvis and preventing dangerous lateral swaying.
When you step forward with your weaker leg, you must advance the cane simultaneously so both strike the ground together. As your foot plants, press down firmly on the cane handle to redirect a portion of your body mass through your arm and shaft. This coordinated action offloads between 15% and 25% of your lower-extremity load, substantially reducing joint pain during the stance phase of walking. Once your strong leg steps forward to take the lead, the cane remains stationary until the next reciprocal stride begins.
Navigating Stairs and Curbs with Correct Cane Positioning
Stair negotiation demands a strict stepping sequence to maintain dynamic balance and prevent devastating falls. When ascending steps, lead upward with your stronger, unaffected leg while keeping the cane and weak leg firmly on the lower step. Once your good foot establishes solid contact on the upper riser, push through that leg to bring the cane and your weaker limb up together. Remembering the clinical phrase “up with the good” helps you execute this safe sequence automatically on flights of any length.
Descending staircases requires exactly the opposite movement pattern to protect your joints from sudden collapse. When going down, lower the cane tip and your affected leg down to the step below simultaneously while bearing weight on your strong leg. After the cane and recovering foot are securely planted, lower your strong leg down to meet them on the same tread. The companion phrase “down with the bad” reinforces this downward progression, ensuring your sound leg controls your lowering descent at all times.
Whenever a sturdy handrail is available, grasp the handrail with your free hand and hold your walking cane in the opposite hand. If the handrail happens to be on your affected side, you may temporarily hold the cane alongside the handrail grip or carry it horizontally in your other hand. Never attempt to place a wide-base quad cane on narrow stair treads, as the protruding legs can easily slip off the edge of the riser. Always verify that all points of your cane tip sit fully flat on the step surface before transferring your body weight.
Handle Ergonomics and Grip Alignment with the Shaft
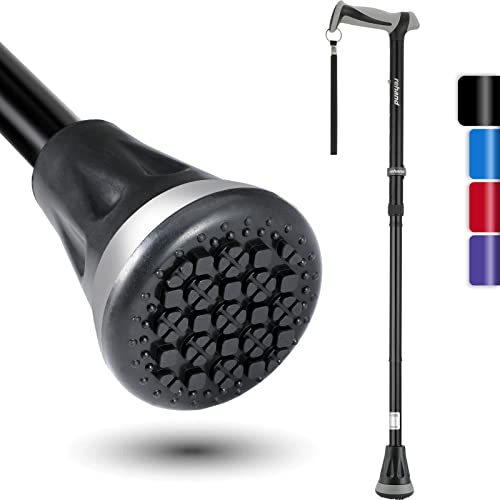
Handle geometry plays a massive role in user comfort, palm pressure distribution, and long-term joint safety. Traditional crook handles place the grip behind the vertical shaft, which can cause the cane to tilt backward under heavy downward loads. Modern offset handle designs bend the upper neck forward, positioning your hand directly over the vertical axis of the shaft. This centered geometry ensures that your downward force travels straight into the rubber tip, dramatically improving stability and reducing wrist torque.
Individuals managing hand osteoarthritis, rheumatoid arthritis, or carpal tunnel syndrome benefit greatly from broad, anatomical palm-contoured grips. These molded handles distribute downward pressure across the broad thenar eminence of your palm rather than concentrating stress on narrow finger joints. Derby and Fritz handles also offer flatter, horizontal gripping surfaces that keep the wrist in a neutral, relaxed position during the walking cycle. Choosing a cushioned grip material, such as textured rubber or closed-cell foam, further dampens joint-jarring vibrations on hard concrete sidewalks.
When traveling, compact folding canes provide remarkable convenience by collapsing into three or four interconnected segments. These collapsible models rely on heavy-duty internal elastic shock cords and precision joint sleeves to maintain rigid alignment during everyday walking. Packing a folding cane into your luggage alongside a comprehensive carry on travel packing guide makes airport transit and vehicle travel seamless. Always verify that each joint sleeve is completely seated and free from grit before putting your full weight onto a folding cane frame.
Base Selection and Traction Maintenance
Matching your cane base to your personal mobility challenges determines how safely the device performs across varied indoor and outdoor environments. Standard single-point rubber tips offer maximum agility and a lightweight profile, making them ideal for individuals who require only mild balance assistance. Quad canes feature a metal four-legged platform that provides a wider base of support and stands upright on its own when released. Articulating pivot-base canes utilize a multi-directional rubber ankle that maintains full surface contact even when the cane strikes the floor at an angle.
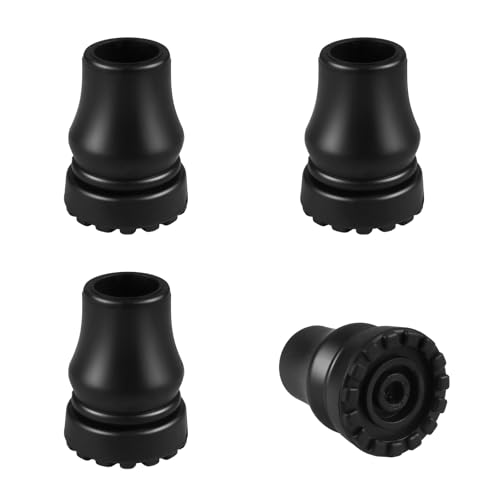
The rubber tip at the base of your cane is the only point of contact between your mobility aid and the ground. Inspect the bottom of the rubber ferrule every week to check for tread wear, cracking, or uneven abrasion patterns. Once the tread grooves wear smooth or the internal metal reinforcement washer begins cutting through the rubber, replace the tip immediately. A worn rubber tip loses its grip on slick surfaces, turning an essential balance aid into a dangerous slip hazard.
Navigating polished hardwood, wet entryway tiles, and smooth linoleum requires constant awareness of floor friction and cane angle. Always plant your cane tip perpendicular to the floor surface rather than extending it far out in front of your body at an angle. Angled strikes significantly increase the risk of the rubber tip skidding forward across polished or damp flooring materials. Taking shorter, controlled strides and keeping the base close to your body ensures the rubber tread grips firmly on smooth indoor surfaces.
Recognizing When to Upgrade from a Single Cane to Bilateral Support
Walking canes provide exceptional unilateral assistance, but they have clear biomechanical limitations that cannot overcome severe balance deficits. A single cane is designed to offload only a fraction of your body weight while offering moderate sensory feedback for balance coordination. If you find yourself leaning excessively over the handle or experiencing frequent near-falls, your balance needs have likely surpassed what a single cane can safely provide. Recognizing these physical changes early prevents traumatic falls and protects your ongoing mobility independence.
Progressive neurological conditions, advanced bilateral knee osteoarthritis, and generalized muscle weakness frequently necessitate a transition to bilateral mobility aids. Standard medical walkers and four-wheeled rollators offer a wide, enclosed base of support that accommodates significant weight-bearing restrictions on both lower limbs. Rollators also provide built-in padded seating, allowing you to rest safely whenever walking fatigue or shortness of breath occurs during community outings. Continuing to rely on a single cane when your gait demands bilateral support places you at severe risk of catastrophic injury.
Consulting a licensed physical therapist or your primary care physician is the safest way to evaluate your gait and confirm your equipment sizing. A trained mobility professional can perform comprehensive balance assessments, analyze your walking cadence, and recommend the exact mobility aid suited to your strength. They can also verify your floor-to-wrist measurement and teach you personalized gait techniques tailored to your home environment. Taking advantage of professional gait evaluation ensures your mobility aid delivers maximum protection, comfort, and walking freedom.
Taking the time to measure your cane accurately to your wrist crease establishes the foundation for confident, upright walking every single day. Before stepping out with your mobility aid, always double-check that your brass adjustment pins are securely locked and your silencer collar is tight. Maintaining a relaxed shoulder posture, a 15- to 20-degree elbow bend, and a steady reciprocal gait will keep your joints healthy and your movement secure across every terrain you encounter.





Write Your Review
No reviews yet. Be the first to share your experience!