


Gait instability and post-injury rehabilitation often begin with selecting a dependable walking aid, yet the physical benefit depends entirely on ergonomic fit. When a mobility stick sits at the incorrect elevation, it can compromise balance and cause persistent shoulder, wrist, or lower back strain. Learning how to adjust cane height correctly ensures that your body weight transfers smoothly through the vertical shaft while preserving a natural stride. Individuals managing joint discomfort or utilizing supportive apparel for knee mobility can especially benefit from establishing an accurate sizing baseline before taking their first steps.
Most modern mobility aids, from standard offset aluminum models to heavy-duty bariatric supports, feature push-button telescoping mechanisms that allow quick personal customization. Setting the top of the handle flush with your wrist crease creates the optimal elbow flexion angle of fifteen to twenty degrees. This precise mechanical positioning offloads up to twenty-five percent of lower-extremity body weight away from recovering joints. Taking a few moments to verify your physical alignment protects against postural fatigue and restores lasting confidence on every walking surface.


The Step-by-Step Guide to Cane Height Adjustment and Gait Biomechanics
Adjusting a walking cane correctly starts with one foundational rule: standing upright in standard walking shoes with arms hanging naturally, the top of the handle must align level with the user’s wrist crease. This anatomical reference point ensures that when the user grips the handle, the elbow flexes slightly between fifteen and twenty degrees. That small bend allows arm muscles to cushion downward impacts while transferring body weight efficiently into the floor. Bypassing this alignment check frequently forces compensatory movement patterns that undermine the safety and stability of the mobility aid.
Anatomical Measurement: Locating the Wrist Crease and Greater Trochanter
Accurate height measurement requires a stable standing position on a flat, even surface. The user should wear their everyday walking shoes, because varying heel thicknesses and sole cushioning alter floor-to-hand clearance. Stand tall with relaxed shoulders, looking straight ahead rather than down at the floor, with arms resting loosely at the sides. If balance instability makes standing unaided difficult, have a caregiver or family member assist during the measurement process to keep posture straight.
The primary anatomical landmark is the distal wrist crease, which is the skin fold where the hand connects to the forearm. When the arm rests comfortably at the side, the distance from the floor up to that wrist crease represents the exact target height for the top surface of the cane handle. A secondary clinical landmark is the greater trochanter, which is the bony prominence on the side of the upper hip. In typical adult body proportions, the height of the greater trochanter matches the level of the wrist crease, offering a dependable secondary reference point.
Taking measurements while seated or barefoot is a frequent sizing error. Sitting down removes natural spinal extension and alters pelvic tilt, producing a measurement that is usually several inches too short. Barefoot sizing fails to account for typical shoe sole heights, which often add anywhere from one-half inch to over an inch of elevation. Taking the measurement in proper footwear ensures that the cane matches the exact ground clearance encountered during real-world walking.
Operating the Telescoping Mechanism and Push-Button Pins
Most aluminum and steel mobility aids use a telescoping shaft system controlled by spring-loaded brass detent buttons. To change the overall length, locate the push-button pin along the lower section of the shaft. Firmly depress the brass button with your thumb while holding the upper handle section with one hand and the lower shaft with the other. Slide the inner tube up or down until the pin lines up with the desired adjustment hole.
Always verify that the push-button clicks outward completely into the selected hole. A partially engaged pin can slip under body weight, creating a sudden drop that could compromise user balance. Visually inspect the hole to ensure the brass button protrudes flush and centered before placing any weight onto the handle. Gently pull and twist the shaft segments in opposing directions to confirm that the mechanical interlock is completely secure.
Many telescoping walking sticks also include a threaded anti-rattle locking ring located near the adjustment seam. Once the brass button is fully locked into position, hand-tighten this collar securely against the outer tube. This collar tightens internal tolerances, stopping the metal tubes from vibrating or rattling with each footstep. Keeping the locking collar firmly tightened creates a solid, unified feel that boosts user confidence across hard surfaces.
Verifying the Fifteen to Twenty Degree Elbow Flexion Angle
Once the telescoping pin is locked into place, place the rubber tip approximately four to six inches forward and two inches to the side of your outer foot. Grasp the handle naturally and inspect the bend at your elbow joint in a full-length mirror or with help from a caregiver. The elbow should rest in a comfortable bend of roughly fifteen to twenty degrees. This slight angle provides the mechanical position where arm muscles can absorb ground impacts without premature joint strain.
This flexion angle is essential for effective biomechanical weight offloading. When configured properly, an adult walking cane can offload fifteen to twenty-five percent of lower-extremity body weight away from a painful hip, knee, or ankle. If the arm were locked completely straight, downward force would jar directly into the wrist, elbow, and shoulder joints. The slight bend acts like a natural suspension spring, allowing the triceps and shoulder stabilizers to control load transfer smoothly.
Conversely, an excessive elbow bend greater than thirty degrees creates severe mechanical inefficiency. Bending the elbow too sharply forces the bicep and forearm muscles to remain under continuous static tension to support body weight. This muscle fatigue quickly leads to hand cramps, trembling, and reduced endurance during longer walks. Rechecking the elbow angle after any shoe change or tip replacement guarantees that your biomechanical efficiency remains steady.
Cane Height Ranges Across Standard, Travel, and Bariatric Models
Mobility aids feature different height adjustment windows based on their frame design and intended user demographic. Standard single-point models, such as the Drive Medical Round Handle Aluminum Cane, adjust across a thirty to thirty-nine inch span that fits most average-height adults. Similarly, the Medline Aluminum-Chrome Offset Walking Cane provides a twenty-nine to thirty-eight inch range, accommodating shorter individuals while supporting up to three hundred pounds. These broad telescoping ranges make standard canes versatile options for households where minor seasonal footwear adjustments are necessary.
Compact folding options prioritize travel convenience while maintaining reliable pin adjustments. The supregear Folding Cane features a five-level adjustment system spanning thirty-three to thirty-seven inches, and the Akeoil Folding Cane provides five distinct positions extending up to thirty-six point six inches. Users seeking extra nighttime visibility often choose the GlowGuard Walking Cane, which offers eight levels of adjustment from thirty-one point one to thirty-seven point eight inches for individuals between four feet eleven inches and six feet three inches tall. When packing collapsible models for flights, consulting a carry on luggage travel guide helps ensure your compact mobility aid fits neatly alongside personal belongings.
Taller individuals and those requiring heavy-duty weight support require specialized structural dimensions. Standard aluminum tubing can bend or fail if extended past safe limits or subjected to excessive dynamic loading. The Medline Tall Steel Bariatric Offset Handle Cane addresses this by utilizing reinforced steel tubing that expands from thirty-seven to forty-eight inches in one-inch increments. Featuring dual push-button locks and a five-hundred-pound capacity, this design provides the structural stability and vertical reach required for users six feet tall or taller.
Biomechanical Placement: Holding the Cane on the Proper Side
A frequent error among new cane users is holding the device on the same side as the injured or painful leg. Clinical gait principles dictate that a cane should almost always be held in the hand opposite the affected limb. This contralateral positioning mirrors the human body’s natural reciprocal gait pattern, in which the opposite arm and leg swing forward together. Placing the cane on the unaffected side widens the overall base of support and keeps body mass centered between both limbs.
When you step forward with the recovering or weakened leg, advance the cane forward simultaneously. As both the weak foot and the rubber cane tip touch the ground, downward pressure is distributed evenly between the two contact points. This simultaneous movement offloads significant joint stress from the compromised hip, knee, or ankle without distorting your posture. The strong leg then swings through naturally, completing a balanced, rhythmic walking cycle.
Holding the cane on the injured side forces an awkward hitch into the user’s stride. This ipsilateral placement tends to pull the user’s center of gravity toward the weak side, increasing joint torque and raising fall risks. Exceptions to the opposite-side rule occur only when severe weakness, arthritis, or stroke impairs the opposite arm. In those rare scenarios, a physical therapist should evaluate the user’s gait to determine the safest alternative configuration.
Step-by-Step Technique for Navigating Stairs and Curbs
Staircases and high outdoor curbs present substantial trip hazards if approached with incorrect footing sequences. Physical therapists teach a simple memory rule for stair climbing: up with the good, down with the bad. When a sturdy handrail is available, grasp the rail with one hand and hold the cane in your other hand. This dual-support setup provides maximum stability while ascending or descending individual steps.
When walking up stairs, step up first with your unaffected, stronger leg. Push down through that strong foot to lift your body weight, then bring the recovering leg and the cane up to the same step. The strong leg performs the heavy lifting required to ascend, protecting the injured joint from extreme vertical loading. Never lead with the cane or the weakened leg when moving upward, as this compromises balance.
Descending stairs requires reversing the sequence completely. Lower the cane tip down to the next step first, followed immediately by your weaker or recovering leg. Once both the cane and weak foot are firmly planted, bring your strong leg down to join them on that step. Leading with the cane and weak leg cushions the descent while keeping your strong leg anchored above to control your movement smoothly.
Recognizing the Warning Signs of an Incorrect Cane Height
An improper height setting manifests through distinct physical symptoms and gait distortions over time. When a cane is adjusted too tall, the user must hike their shoulder upward toward their ear to plant the tip. This unnatural elevation causes chronic tension in the trapezius muscles, neck soreness, and uncomfortable wrist extension. Furthermore, an overextended shaft pushes the cane too far away from the body, diminishing downward leverage and making slips more likely.
A cane that is set too low forces the user to stoop forward and lean heavily over the handle. This forward posture places strain on the lumbar spine, leading to lower back fatigue and muscle soreness after short walks. A cane that is too short also shortens the forward stride, resulting in a shuffling cadence. Shuffling gait patterns increase the chance of catching a toe on rugs, thresholds, or uneven sidewalks.
Pay close attention to lateral trunk lean, where the torso tilts sideways over the cane with each step. While a minor lean is normal when offloading weight, an exaggerated side bend indicates that the cane height does not match the user’s limb length. If you notice persistent wrist tenderness, shoulder stiffness, or hip soreness after walking, pause and recheck your wrist crease alignment immediately.
Handle Ergonomics and Pressure Distribution on the Palm
Handle design plays a vital role in comfort and joint protection once proper height is established. Offset handles, such as those found on Medline offset models, curve outward above the shaft to position the hand directly over the vertical center of the cane. This geometric alignment centers downward body weight directly above the rubber tip, reducing wrist torque and providing structural stability. Offset handles are especially favored by adults managing arthritis or recovering from orthopedic joint surgery.
Traditional round or crook handles, like the Drive Medical Round Handle Aluminum Cane, provide classic styling and allow easy hooking over arms or chairs. However, round grips concentrate pressure into a narrow band across the center of the palm. In contrast, contoured T-handles and molded ergonomic grips distribute downward pressure broadly across the thenar eminence. Spreading that compressive load relieves pressure on the median and ulnar nerves, helping avoid numbness and carpal tunnel irritation.
Grip cushioning materials also influence user comfort during extended daily mobility. Soft foam wraps and textured thermoplastic rubber grips absorb minor ground vibrations while offering a secure, slip-resistant surface. Many models also include an integrated wrist strap, which keeps the cane tethered to the wrist when opening doors or handling items. This simple accessory eliminates the painful chore of bending down to retrieve a dropped cane from the floor.
Hardware Inspection, Silencing Collars, and Rubber Tip Maintenance
Regular maintenance ensures that a height-adjusted walking aid remains mechanically sound and quiet during daily use. Periodically check the spring tension of the brass push-button detent to make sure it springs back firmly into the shaft hole. Dirt, sand, and lint can occasionally enter the adjustment holes, preventing the pin from extending fully. Cleaning the shaft with a damp cloth and drying it thoroughly prevents grime buildup and preserves smooth telescoping action.
A clicking or rattling noise during walking almost always points to a loose threaded silencing collar. Over several weeks of movement, footsteps can cause the collar nut to back off slightly from the adjustment seam. When this happens, the inner and outer aluminum tubes shift against each other, creating an annoying click and slight play. Simply re-tightening the anti-rattle ring by hand eliminates the noise and restores structural firmness.
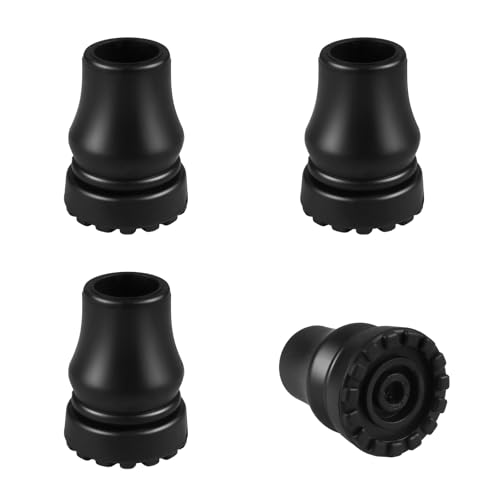
The bottom rubber ferrule tip is your primary point of traction and requires frequent visual inspection. Check the tread grooves along the base of the tip to verify that deep traction sipes remain visible. If the rubber wears smooth, cracks, or hardens with age, replace the tip promptly to prevent slipping on smooth tile or wet pavements. Ensure that any replacement tip matches the exact outer diameter of your cane shaft, which is commonly three-quarters of an inch or seven-eighths of an inch.
When to Transition from a Single Cane to Bilateral Walker Support
While an adjusted walking cane provides balance assistance, it has definite biomechanical boundaries. A single cane is designed to offer unilateral support, transferring roughly fifteen to twenty-five percent of body weight away from a lower limb. It cannot support full body weight or manage severe bilateral leg weakness. Recognizing when a single-point or offset cane is no longer sufficient is critical for fall prevention.
If you experience frequent balance loss, persistent dizziness, or multiple near-falls despite proper cane height, it may be time to upgrade your mobility aid. Similarly, conditions involving freezing of gait, severe peripheral neuropathy, or bilateral knee osteoarthritis often overwhelm single-cane stability. In these situations, transitioning to a four-wheeled rollator or folding walker provides bilateral support and a wide protective frame. A walker also incorporates a built-in seat, giving users a safe place to rest during bouts of fatigue.
Always seek guidance from a licensed physical therapist or physician before changing your mobility equipment. A professional gait assessment evaluates stride length, dynamic balance, postural sway, and upper-body strength. A therapist can provide personalized sizing, confirm your walking technique, and recommend whether a cane, quad base, or walker best supports your daily independence.
Pre-Walk Stability Check and Final Posture Alignment
Before heading out for a walk or running errands, perform a quick three-point mechanical check on your mobility aid. First, confirm that the push-button detent pin is fully centered and protruding through its adjustment hole. Second, give the threaded anti-rattle locking ring a firm hand-tightening twist to eliminate internal tube wobble. Third, inspect the rubber tip to ensure it is seated flush against the bottom of the shaft without cracks or debris.
Once the hardware is verified, stand tall, align the cane four to six inches to the side of your foot, and check your posture in a mirror. Keep your head upright, shoulders relaxed and level, and your elbow bent at that comfortable fifteen to twenty degree angle. Take a few test strides across the room, focusing on a smooth reciprocal cadence that moves the cane forward in tandem with the opposite foot. Setting your cane height accurately and confirming proper alignment keeps you upright, balanced, and mobile throughout the day.




Write Your Review
No reviews yet. Be the first to share your experience!