


Walking with an improper mobility aid can turn a helpful tool into a painful liability. Many adults experience unsteadiness after surgery or during joint recovery, only to find that an incorrectly adjusted cane causes shoulder soreness and awkward posture. Understanding how tall should a cane be for a person provides the foundation for restoring a stable, balanced walking cadence. A correctly sized shaft transfers between 15% and 25% of body weight away from vulnerable joints, protecting your hips and knees with every stride.
Achieving the right fit requires measuring from the floor to the user’s wrist crease while wearing everyday walking shoes. Proper alignment keeps the arm at a slight bend, preventing muscle fatigue across the forearm and neck. Recovering mobility after lower-limb strain often pairs proper cane adjustment with supportive knee joint apparel to manage comfort during daily movement. Taking time to dial in this measurement protects physical stamina, reduces trip risks, and supports long-term independence.

Accurate Cane Sizing and Biomechanical Mobility Setup
Establishing the correct height for a walking aid directly influences joint loading, balance confidence, and daily endurance. When a cane sits at the proper level, the handle aligns with the user’s natural wrist crease to maintain a stable 15- to 20-degree bend at the elbow. This specific alignment allows the arm muscles to bear weight efficiently without straining the shoulder or spine. Dialing in this setup creates a smooth, rhythmic gait that protects vulnerable joints and enhances stability across every surface.
Biomechanics of Proper Shaft Elevation
Body mechanics rely on balanced weight transfer to preserve upright posture and prevent fatigue during extended walking. If a walking aid is set too tall, the user must hike the shoulder upward with every forward stride. This sustained elevation strains the trapezius muscles, pinches neck nerves, and limits the arm’s mechanical leverage. Over time, that awkward posture forces the spine into a lateral tilt that can trigger lower back discomfort.
Setting the handle too low produces the opposite biomechanical problem by forcing the user to stoop forward. Walking in a hunched position shifts your center of gravity ahead of your support base, increasing the risk of forward falls. Stooping also prevents the arm from absorbing downward force, transferring excessive impact directly into the lower back and hips. Proper height establishes a neutral spine that lets your leg and arm work together in natural harmony.
Measuring from Floor to Wrist Crease
Taking an accurate measurement requires setting up the body in a normal standing position while wearing typical footwear. You should put on your everyday walking shoes because sole thickness directly alters the distance from the floor to your hand. Stand upright against a flat wall or firm support with your arms hanging loosely at your sides. If balance is an issue, having a family member or caregiver assist with the tape measure ensures safety and accuracy.
Locate the small skin crease on the palm side of your wrist where the hand meets the forearm. Measure the vertical distance from the floor directly up to that anatomical wrist crease. This exact measurement represents the ideal distance from the bottom of the rubber tip to the top of the cane handle. Using this anatomical landmark ensures that the cane matches your unique arm length and standing posture.
Confirming Elbow Flexion Angles
The position of your elbow provides immediate confirmation of whether your walking aid fits your body correctly. Grasp the cane handle while standing upright with your normal walking shoes on and your shoulders relaxed. Your elbow should settle into a comfortable bend between 15 and 20 degrees. This gentle flexion functions like a biological shock absorber that flexes slightly as downward pressure is applied.
A straight, locked elbow indicates that the shaft is adjusted too short, leaving no room for shock absorption during weight bearing. Conversely, an elbow bent beyond 30 degrees signals that the cane is set too high, forcing the triceps and shoulder into continuous contraction. Maintaining that 15- to 20-degree window provides the mechanical advantage needed to offload joint stress efficiently. A physical therapist can use a goniometer during an evaluation to confirm that this joint angle is exact.
Adjusting Telescoping Pins and Locking Collars
Most modern adjustable canes rely on push-button brass detent pins paired with telescoping aluminum tubing to set height. To adjust the length, depress the spring-loaded brass pin and slide the inner shaft until the pin snaps firmly into the correct hole. You must visually inspect the setting to verify that the pin fully protrudes through the opening rather than sitting half-engaged. A partially engaged pin can slip under sudden weight, creating a severe fall hazard.
Lightweight aluminum models like the Scottie Cane – Ultimate Comfort incorporate reinforced height adjustment points along a sturdy frame to maintain reliable positioning. Once the push pin locks into place, tighten the threaded anti-rattle locking nut located just below the adjustment joint. Spinning this collar tight compresses the joint tolerances, eliminating annoying metallic clicks and wobbles during walking. A silent, rigid shaft gives users far greater psychological confidence during daily strides.
Contralateral Placement and Reciprocal Gait
A common mobility mistake involves holding the walking cane on the same side as the painful or recovering leg. Clinical gait principles dictate holding the cane in the hand opposite the injured or weaker limb. This contralateral placement mirrors the body’s natural reciprocal gait, where opposite arms and legs swing together. Holding the device on the stronger side allows you to lean partial weight onto the cane simultaneously as the weak leg steps forward.
This coordination effectively widens your base of support and transfers 15% to 25% of body weight away from the sensitive joint. To walk smoothly, advance the cane and the weaker leg forward at the exact same moment. Next, push down lightly through the handle as you step past with your stronger, unaffected leg. This rhythmic cadence maintains balanced momentum while protecting hips, knees, or ankles from peak impact forces.
Navigating Stairs and Curbs Safely
Stairs demand careful sequencing to prevent missteps, loss of balance, or tripping hazards. The universal physical therapy rule for stair climbing is simple: lead up with the good leg and lead down with the bad leg. When ascending stairs, grip the handrail with one hand while holding your cane in the other hand. Step up first with your stronger leg, then bring the cane and your recovering leg up to the same step.
Descending stairs reverses the sequence to protect the vulnerable limb from handling full downward gravity loads alone. Move your cane and the affected leg down to the lower step together, keeping your weight supported through the handrail. Once that footing is stable, step down with your stronger leg onto the same step. Never place the cane tip on the extreme outer edge of a stair tread where it could slip off during descent.
Handle Ergonomics and Pressure Relief
Handle shape determines how downward force spreads across the delicate nerves and bones of the hand. Traditional rounded crook handles concentrate body weight onto a narrow band across the center of your palm. That concentrated pressure can compress the ulnar nerve, triggering palm numbness or carpal tunnel irritation over time. Modern designs like Fritz handles, Derby grips, and offset shafts distribute load more evenly across the thenar eminence at the base of the thumb.
Offset handles position the grip directly over the center line of the shaft to maximize downward balance. The Scottie Cane – Ultimate Comfort utilizes a forward-facing grip with Crossbow Bend engineering and a high-density micro-foam cover to cushion palm contact. That padded grip helps absorb pavement shock while keeping the wrist in a neutral, strain-free alignment during extended walks. Selecting an ergonomic handle allows individuals with arthritis or weak grip strength to walk comfortably without joint fatigue.
Traction Tips and Base Stability Dynamics
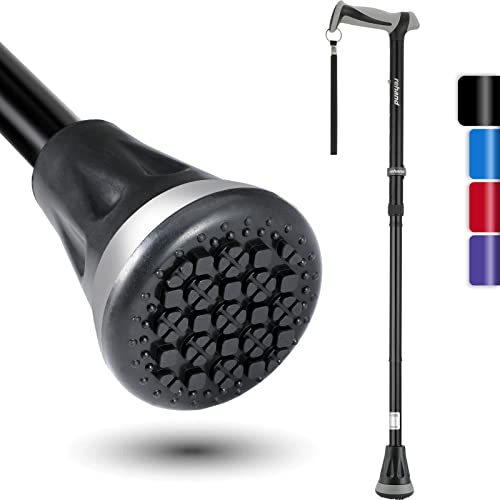
The contact point between the cane shaft and the walking surface plays an essential role in fall prevention. Standard single-point rubber ferrules offer excellent agility and light weight for users who need mild balance assistance. However, standard rubber tips require the shaft to remain fairly vertical to maintain full tread contact with the ground. Advanced bases, such as the Cyclone Tip found on the Scottie Cane, feature flexible tread designs engineered to maintain grip as the cane angles forward.
Quad canes feature four small feet that widen the base of support and stand upright independently on level floors. While quad bases offer high static stability, their wide metal corners can catch on stair risers or uneven sidewalks. For active travelers navigating airports and crowded streets, a streamlined single-point or articulating tip offers superior maneuverability. When preparing compact mobility gear for flights, reviewing a carry-on travel packing guide helps ensure folding shafts stow safely alongside other essential travel gear.
Recognizing Signs of Sizing Errors
Observing your physical habits and body comfort during walks reveals whether your cane requires height readjustment. If you find yourself consistently leaning your torso sideways over the cane handle, the shaft is likely adjusted too tall. That lateral lean throws your hips out of alignment and disrupts natural walking momentum. Frequent neck stiffness and tension along your upper shoulder blades also point toward an overly elevated handle setting.
Conversely, an aching lower back or a forward-pitched gaze usually indicates that the cane sits too low for your frame. Stooping over forces you to shorten your stride, creating a choppy, hesitant gait that increases fatigue. You may also notice your wrist bending backward awkwardly if the handle sits at an improper height. Checking your posture in a full-length mirror while taking practice strides provides immediate feedback on your body alignment.
Transitioning to Bilateral Support
A single walking cane serves as a partial mobility aid designed for unilateral assistance and mild balance deficits. It cannot safely compensate for severe bilateral leg weakness, advanced neurological conditions, or profound vestibular instability. If you find yourself placing nearly your entire body weight through the cane handle, a single-point device is no longer sufficient. Relying too heavily on one arm creates severe joint strain and leaves you vulnerable to sudden falls.
Frequent near-falls, freezing of gait, or persistent fear of walking indoors signal that it is time to consider bilateral support. Devices like standard walkers or four-wheel rollators provide a wide, enclosed base of support that cradles both sides of the body. They distribute body weight across both arms simultaneously, reducing individual joint load far more effectively than any single cane. Anyone experiencing progressive balance deterioration should schedule an evaluation with a physical therapist or physician for formal gait testing and equipment recommendations.
Daily Safety Checks and Pre-Walk Verification
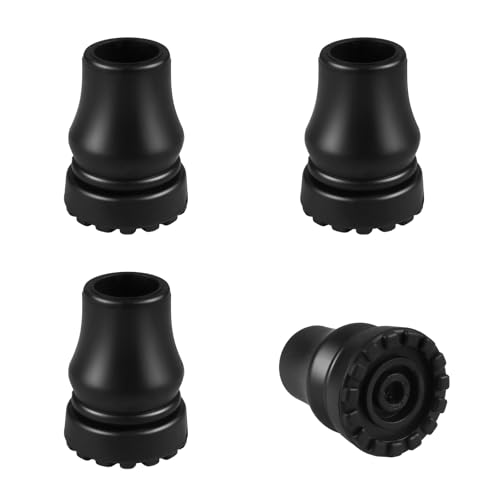
Establishing a quick safety routine before heading out the door ensures your mobility equipment remains safe and dependable. Begin by inspecting the bottom rubber tip to confirm that the circular tread grooves remain deep and pliable. Worn-down, smooth rubber loses its grip on wet tile, slick hardwood, and rainy outdoor pavements. You should also verify that the internal metal washer has not punched through the rubber base, which could cause sudden slippage.
Next, test the push-button adjustment pin by pressing firmly downward on the handle while holding the base stationary. The pin must remain fully seated in its hole without slipping or wiggling under direct downward pressure. Check that the threaded anti-rattle locking nut is spun tight against the upper shaft to eliminate clicking sounds. Taking thirty seconds to complete these simple hardware checks protects your footing and ensures your cane delivers dependable balance support all day.
Taking the time to accurately measure and adjust your walking cane transforms your mobility experience from hesitant to self-assured. A properly sized shaft aligns with your body to offload joint pressure, maintain upright posture, and protect your natural walking rhythm. Pair that accurate height with mindful step sequencing and routine hardware checks to stay active, independent, and secure on your feet.





Write Your Review
No reviews yet. Be the first to share your experience!