


Walking with an uncalibrated mobility device often forces awkward posture, uneven stride lengths, and unnecessary wrist discomfort. Understanding how to fit cane height ensures that your body weight transfers naturally through the shaft rather than straining your shoulder or lower back. When a walking stick rests at the correct anatomical height, it provides balanced stability while offloading up to twenty-five percent of lower-limb stress. Proper adjustment turns a simple cane into a steady extension of your arm rather than an awkward obstacle.
Many popular mobility aids, from standard collapsible sticks to reinforced models, offer push-button telescoping pins that make fine-tuning straightforward at home. If you frequently navigate transit or pack lightweight gear into a carry on travel backpack guide, collapsible aluminum models easily adjust to your exact measurements after unfolding. Checking handle alignment against your natural wrist crease creates the foundation for comfortable everyday steps. Taking a few moments to verify your physical stance and footwear ensures every outing remains safe and upright.




The Complete Biomechanical Guide on How to Fit Cane Height Properly
Setting your mobility aid to the proper height is the single most important adjustment for safe daily walking, preventing postural slouching and upper-body fatigue. When a walking cane rests too high or too low, it compromises your base of support and increases strain across your shoulders, wrists, and back. Learning how to fit cane height accurately requires measuring anatomical landmarks while standing in your everyday footwear. This step-by-step biomechanical approach establishes steady balance, smooth walking cadence, and dependable joint offloading.
Anatomical Landmarks: Locating the Wrist Crease and Hip Joint
Finding the exact height for your cane begins by identifying clear anatomical reference points on your body. The most reliable reference marker is the distal wrist crease on the inside of your wrist joint. When you stand upright with your arms hanging naturally at your sides, the top of the cane handle should align directly with this wrist skin fold. This positioning ensures your hand rests comfortably on the grip without forcing your shoulder to hike upward or your elbow to lock straight.
A secondary anatomical marker used by clinicians is the greater trochanter of the femur, which is the prominent bone felt on the outer edge of your upper hip. In an upright posture, the greater trochanter sits at the same horizontal plane as your wrist crease. Measuring while wearing your regular walking shoes is essential because sole thickness significantly alters the distance between your wrist and the floor. Always stand in your everyday walking footwear rather than bare feet or slippers to ensure accurate alignment before locking in your settings.
The Critical Role of the Fifteen to Twenty Degree Elbow Bend
Proper cane fit relies on establishing a slight, natural bend in your elbow when your hand rests on the grip. Clinical mobility guidelines recommend an elbow flexion angle between fifteen and twenty degrees. This gentle bend acts like a shock absorber during ground contact, absorbing impact forces before they travel into your elbow or shoulder joints. It also gives your arm optimal mechanical leverage to push down firmly whenever you need sudden balance assistance.
A completely straight, locked arm indicates that your cane is set too low, which forces your torso to tilt sideways and strains your lower back. Conversely, if your elbow bends at thirty degrees or more, the cane is adjusted too tall for your frame. Excessive elbow bend creates continuous muscular fatigue in your biceps and forearms while pushing the cane too far forward. You can verify this angle by checking your profile in a full-length mirror, confirming your shoulders remain relaxed and level.
Step-by-Step Instructions for Measuring and Adjusting at Home
Preparing to measure your cane height takes only a few minutes and works best on a flat, even floor. Stand upright with your back straight, feet shoulder-width apart, and weight distributed evenly between both legs. Let your arms hang loosely at your sides with your shoulders completely relaxed, avoiding any subconscious slouching or reaching forward. Having a family member or caregiver hold a tape measure ensures your posture remains perfectly upright throughout the measurement process.
Place the bottom end of the tape measure on the floor directly beside the outer edge of your shoe heel. Extend the tape straight upward along the side of your leg until it meets the horizontal crease on the underside of your relaxed wrist. Note this exact distance in inches, rounding to the nearest half-inch if your measurement falls between whole increments. This number represents your target total cane height from the floor surface to the top peak of the handle grip.
Adjustable aluminum canes feature spring-loaded push pins along the lower telescoping shaft to adjust overall length. Depress the brass detent button firmly with your thumb while sliding the lower tube up or down to align with your measured height. Most adjustable walking canes provide adjustment ranges spanning between thirty-two and thirty-seven inches in convenient one-inch increments. Once the button snaps completely through the hole, firmly tighten the threaded anti-rattle silencing collar by hand to eliminate shaft wobble and clicking noises.
Postural Warning Signs: Identifying an Incorrectly Sized Cane
Using a cane adjusted too tall causes noticeable compensatory movements throughout your entire upper body. When the handle sits higher than your wrist crease, your shoulder hikes upward on the side holding the cane. This unnatural elevation creates chronic muscular tension in your neck and trapezius, often leading to tension headaches and fatigue after short walks. A tall cane also tends to push your center of mass backward, which undermines stability and increases fall risks on slick floors.
A cane adjusted too short forces you to lean forward and stoop your spine toward the mobility aid. This bent posture places excessive mechanical strain on your lumbar spine and hip extensor muscles while shortening your natural stride. Improper height also causes localized palm numbness and wrist soreness because downward forces strike the hand at an awkward oblique angle rather than through a neutral joint. Correcting shaft height restores an upright posture, broadens forward visibility, and eliminates painful nerve compression across the palm.
Contralateral Placement: Which Hand Should Hold the Cane?
A fundamental biomechanical rule of cane usage is holding the device in the hand opposite your injured or weaker leg. This contralateral technique mirrors the natural reciprocal arm swing of human walking, where your opposite arm and leg move forward in tandem. Holding the cane opposite the affected limb allows the cane tip to advance simultaneously with your weaker foot. This coordinated movement widens your base of support and offloads fifteen to twenty-five percent of your body weight away from the sensitive joint.
Holding a cane on the same side as your weak leg is a frequent error that disrupts balanced walking mechanics. Ipsilateral placement forces you to lean laterally toward the injured side, increasing torque across your hip abductor muscles and destabilizing your pelvis. Unless a physical therapist or orthopedic physician specifically instructs ipsilateral use due to an upper-limb injury, contralateral holding remains the clinical standard. Always consult a licensed mobility specialist for personalized gait evaluation and walking instruction.
Navigating Stairs and Curbs Safely with an Adjusted Cane
Managing staircases and street curbs requires strict stepping sequences to maintain stability and prevent serious falls. The standard memory aid taught by rehabilitation therapists is simple: step up with the good leg, and step down with the bad leg. When ascending stairs, your unaffected, stronger leg steps up onto the higher step first, providing the muscular force to lift your body weight. Once your strong foot is securely planted, bring the cane and your recovering leg up together onto the same step.
When descending stairs, reverse the sequence by moving the cane and your recovering leg down to the lower step first. Your strong leg remains on the higher step, bending at the knee to slowly and safely lower your body weight. Once the cane tip and your recovering foot are firmly positioned, bring your strong leg down onto the same step beside them. If a sturdy handrail is available, always grip it with one hand while holding your cane in the other for maximum balance.
Handle Ergonomics, Grip Selection, and Pressure Distribution
The shape of your cane handle directly influences how comfortably downward pressure distributes across the bones of your hand. Traditional tourist crook handles curve downward in a narrow semicircle, which concentrates downward forces into a small, sensitive area of the palm. Modern T-handles, Derby grips, and Fritz handles feature broader, flattened surfaces that spread contact forces across the thenar eminence. This broader contact zone substantially reduces localized pressure, preventing nerve irritation and hand cramping during extended walks.
Offset handles curve the neck of the aluminum shaft forward before centering the grip directly above the vertical shaft axis. This intentional geometry positions your downward body weight over the center of gravity, improving stability and reducing wrist torque. If you enjoy active outdoor walks or neighborhood strolls, wearing supportive knee joint apparel alongside a well-fitted cane can help protect sensitive knee joints during daily activities. Pairing proper cane sizing with ergonomic equipment choices ensures that walking remains comfortable and joint-friendly across diverse surfaces.
Base Styles, Ground Contact, and Slip-Resistant Rubber Tips
The base of your walking stick determines how effectively the device grips walking surfaces across diverse environments. Standard single-point canes feature a durable rubber tip that provides exceptional agility and a light swing weight. These single-point tips allow rapid maneuvering through crowded indoor spaces, narrow hallways, and around household furniture. However, single-point tips do not stand on their own and require the user to maintain full balance during pauses.
Self-standing quad bases and articulating pivot bases provide broader ground contact for individuals needing extra stability. Quad bases feature four separate contact feet that spread across a wider rectangular footprint, allowing the cane to stand upright when released. Articulating pivot bases utilize flexible rubber joints that conform to pavement angles, keeping maximum rubber in contact with the ground. Regardless of base style, routinely inspect the rubber tread grooves for signs of thinning rubber or exposed internal metal washers.
Weight Limits, Folding Mechanisms, and Walker Transition Points
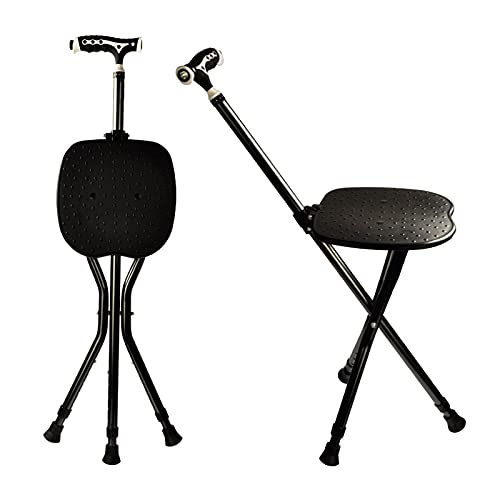
Every mobility device is manufactured to support specific weight limits that must never be exceeded during normal use. Standard lightweight folding canes crafted from tubular aluminum typically support user weights between 198 and 250 pounds. For individuals requiring greater structural reinforcement, heavy-duty bariatric models and reinforced seating canes support static capacities of 400 pounds or more. Always check the manufacturer specifications to ensure the cane matches your body weight and daily balance requirements.
Folding travel canes rely on internal elastic cords that hold multiple aluminum shaft segments securely together when unfolded. Before trusting your weight to a collapsible cane, always verify that each interlocking joint sleeve is fully seated and flush. Worn elastic cords or loose joints can introduce structural play, creating unsettling wobble under partial weight-bearing. Regularly inspect the internal cords for signs of fraying, and avoid using folding canes that fail to lock firmly into place.
It is equally important to recognize when a walking cane is no longer sufficient for your personal mobility needs. A single cane provides unilateral balance assistance and offloads only a moderate portion of lower-limb weight. If you experience progressive balance deterioration, frequent near-falls, or bilateral leg weakness, transitioning to a two-wheeled walker or four-wheeled rollator is strongly advised. Consult a physician or physical therapist for a comprehensive gait evaluation whenever your walking stability feels uncertain.
Taking the time to measure your anatomical landmarks, confirm your fifteen to twenty degree elbow bend, and secure your push-button pin transforms your daily walking experience. A properly fitted walking cane supports your natural gait mechanics, protects your joints from excessive loading, and restores steady confidence on every walking surface. Keep your rubber tips inspected, wear supportive footwear, and enjoy the dependable balance that comes from a personalized, perfectly sized mobility aid.






Write Your Review
No reviews yet. Be the first to share your experience!