


Walking with an improperly adjusted mobility aid can create persistent postural strain, shoulder fatigue, and an unsteady gait cadence. Learning how to measure a cane to your body provides the biomechanical foundation necessary to offload joint stress and restore natural walking balance. When the handle aligns accurately with the body, the user can safely transfer up to twenty-five percent of body weight away from a compromised knee, hip, or ankle.
Achieving this fit requires understanding precise anatomical landmarks, starting from the floor up to the wrist joint while wearing standard walking shoes. Along with selecting the right mobility device, pairing daily routines with knee support mobility apparel can assist with stability during active recovery. Setting the proper cane elevation ensures that users maintain an upright posture without hiking the shoulder or stooping forward.

Biomechanical Principles for Measuring and Adjusting a Walking Cane
Establishing the correct height for a mobility cane is essential for maintaining safety, joint protection, and fluid walking mechanics. When an individual understands how to measure a cane to your body, they prevent common gait compensations such as lateral trunk lean, wrist hyperflexion, and shoulder elevation. A properly sized cane provides optimal leverage, enabling users to navigate indoor hallways and outdoor pathways with renewed confidence.
The standard clinical benchmark dictates that the top of the cane handle should align directly with the user’s wrist crease when standing upright with relaxed arms. At this precise height, the user’s elbow forms an approximate fifteen to twenty degree flexion angle when grasping the grip. This slight bend allows the arm muscles to absorb shock and bear downward load efficiently without causing joint impingement or muscular exhaustion.
The Biomechanics of Cane Height and Spinal Alignment
An improperly sized cane forces the body to make unnatural physical compromises during every stride. If a walking cane is adjusted too high, the user must hike their shoulder upward to clear the ground, which compresses the brachial plexus and strains upper back muscles. This constant elevation also locks the elbow into an exaggerated bend, drastically diminishing the arm’s mechanical advantage when pressing down.
Setting the cane too low produces the opposite postural problem by causing the user to stoop forward. Walking in a perpetually bent posture rounds the thoracic spine, places excessive shear stress across lumbar vertebrae, and tires out core muscles. This forward pitch also shifts the center of gravity ahead of the base of support, noticeably increasing the likelihood of forward falls.
A walking aid is engineered to redirect fifteen to twenty-five percent of lower-extremity body weight away from a damaged joint. That weight transfer relies entirely on vertical alignment so the kinetic force travels straight down through the cane shaft to the floor. When the height matches the user’s anatomy, walking cadence stays smooth and spinal curvature remains neutral.
Essential Preparation: Footwear Selection and Standing Posture
Accurate measurements begin with wearing the exact shoes you wear for daily walking. Sizing a cane while barefoot or in stocking feet introduces a significant measurement error because typical footwear adds anywhere from half an inch to nearly two inches of height. Supportive sneakers, orthopedic shoes, and walking shoes all feature distinct heel-to-toe drops and midsole cushioning that change your standing elevation.
Stand on a firm, level surface such as hardwood, laminate, or smooth tile rather than high-pile carpeting. Carpet pile allows footwear to sink slightly, which can skew the measurement by a quarter of an inch or more. Position your feet shoulder-width apart to create a stable, natural base of support that mimics your standard standing position.
Allow your arms to hang naturally at your sides with your shoulders relaxed and pulled gently back. Looking straight ahead into a mirror or at the horizon keeps the cervical spine aligned and prevents subconscious forward leaning. If you experience balance deficits while standing upright, position yourself adjacent to a sturdy countertop or have a helper nearby for physical stability.
Step-by-Step Anatomical Landmarks for Cane Measurement
The primary anatomical landmark for cane height is the distal wrist crease, which is the small horizontal skin fold where the hand connects to the forearm. When your arm hangs loosely beside your hip, the top of the cane handle should sit level with this crease. This positioning ensures that your hand naturally rests on the grip without lifting your shoulder or dropping your torso.
A secondary anatomical reference point is the greater trochanter of the femur, which is the prominent bony bump located on the outside of your upper thigh. In standard adult human proportions, the greater trochanter sits on the same horizontal plane as the hanging wrist crease. Physical therapists frequently palpate the greater trochanter to cross-reference handle height when a patient exhibits unusual posture or joint contractures.
Measuring from the floor up to the wrist crease requires a flexible, reliable measuring tool that will not snap or bend unexpectedly. Using a specialized tool like the Perfect Body Tape Measure allows for easy, accurate linear tracking without fighting stiff metal tape blades. Record the measurement to the nearest half-inch, as standard mobility equipment adjustments generally operate in one-inch increments.
Verifying the Fifteen to Twenty Degree Elbow Flexion Angle
Once the handle height is established, verifying the elbow flexion angle confirms that the cane fits your body dynamically. When placing your hand firmly on the cane handle while the tip rests on the floor approximately four to six inches to the side of your shoe, your elbow must display a gentle bend between fifteen and twenty degrees. This angle is vital because a completely straight arm cannot absorb shock, transmitting every ground impact directly into your wrist and shoulder joints.
Conversely, an elbow flexed beyond twenty or twenty-five degrees places an excessive biomechanical load on the triceps and biceps brachii muscles. Maintaining that sharp angle during extended walking sessions quickly causes muscular fatigue, forearm cramping, and grip failure. The fifteen to twenty degree window optimizes muscular leverage, letting your upper extremity offload body weight smoothly during the stance phase of walking.
While clinicians utilize an orthopedic goniometer to measure this angle precisely, you can perform a quick visual assessment at home. The bend in your elbow should look subtle and relaxed, very similar to the natural arm angle you use when carrying a medium-weight grocery tote. If your elbow feels locked or your forearm feels parallel to the floor, the height needs immediate readjustment.
Assisted Sizing Versus Solo Measurement Approaches
Having a partner or caregiver assist with the measurement process is the most dependable method for obtaining an accurate cane height. An assistant allows the user to remain completely upright, looking forward with relaxed arms, while the helper extends the measuring tape from the floor up to the wrist crease. This eliminates the risk of postural distortion that inevitably happens when an individual bends or turns to read the numbers themselves.
Measuring by yourself presents distinct physical hurdles because leaning forward to reach the floor shifts your shoulders and alters the wrist position. If you must size a cane alone, stand with your back flat against an unobstructed wall while wearing your regular walking shoes. Hold a pencil in your hand and make a tiny horizontal pencil mark on the wall directly at the level of your wrist crease while keeping your arm relaxed.
Once the mark is made, step away from the wall and measure the distance from the base of the floorboard up to that pencil line. This wall-marking method preserves your natural spinal extension and prevents the false, shortened measurements caused by bending over. Double-check the measurement twice to guarantee consistency before modifying any mobility aid.
Adjusting Telescoping Push-Pin Shafts and Tightening Lock Collars
Most contemporary adjustable walking canes utilize telescoping aluminum shafts equipped with spring-loaded brass detent pins. These push-buttons snap into a vertical column of pre-drilled holes spaced in half-inch or one-inch increments along the lower tube. To adjust the height, firmly depress the brass button with your thumb and gently slide the inner shaft up or down until the button aligns with the desired hole.
Always confirm that the push-button extends entirely through the selected adjustment hole before putting any weight on the cane. If the pin is partially caught beneath the outer tube wall, the shaft can suddenly collapse under your body weight, causing an unexpected fall. Listen for a distinct mechanical click and perform a firm visual inspection of the pin protrusion to confirm that the lock is fully engaged.
Directly below the adjustment holes, adjustable canes typically feature a threaded anti-rattle silencing collar. Once the pin is locked, turn this plastic or aluminum collar clockwise until it is hand-tight against the joint. This tightening action compresses an internal rubber bushing against the telescoping tube, eliminating annoying clicking sounds and preventing structural play between the shaft segments.
Sizing and Trimming Traditional Solid Hardwood Canes
Solid hardwood walking canes provide classic styling and exceptional structural rigidity, but they lack push-button adjustability and must be trimmed to size. Because cutting a wooden shaft is permanent, you must measure your required height multiple times before making an incision. Remember that removing material is effortless, but replacing cut wood is impossible, so err on the side of caution if you are uncertain.
Begin by removing the rubber ferrule tip from the base of the wooden cane. Factory-installed tips can fit very tightly, but twisting the rubber back and forth or warming it gently with a hair dryer usually breaks the suction. Measure the desired overall cane height starting from the highest contour of the handle down along the wooden shaft, and mark the cut line with a pencil.
Wrap a piece of painter’s tape around the cut line to prevent the wood grain from splintering during the sawing process. Use a fine-tooth miter saw or hand saw to execute a clean, perfectly flat ninety-degree crosscut across the shaft. Smooth the cut edge with medium-grit sandpaper, and firmly press the rubber tip back into place, ensuring the internal metal washer rests flush against the wood.
Recognizing Biomechanical Symptoms of an Incorrect Cane Fit
Your body provides immediate biomechanical feedback when a cane is set to an improper elevation. Persistent neck soreness, shoulder stiffness, or numbness in the fingers frequently points to a cane that is adjusted too tall. When the handle sits too high, the shoulder stays constantly shrugged, compressing nerve pathways and placing the upper trapezius muscle in a state of chronic spasm.
If you experience dull lower back pain, tight hip flexors, or a tendency to shuffle your feet, your cane is likely adjusted too low. Sinking down onto a short cane forces the torso into forward flexion and promotes a compensatory lateral sway during each step. This awkward lurching gait increases joint wear across the lower spine and drains your physical endurance over short distances.
Conducting a walking self-check in front of a mirror or having a family member record your gait from the front helps spot subtle errors. Your shoulders should remain level throughout the entire walking cycle, without one side rising or dipping dramatically. If you notice a visible shoulder tilt or a rigid, unbent arm, take a few minutes to readjust your cane height.
Contralateral Hand Placement and Proper Reciprocal Gait Mechanics
One of the most widespread mobility mistakes is holding the walking cane on the same side as the injured or weakened leg. Clinical protocols mandate contralateral placement, meaning the cane must be held in the hand opposite the affected limb unless a medical specialist directs otherwise. Natural human gait relies on reciprocal arm swing, where the forward movement of one leg coincides with the forward movement of the opposite arm.
Holding the cane on the opposite side mimics this natural biological rhythm and broadens your physical base of support. As you step forward with your weaker leg, you bring the cane forward simultaneously, placing both points of contact down at the exact same moment. This dual contact allows downward body weight to be split smoothly between your recovering limb and the cane tip.
Once the cane and the affected leg bear weight together, your stronger leg swings through to complete the step. This reciprocal sequence keeps your pelvis level and prevents the painful limp known as an antalgic gait. Practicing this rhythm slowly across level ground helps ingrain the movement into your daily muscle memory.
Handle Ergonomics and Palm Pressure Distribution
The shape and contour of a cane handle directly affect how downward forces transfer into your palm, wrist, and carpal tunnel. Traditional crook handles feature a narrow, circular cross-section that concentrates weight across a tiny ridge of skin, which can cause blisters and nerve irritation. For individuals with osteoarthritis or reduced hand strength, choosing an ergonomically shaped handle is just as critical as getting the height right.
Derby and Fritz handles feature wider, flatter horizontal resting surfaces that distribute downward pressure evenly across the thenar eminence of your palm. This expanded surface area reduces pressure peaks and allows the hand to rest in a neutral position without pinching the median nerve. Fritz handles also include an open-ended front curve that accommodates arthritic fingers comfortably without cramping.
Offset handle canes curve the upper portion of the aluminum shaft forward before bending back toward the grip. This intentional architectural curve positions the user’s downward weight directly over the center axis of the cane tip, minimizing rotational torque on the wrist. Anatomical palm grips are molded specifically for the right or left hand, providing exceptional contouring for severe joint pain.
Base Selection: Single-Point Tips, Quad Canes, and Pivot Bases
Selecting the appropriate cane base depends heavily on your specific balance deficits and everyday walking environments. Standard single-point rubber tips deliver lightweight agility and swift swing action, making them ideal for individuals recovering from mild joint sprains or minor balance hesitations. These single ferrules maneuver easily through tight doorways, crowded restaurants, and vehicle footwells without catching on furniture legs.
Quad canes utilize a broad four-point steel or aluminum platform that stands independently on flat surfaces, preventing the cane from falling to the floor. Quad bases come in small-base and large-base configurations, providing superior stability for stroke rehabilitation and significant neurological weakness. When using a quad cane, always ensure the flat side of the base faces toward your body so you do not trip over the extended legs.
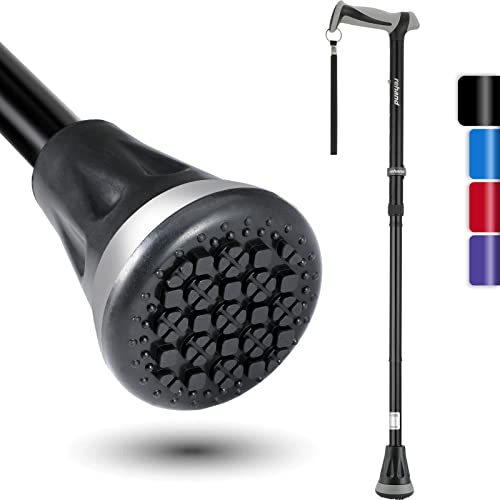
Articulating pivot bases combine the agile feel of a single shaft with a wide multi-tread foot connected by an internal rubber ankle joint. This pivoting mechanism allows all outer tread nubs to maintain full, flat contact with the floor even when the cane shaft angles forward during walking. Pivot bases also offer freestanding convenience on level surfaces, sparing users the discomfort of bending over to retrieve fallen canes.
Safe Step Sequencing for Stairs and Threshold Navigation
Navigating stairs and raised thresholds requires strict adherence to physical therapy sequencing to prevent slips and falls. The universal memory phrase for stair climbing is “up with the good, down with the bad,” which designates which leg leads the movement. Following this guideline ensures that your stronger limb always manages the heavy mechanical lifting when ascending and controls lowering when descending.
When going upstairs, grasp the handrail with your free hand and step up first with your stronger, unaffected leg. Straighten that leg to lift your body weight, and then bring the cane and your recovering leg up onto the step beside it. Never lead with the cane when ascending stairs, as doing so forces your weakened joint to hoist your entire body weight upward.
When descending stairs, reverse the process by lowering the cane and your affected leg down onto the lower step first. Once the cane tip is firmly planted and supporting your balance, step down with your stronger leg to meet them. Always make sure the entire rubber ferrule rests securely on the tread, well clear of the edge of the stair riser.
Routine Maintenance and Recognizing Walker Transition Indicators
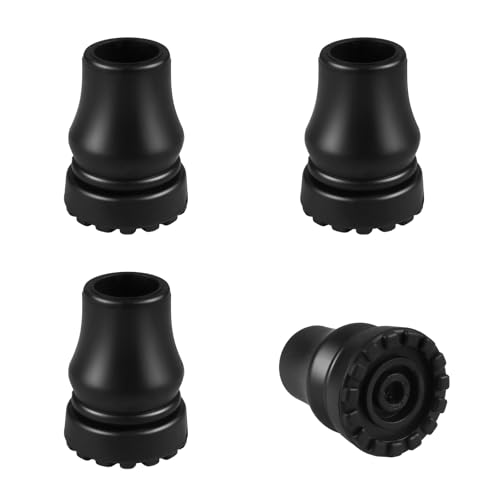
A walking cane requires regular safety inspections to verify that hardware components have not worn down or loosened. Inspect the rubber ferrule tip every month to ensure the tread siping has not smoothed out and the internal steel washer has not punched through the rubber. A bald or cracked rubber tip can slip unexpectedly on wet tile, smooth concrete, or polished hardwood flooring.
When walking outdoors, pairing your daily mobility aid with comfortable, flexible gear like lightweight walking trousers ensures uninhibited movement over curbs and uneven sidewalks. Check telescoping push-pins for rust or dirt, and tighten the anti-rattle collar whenever you hear a clicking sound during your stride. If an internal shock cord inside a folding travel cane feels slack, replace the device before continuing use.
Remember that a single cane is designed to offer unilateral support and can only offload up to twenty-five percent of your body weight. If you experience progressive balance decline, frequent near-falls, or bilateral leg weakness, a single cane is no longer sufficient for your safety. Under those conditions, schedule an evaluation with a physical therapist or physician to transition safely to a rolling walker or rollator.





Write Your Review
No reviews yet. Be the first to share your experience!