


Proper balance starts from the ground up, yet an incorrectly sized walking stick can undermine stability and strain the body. Learning how to measure yourself for a walking cane ensures that the handle supports your natural gait without forcing an awkward hunch or raised shoulder. When sizing is accurate, a mobility aid can relieve substantial pressure from hips, knees, and ankles during everyday movement. Pairing an appropriately adjusted cane with supportive knee apparel helps maintain smooth joint tracking and confident steps across varied indoor and outdoor surfaces.
Sizing errors often go unnoticed until lower back soreness, wrist fatigue, or balance hesitations begin to appear. Establishing the correct shaft length aligns your body weight cleanly over the base of support, allowing for smooth partial weight offloading. Modern canes from brands like COMFKEY, Honmido, and rehand feature telescoping adjustment pins that accommodate a wide range of user heights. Taking a few simple measurements before adjusting or purchasing your cane guarantees steady footing, relaxed posture, and reliable daily support.


The Complete Biomechanical Guide to Measuring and Sizing a Walking Cane
Finding the exact height for your mobility stick transforms how your body carries weight during daily walking. An accurate cane measurement lines up the grip directly with your skeletal structure, protecting your joints and preventing unnatural muscle compensation. Taking the time to record your dimensions carefully before setting your cane pins ensures immediate stability from your very first step.
Essential Preparation: Footwear and Posture Landmarks
Accurate measurements begin with wearing the exact shoes you plan to wear most frequently outdoors. Athletic sneakers, orthopedic walking shoes, and casual loafers all add anywhere from half an inch to over an inch of sole thickness. Measuring barefoot or in thin socks produces a cane that ends up significantly too short once you put on regular footwear. Set aside your everyday walking shoes and put them on before touching a tape measure.
Stand upright on a firm, flat surface such as a hardwood or tile floor rather than plush carpet. Keep your weight distributed evenly across both feet with your knees straight but unpinned. Let your arms hang loosely at your sides with your shoulders relaxed and down rather than tensed or elevated. If you experience balance hesitations while standing unassisted, have a family member or caregiver assist you with the measuring tape.
The Wrist Crease Measurement Method
The primary anatomical reference point for sizing a walking stick is the distal crease of your wrist. When you let your arm hang naturally at your side, locate the small horizontal skin fold where your wrist meets the base of your palm. The distance from the flat floor straight up to this wrist fold represents the ideal overall height of your cane, including its handle and rubber tip. This measurement ensures that when your hand rests on the grip, your arm maintains the correct biomechanical leverage.
You can confirm this measurement by cross-referencing another reliable skeletal landmark known as the greater trochanter. The greater trochanter is the prominent bony bump located on the outside of your upper thigh bone, just below the hip joint. In standard adult anatomy, the height of the greater trochanter sits level with the distal wrist crease. If you feel this bone while shifting your hip slightly, measure from that point down to the floor to verify your initial wrist crease number.
Verifying the 15 to 20 Degree Elbow Flexion Angle
Once you stand with your hand resting on the cane handle, your elbow should form a slight, natural bend between 15 and 20 degrees. This precise angle acts like a biological shock absorber as you press down through the shaft. It allows your arm muscles to assist in weight bearing without locking your elbow joint rigidly. A slight bend also gives you the mechanical leverage needed to push down effectively when stepping over curbs or uneven ground.
A straight, locked arm indicates that the cane handle sits too low, which forces your shoulder downward and strains the upper spine. Conversely, if your elbow bends at 30 degrees or more, the cane handle sits too high. An overly flexed elbow forces your biceps and forearm muscles to work continuously, leading to rapid hand fatigue and reduced stability. You can check this flexion in a full-length mirror or have someone confirm the slight bend from the side.
Adjusting Push-Button Telescoping Shafts and Locking Collars
Most modern aluminum canes utilize a telescoping shaft equipped with spring-loaded brass push-button pins. Models from manufacturers like rehand and Honmido often feature eight to ten individual adjustment holes spaced in one-inch increments. To adjust the height, depress the dual brass button and slide the inner shaft up or down until the pin snaps firmly into the hole matching your floor-to-wrist measurement. Always confirm that the brass detent fully protrudes through the metal hole before placing any weight on the handle.
After snapping the push-button pin into place, locate the threaded anti-rattle silencing collar located just below the adjustment joint. Turn this circular nut clockwise until it fits snugly against the outer shaft tube. This locking ring removes microscopic tolerances between the inner and outer aluminum tubes, eliminating annoying metallic clicks during movement. A tightened silencer ring also reinforces structural rigidity, preventing the shaft sections from twisting or shifting under body weight.
Sizing and Trimming Traditional Solid Wood Canes
Solid turned wood canes offer timeless styling, but they require a permanent manual cut to achieve the correct length. Because a wood cut cannot be undone, measure twice and verify your footwear sole thickness before cutting the shaft. Stand in your walking shoes, confirm your wrist crease height, and mark that exact measurement along the wood shaft starting from the top of the handle. Remember to factor in the base thickness of the rubber tip ferrule, which typically adds about half an inch of height.
To make the cut, remove the original rubber tip ferrule by twisting and pulling it free from the bottom of the wood shaft. Wrap a strip of masking tape tightly around the shaft at your measured cut line to prevent wood fibers from splintering as you saw. Use a fine-tooth handsaw or miter box to make a clean, flat cut perpendicular to the shaft length. Sand the fresh edge smooth and press the rubber ferrule back on, making sure the internal metal reinforcement washer sits squarely against the wood.
Proper Hand Placement and Contralateral Gait Mechanics
A frequent misconception among first-time cane users is holding the mobility aid on the same side as the painful or injured leg. Biomechanical gait guidelines dictate holding your cane in the hand opposite your affected or weaker leg. Holding the device contralaterally widens your functional base of support and mimics the natural reciprocal arm swing of human walking. If your left knee or hip is injured, you hold the cane firmly in your right hand.
As you take a step forward, advance the cane simultaneously with your injured leg. As both the cane tip and your affected foot strike the ground together, body weight divides between the cane shaft and your leg. This simultaneous movement offloads approximately 15 percent to 25 percent of downward joint pressure away from the healing joint. Your stronger opposite leg then steps forward smoothly, maintaining a rhythmic, balanced stride.
Safe Step and Stair Navigation Sequences
Navigating staircases demands strict adherence to step sequencing to prevent missteps and loss of balance. Physical therapy instruction emphasizes a simple memory rule: up with the good leg, down with the bad leg. When ascending stairs, grip the handrail with one hand while holding your cane in the other hand. Step up first with your unaffected, stronger leg to lift your body weight, then bring your injured leg and the cane up to join it on the same tread.
When descending stairs, reverse the entire movement sequence to protect your recovering joint from shock. Place your cane tip down onto the lower step tread first, then step down with your affected leg so the cane bears the initial impact. Finally, step down with your stronger leg onto that same step. Always take stairs one step at a time, keeping both feet and the cane on the same tread before attempting the next riser.
Handle Ergonomics and Grip Pressure Distribution
The shape of your cane handle directly influences hand comfort, wrist posture, and daily grip fatigue. Traditional tourist crook handles curve smoothly, but they focus pressure onto a narrow strip across the center of your palm. Modern offset handle designs curve the neck forward, centering the user’s downward weight directly over the vertical shaft axis. This alignment reduces rotational twisting in the wrist and promotes a neutral joint posture during prolonged walking.
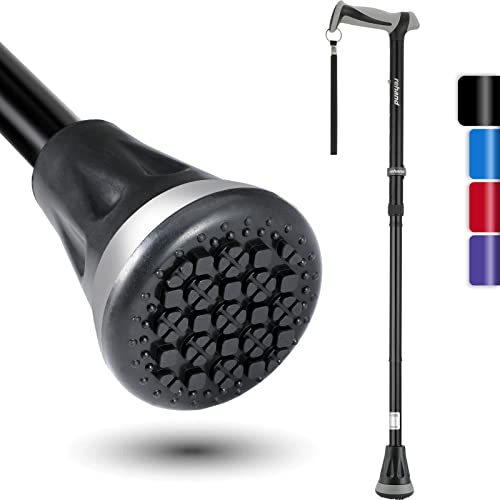
For individuals managing osteoarthritis, rheumatoid arthritis, or carpal tunnel syndrome, ergonomic palm-contoured grips offer significant relief. Handles crafted with soft thermoplastic rubber materials, like those found on rehand canes, provide wider surfaces that disperse downward force across the fleshy thenar eminence of your palm. Spreading contact pressure across a broader surface area prevents nerve compression and reduces muscle cramping in the fingers and wrist.
Base Selection and Ground Traction Stability
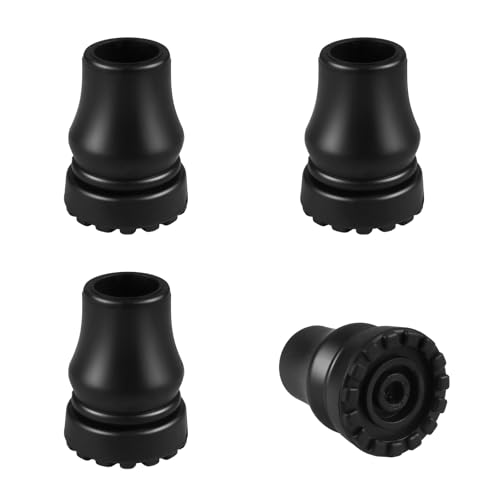
The contact point between your walking cane and the ground determines traction across slick tile, polished hardwood, and outdoor asphalt. Standard single-point canes utilize a flexible rubber ferrule with molded bottom siping to channel away moisture. While single-point tips offer exceptional swing agility, they require adequate user balance to keep the shaft perpendicular to the ground. Inspect your rubber tip regularly to ensure the tread pattern remains deep and the internal metal reinforcement washer has not worn through.
Canes equipped with articulating pivot bases or quad feet provide enhanced contact surface area on challenging terrain. Quad bases feature four separate rubber feet that provide a wider footprint and allow the cane to stand freely on flat floors. Articulating bases, such as the shock-absorbing multi-layer designs on TIRAROME and rehand models, flex as your ankle moves, maintaining full rubber contact even on gentle slopes. Self-standing bases also eliminate the nuisance of canes falling to the floor when propped against counters.
Collapsible Travel Canes and Portable Storage
Active travelers often benefit from multi-section folding canes that collapse down to ten or twelve inches in length. Models from brands like COMFKEY feature aluminum segments held together by heavy-duty internal elastic shock cords. These canes fold and unfold in seconds, snapping rigidly into place whenever balance support is needed. Their compact size makes them easy to slip into briefcases, tote bags, or vehicle compartments during road trips and daily errands.
When flying or traveling long distances, a compact folding stick can easily fit inside your personal luggage or a carry on travel pack without exceeding carry-on space restrictions. Always inspect the internal shock cord periodically to confirm it retains strong tension. Loose cords can cause play at the interlocking joint collars, resulting in slight shaft deflection or wobbling during partial weight bearing. A firm cord and snug aluminum joint ferrules ensure dependable, rattle-free support throughout transit.
Troubleshooting Symptoms of Improper Cane Height
Recognizing physical signs of incorrect cane height allows you to make rapid adjustments before pain or bad posture habits develop. If your cane is set too high, your shoulder on the cane side will hike upward toward your ear with every stride. This chronic elevation leads to tension headaches, upper trapezius tightness, and wrist strain because you cannot push down effectively. You may also find yourself pushing the cane too far out to the side rather than keeping it close to your hip.
A cane that is set too low forces your torso to lean forward and bend sideways toward the mobility aid. This stooped posture places excessive strain on your lumbar spine, causing lower back fatigue and shortening your stride length. If you notice yourself hunching or leaning heavily into the grip, raise the telescoping shaft by one or two notches to restore an upright torso. Walking should feel balanced, symmetric, and upright, allowing your spine to maintain its natural curvature.
Weight Capacities and Recognizing When to Transition to a Walker
Every walking cane carries a certified static weight capacity that must match your body weight and mobility needs. Standard aluminum folding canes typically support 240 to 250 pounds, while reinforced models like specific rehand canes support up to 350 pounds. Dynamic stability during real-world walking depends on choosing a frame that does not bend under sudden balance shifts. Never exceed manufacturer weight limits, as overloading an aluminum or wood shaft risks sudden structural failure.
A single walking cane is designed exclusively for unilateral support, offloading up to 25 percent of body weight to assist with mild unsteadiness or single-limb injury. If you experience severe balance loss, bilateral knee weakness, frequent dizziness, or persistent freezing of gait, a single cane is no longer sufficient. Under these conditions, transitioning to a bilateral support device such as a four-wheeled rollator or standard walker is essential for fall prevention. Always consult a licensed physical therapist or physician for personalized gait evaluation and mobility equipment prescription.
Measuring yourself accurately takes only a few minutes, but it lays the foundation for safe, pain-free daily walking. By confirming your wrist crease height in your everyday shoes, securing telescoping push pins firmly, and practicing contralateral gait mechanics, you can move with complete confidence. Take the time to verify your measurements before setting out, and enjoy the renewed freedom and balance that a properly fitted walking aid provides.





Write Your Review
No reviews yet. Be the first to share your experience!