


Walking with confidence starts from the ground up, especially when managing joint discomfort, post-operative rehabilitation, or subtle balance changes. An ill-fitted mobility aid forces the body into awkward compensations, throwing off natural spinal alignment and worsening knee or hip fatigue. Many people wonder what is the proper cane height when setting up a new walking stick at home. Finding that precise measurement ensures the cane absorbs downward shock effectively while allowing your arm to provide stable leverage without straining your neck. Those managing arthritis or post-injury recovery often coordinate their walking aids with specialized knee joint support gear to keep legs aligned and comfortable during daily strolls.
Proper sizing establishes an ergonomic baseline where your shoulders stay level and your upper body moves naturally throughout every stride. When a cane sits at the correct elevation, it offloads significant body weight from vulnerable joints while supporting a rhythmic reciprocal gait. Adjustable models from brands like supregear and Merry Sticks offer convenient telescoping shafts to accommodate various statures, but the adjustment buttons must match your anatomical landmarks accurately. Taking a few moments to measure your body correctly prevents muscle fatigue, reduces fall anxiety, and restores dependable stability on every surface you navigate.


The Clinical Guide to Proper Cane Height and Sizing
Determining what is the proper cane height requires aligning the top of the handle with your body’s natural skeletal landmarks. A cane is not designed to bear your full body weight like a crutch, but rather to offload joint pressure and improve sensory feedback during gait. When the height matches your anatomical proportions, your body maintains an upright posture and your arm moves with biomechanical efficiency. Consulting a physical therapist or physician provides personalized gait evaluation, but standardized physical therapy measurement rules offer the clearest starting point for sizing a walking cane at home.
Anatomical Sizing Rules and Wrist Crease Measurement
The most reliable anatomical reference point for cane sizing is the distal wrist crease on the inside of your wrist. Stand upright on a firm, level floor while wearing your typical daily walking shoes. Allow your arms to hang naturally at your sides with your shoulders completely relaxed, rather than tensed or elevated. The top crest of the cane handle should align directly with that small skin fold where your hand meets your forearm.
Having a friend or family member measure this distance with a flexible tape measure produces the most accurate result. Measuring alone often causes users to tilt sideways or look down, which instantly changes shoulder height and skews the final number. Measure from the floor surface up to the crease of the wrist on your unaffected side. This distance represents your ideal overall cane height from the bottom of the rubber tip to the highest point of the grip.
The 15 to 20 Degree Elbow Flexion Test
Once the cane rests on the floor beside your foot, grasping the handle should produce a gentle bend in your elbow of approximately 15 to 20 degrees. This precise angle allows your arm muscles to act as natural shock absorbers when downward force transfers through the shaft. A straight arm locks the elbow joint and transfers jarring vibrations directly into your shoulder, collarbone, and neck.
Conversely, an excessive elbow bend greater than thirty degrees places continuous strain on your bicep and tricep muscles. That excessive flexion reduces your leverage, making it much harder to push down and offload weight from an arthritic knee or recovering ankle. You can confirm this angle by looking into a full-length mirror while resting your hand on the grip. If your elbow feels almost straight or bent like a right angle, the cane requires immediate adjustment.
Physical Consequences of an Incorrect Cane Height
Using a cane that is adjusted too tall forces your shoulder into a permanent shrug, known clinically as shoulder hiking. This unnatural elevation strains the trapezius muscles and compresses the cervical spine, leading to chronic upper back pain and tension headaches. An overly tall shaft also pushes the base of the cane too far outward, creating an unstable lever arm that can slip across slick surfaces.
A cane that is adjusted too short creates equally severe postural hazards. Walking with an undersized cane forces your torso to stoop forward and list sideways, bending the lumbar spine into a kyphotic posture. This forward pitch shifts your center of gravity ahead of your base of support, dramatically increasing the risk of forward falls. Lower back fatigue and hip soreness quickly develop because your spine must constantly work against gravity to keep you upright.
Step-by-Step Adjustment of Telescoping and Push-Button Canes
Modern adjustable walking aids, such as the supregear folding models and the Akeoil adjustable walking pole, use push-button brass detent pins within tubular aluminum shafts. To adjust these models, loosen the threaded anti-rattle silencing collar located near the adjustment holes by turning it counterclockwise. Depress the spring-loaded brass pin firmly with your thumb and slide the inner telescoping tube until the pin snaps cleanly into the target hole.
Always confirm that the detent pin pops fully through the adjustment aperture before placing any weight onto the grip. A partially engaged pin can slip under downward pressure, causing the shaft to collapse unexpectedly during mid-stride. After the pin snaps into position, tighten the anti-rattle lock nut clockwise until snug. This collar eliminates mechanical wobble between the metal segments and silences irritating clicks as you walk across hard floors.
Sizing and Cutting Non-Adjustable Wooden Canes
Traditional solid hardwood canes provide classic styling and exceptional structural rigidity, but they require permanent physical alteration to achieve proper sizing. Begin by removing the protective rubber ferrule from the bottom of the cane shaft, which can usually be twisted off by hand or loosened with warm water. Stand next to the cane wearing your regular walking shoes and mark the excess length that extends above your wrist crease onto the bottom of the shaft.
Use a fine-tooth hand saw to cut the excess wood straight across, taking care to maintain a ninety-degree angle to the shaft axis. Sand the cut edge smooth to prevent wood splintering and ensure a flush fit inside the base tip. Reinstall the rubber ferrule firmly over the trimmed bottom, tapping the tip gently against the floor to seat the wood against the internal metal washer. Remember that a wooden cane cut too short cannot be lengthened, so cutting slightly long and testing the fit first is always the safest strategy.
Contralateral Side Placement and Natural Gait Biomechanics
A common mistake among new cane users is holding the device on the same side as the painful or injured lower limb. Biomechanical principles require holding the cane in the hand opposite the affected leg, a technique known as contralateral placement. For example, an injured left knee requires using the cane in the right hand. This positioning mimics the natural reciprocal arm swing of human walking, where your right arm swings forward simultaneously with your left leg.
Holding the cane contralaterally widens your functional base of support and allows downward force to offload fifteen to twenty-five percent of your body weight away from the compromised joint. The cane and your vulnerable leg move forward in unison, bearing weight together as you step through with the stronger limb. Holding the cane on the injured side disrupts balance, forces an awkward limp, and increases lateral trunk sway. Anyone unsure about their gait cadence should consult a physical therapist for individualized walking instruction.
Stair Navigation Mechanics with an Adjusted Cane
Negotiating staircases requires deliberate technique to prevent balance loss, especially in homes with narrow steps. Physical therapists teach the universal sequence often remembered as stepping up with the good and down with the bad. When ascending stairs, grip the sturdy wall handrail with one hand while holding your cane in the other hand. Step up first with your unaffected, stronger leg, using its quadriceps strength to lift your body upward before bringing the cane and affected leg onto the step.
Descending stairs reverses this mechanical progression to protect your joint from sudden impact. Lower your cane and your affected leg down to the step below simultaneously, keeping your weight supported through your handrail grip. Once the cane tip makes solid, flat contact with the tread, step down with your stronger leg. Never position a quad cane or wide pivot base over the lip of a stair tread, because overhang can cause the base to tip forward and precipitate a dangerous fall.
Footwear Variations and Sole Thickness Factors
Cane height measurements remain accurate only when your footwear matches the sole thickness used during the initial sizing session. Measuring your wrist crease while barefoot or wearing thin bedroom slippers results in a cane that is noticeably too short when you step outdoors in thick athletic sneakers. A running shoe with a cushioned sole or a walking shoe with a modest heel lift can add one to two inches to your overall standing height.
When sizing your mobility device, wear the specific shoes you intend to wear most frequently for outdoor strolls and errands. Choosing appropriate outdoor apparel like flexible lightweight walking pants ensures your legs move freely without fabric catching on the cane shaft during measurement. If you alternate between flat indoor house shoes and thick-soled winter boots, an adjustable telescoping cane provides the necessary flexibility to shift pin settings as footwear changes.
Matching Handle Styles and Grip Ergonomics to Height Fit
The geometry of a cane handle influences how your body distributes downward force and perceives overall height. Traditional crook handles place your hand behind the vertical shaft, which can create rotational torque and strain sensitive wrist joints. Offset handles, by contrast, curve the upper aluminum neck forward so that downward hand pressure centers directly over the vertical shaft and the rubber tip.
Ergonomic contour grips and Derby handles distribute downward force evenly across the palm, reducing pressure on the ulnar nerve and the base of the thumb. Models like the Merry Sticks foldable walking cane combine refined aesthetic finishes with contoured handles that accommodate daily use without causing palm numbness. If severe osteoarthritis or carpal tunnel syndrome causes hand fatigue, an anatomical palm grip molded specifically for left or right hands offers superior comfort while maintaining the correct height alignment.
Travel Folding Canes and Height Retention on the Go
Folding canes provide exceptional convenience for active adults who travel by car, bus, or airplane, but their height mechanism requires careful handling. Quality folding models, such as the four-section supregear travel canes and the Akeoil collapsible pole, feature internal high-tension elastic shock cords that pull the aluminum segments together automatically. When unfolded, precision joint sleeves interlock to create a rigid column that functions like a standard single-point cane.
These portable aids typically fold down to compact lengths of ten to twelve inches, slipping neatly into tote bags or carry-on luggage. Readers planning extended transit trips can consult a carry on luggage packing guide to see how folding mobility aids fit alongside travel essentials. Once you establish your ideal pin setting on an adjustable folding cane, that height setting remains locked in place even when you disassemble and collapse the four shaft segments for transit.
Base Footprints and Traction Tip Mechanics
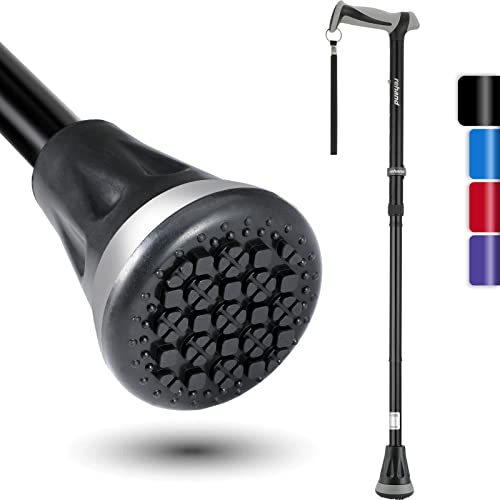
The type of base attached to your walking stick directly influences how the device interacts with the floor and impacts effective working height. Standard single-point canes terminate in a durable rubber ferrule that provides agile pivot action and excellent maneuverability in tight hallways. Articulating multi-foot bases, like the self-standing model from Assistive Technology Services, incorporate four ground-gripping rubber pads on a flexible neck that flexes with natural foot motion.
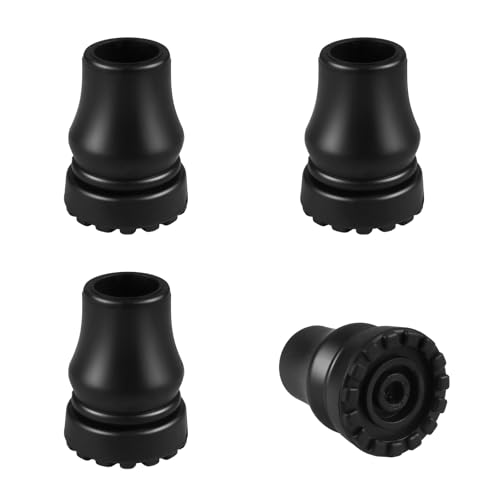
These wider multi-point bases offer freestanding convenience so the cane remains upright next to chairs, eliminating the painful bending required to retrieve fallen sticks. However, large quad platforms and heavy pivot bases add slight stack height to the bottom of the shaft, which must be accounted for during the wrist-crease measurement. Inspect the bottom rubber tread regularly for signs of bald spots or hardening, and ensure the internal steel washer has not punctured through the rubber ferrule.
Weight Capacities and Recognizing When to Transition
Every walking cane carries an engineered weight capacity rating that buyers must verify before putting the aid into daily service. Standard aluminum folding models commonly support between one hundred ninety-eight and two hundred fifty-three pounds under normal assisted walking conditions. Canes are designed solely for auxiliary balance and unilateral offloading of fifteen to twenty-five percent of body weight, not for supporting your complete physical mass.
If your balance instability worsens, or if severe neurological conditions like Parkinson’s disease cause frequent freezing episodes, a single walking cane may no longer provide sufficient protection. Transitioning to a bilateral mobility device, such as a four-wheeled rollator or a standard folding walker, provides continuous two-handed support and wider stability margins. Always discuss your mobility progression with a licensed physical therapist or physician to ensure your mobility equipment matches your balance capabilities and recovery goals.
Taking the time to measure your wrist crease, verify elbow flexion, and tighten the anti-rattle locking collar ensures your walking cane delivers safe, comfortable support with every step. When adjusted accurately, a quality walking aid reduces joint strain, improves posture, and restores personal independence both indoors and outdoors. Pair your properly sized cane with routine ferrule tread checks, maintain safe stair sequencing, and consult a mobility specialist whenever your balance needs evolve.




Write Your Review
No reviews yet. Be the first to share your experience!