


Walking with an improperly fitted mobility aid often forces your shoulders to hunch and places unnecessary strain on your lower back. When recovering from joint surgery or managing balance hesitation, dialing in the precise handle alignment ensures that your body weight transfers smoothly through the cane shaft rather than twisting your spine. Many seniors and post-operative patients wonder what is the proper height for a walking cane before taking their first steps outside the clinic. Finding that sweet spot allows the arm to support joint offloading naturally while preserving an upright, confident gait.
Setting the handle at the level of your wrist crease while wearing standard footwear encourages a relaxed fifteen to twenty degree bend at the elbow. This biomechanical positioning allows a cane to relieve joint impact on recovering knees or hips while preventing excessive wrist fatigue. Pairing an accurate cane height with supportive attire like knee support pants for walking stability can help individuals navigate daily household tasks and outdoor walkways with greater assurance. Checking your setup early protects both your posture and your peace of mind.



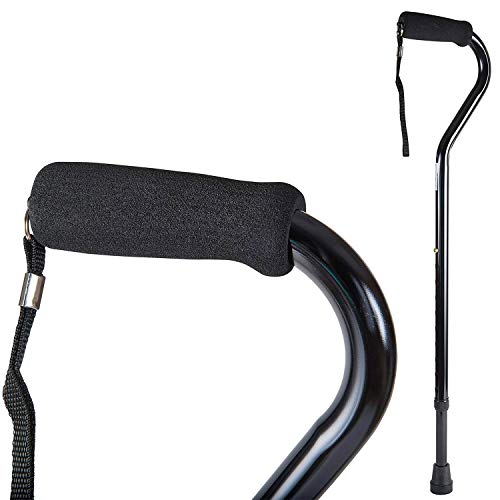

Complete Sizing Guide: Finding the Proper Height for a Walking Cane
Establishing the correct cane height is the foundational step in preventing falls and restoring natural walking patterns. When an individual stands upright with arms relaxed at their sides, the top of the walking cane grip should line up with the distal wrist crease. This specific anatomical alignment ensures that the user maintains an elbow bend between fifteen and twenty degrees during weight-bearing steps. Setting this measurement accurately allows the arm muscles to absorb ground impact while transferring partial body weight away from painful lower joints.
The Anatomical Measurement: Wrist Crease and Greater Trochanter
Two anatomical reference points provide reliable guidance for measuring walking cane height. The primary landmark is the interior crease of the wrist, located just above the base of the thumb. When your arm hangs naturally at your side, the distance from this skin crease to the floor represents the precise height your cane handle should occupy. Using this landmark prevents common posture distortions like elevated shoulders or curved spines during regular ambulation.
The secondary landmark is the greater trochanter, which is the prominent bony bump on the upper outside portion of the thigh bone. In clinical gait evaluations, the greater trochanter sits at virtually the identical horizontal plane as the hanging wrist crease. Measuring should always take place while wearing your customary walking shoes, because standard soles add between half an inch and an inch and a half of height. Aligning your mobility aid with these natural skeletal landmarks ensures optimal mechanical efficiency.
The Elbow Flexion Rule: Why a 15 to 20 Degree Bend Matters
The angle of your elbow during cane use directly dictates how much body weight your upper extremity can offload safely. Maintaining an elbow flexion angle between fifteen and twenty degrees creates a dynamic biological shock absorber. A slightly bent elbow engages the triceps, pectorals, and latissimus dorsi muscles in a synchronized fashion to support downward pressure. This gentle bend also prevents the sudden joint jarring that travels into the shoulder when a locked, straight arm hits the pavement.
If the cane is adjusted too short, the elbow is forced to straighten completely into full extension. Walking with a fully locked elbow compromises muscle leverage and forces you to lean forward at the hips to reach the handle. This posture increases lumbar strain, reduces walking endurance, and destabilizes balance on uneven sidewalks. Conversely, an excessive elbow bend past thirty degrees means the cane is set too high, which quickly overworks the bicep muscles and destabilizes your forearm.
Step-by-Step Sizing Instructions: Measuring at Home
Performing this measurement accurately at home requires a partner, a standard flexible tape measure, and a level indoor floor surface. Stand upright against an interior wall with your feet placed approximately shoulder-width apart for natural balance. Relax your shoulders completely, allowing both arms to hang loosely at your sides without tension. Resist the temptation to reach forward or look down at the floor, because tilting your head alters your spinal alignment and throws off the measurement.
Have your assistant place the base of the measuring tape on the floor adjacent to your outside ankle bone. They should extend the tape measure vertically to the prominent skin fold on the inside of your wrist joint. Record this measurement to the nearest half-inch, as this number represents the total target height from the bottom of the rubber tip to the highest surface of the handle. Many adjustable canes, such as the supregear folding model, note this exact distance from the floor to the wrist joint as their primary sizing metric.
Adjusting Telescoping Canes and Anti-Rattle Locking Collars
Most modern mobility aids utilize push-button telescoping pins that click into pre-drilled holes along an aluminum shaft. To adjust the height, depress the small spring-loaded brass detent pin and slide the inner tubing up or down until it snaps firmly into the appropriate hole. Many canes feature adjustment holes spaced at one-inch intervals to accommodate a wide variety of adult heights. For instance, REHAND walking canes provide eight distinct height settings to accommodate users from five feet tall up to six feet five inches.
After locking the push-button pin, you should inspect the threaded locking ring located directly beneath the joint. This collar, often called a silencer nut, tightens against the seam of the telescoping tubes. Turning this collar clockwise secures the inner shaft firmly and eliminates annoying clicking sounds during weight transfer. The DMI adjustable cane specifically highlights this locking ring mechanism to prevent shaft wobbling, while ensuring the brass pin has popped entirely through the selected shaft aperture before bearing any weight.
What Happens When a Cane Is Sized Incorrectly?
Using a cane adjusted to an improper height disrupts your natural walking mechanics and can create secondary orthopedic problems. When a cane is set too high, the user must hike their shoulder upward toward their ear on every step to clear the ground. This repetitive elevation strains the trapezius and levator scapulae muscles, frequently causing chronic neck pain and tension headaches. Over time, the wrist is also forced into an awkward extended position that increases carpal tunnel pressure.
A cane adjusted too short forces the user to stoop forward and tilt laterally toward the supported side. This bent-over posture shifts the body center of gravity forward, significantly elevating the risk of forward tripping and falling. Wearing comfortable and protective outdoor walking pants allows for unhindered leg movement while caregivers assess natural gait alignment on level ground. Subtle adjustments of just one or two inches frequently resolve persistent joint soreness and unsteady walking habits.
The Contralateral Rule: Which Hand Holds the Cane?
One of the most widespread mobility mistakes involves holding the walking cane on the same side as the painful or injured leg. Unless specifically instructed otherwise by a physical therapist, you must always hold the cane in the hand opposite the weak or recovering limb. If your right knee is recovering from surgery, your left hand should hold the cane. This contralateral positioning maintains natural human locomotion, where opposite arms and legs swing forward in unison.
Holding the cane on the opposite side creates a wide, balanced base of support between the mobility aid and your affected foot. As you step forward with your recovering leg, you move the cane forward simultaneously so that both contact the ground at the exact same moment. This synchronized movement allows you to offload roughly fifteen to twenty-five percent of your total body weight directly onto the cane shaft. This weight transfer substantially reduces joint contact forces in the arthritic hip, knee, or ankle during the stance phase of walking.
Stair Navigation Mechanics: Up with the Good, Down with the Bad
Navigating indoor stairs or outdoor curbs presents unique balance challenges that demand strict adherence to clinical movement rules. The universal guideline taught by physical therapists is simple to remember: go up with the good leg and down with the bad leg. When ascending stairs, grasp the handrail, step up onto the first riser with your stronger leg, and then bring your recovering leg and the cane up to the same step. When descending, move the cane and your affected leg down first, followed by your stronger leg.
Take extra caution with cane base placement on narrow stair treads to avoid catching the rubber ferrule on the edge. Canes equipped with wide quad bases or large pivoting feet require careful positioning, as their multi-pronged pads can hang over step edges and cause sudden tripping. On steep staircases, standard single-point rubber tips generally provide cleaner clearance than wide-stance multi-tip designs. Never attempt to take two steps at a time or rush your cadence while negotiating stair transitions.
Handle Ergonomics and Base Configurations that Affect Height
The shape of a cane handle alters how body weight travels down the shaft and influences effective hand height. Traditional crook or T-handle designs position the hand away from the vertical axis, whereas an offset handle, found on the Medline and DMI aluminum canes, curves the shaft forward beneath the grip. This offset geometry centers downward body weight directly over the vertical shaft to enhance wrist comfort. Wider ergonomic grips made from soft thermoplastic rubber further distribute palm pressure across the hand to reduce joint strain.
The style of the base attached to the bottom of the cane can also affect total clearance and floor traction. While standard single-point tips offer lightweight agility, quad canes and articulating pivot bases provide self-standing convenience and enhanced multi-surface traction. For individuals who travel frequently, collapsible models that fold into compact sections can easily match carry on luggage travel bag guidelines without losing height settings. Keep in mind that aftermarket replacement rubber tips or pivot pods may add half an inch to total shaft length.
When a Single Cane Is No Longer Enough: Walker Transitions
A walking cane is designed exclusively for mild to moderate balance support and partial limb offloading of fifteen to twenty-five percent. If an individual experiences progressive neurological balance decline, bilateral knee pain, or recurrent near-fall episodes, a single cane is no longer adequate. Warning signs that indicate the need for an upgrade include frequent lateral stumbling, persistent fear of walking, or placing two hands on a single cane. Transitioning to a walker or rollator provides a broad base of support and bilateral hand placement that dramatically improves stability.
Whenever you feel uncertain about your balance stability or device fit, consult a licensed physical therapist or physician for a detailed gait evaluation. A clinical professional can evaluate your walking speed, joint range of motion, and weight-bearing restrictions to recommend the ideal mobility device. They can also fine-tune your cane height to the millimeter and correct subtle gait compensations before they become entrenched habits. Professional guidance ensures that your mobility equipment actively promotes safety and independent movement.
Safety Verification and Pre-Walk Checklist
Before using your walking cane each day, run through a quick thirty-second safety checklist to verify structural readiness. Check that the push-button adjustment pin protrudes completely through the shaft hole and that the anti-rattle collar remains securely tightened. Inspect the bottom rubber tip to ensure the tread sipes are distinct and have not worn smooth from pavement friction. If the internal metal washer becomes visible through worn rubber, replace the ferrule immediately to prevent hazardous slippage on smooth floors.
Put on your walking shoes, stand erect, and grasp the handle to perform a final posture check in front of a full-length mirror. Your shoulders should appear level, your trunk should remain upright without leaning, and your elbow should display that essential fifteen to twenty degree flex. Slip the wrist strap around your forearm so the cane will not tumble to the floor if you momentarily open your hand to open a door. With your cane adjusted to the proper height and mechanically secure, you can step forward with balance, stability, and renewed confidence.





Write Your Review
No reviews yet. Be the first to share your experience!