


Maintaining upright posture and steady balance while strolling through neighborhoods or parks can transform routine walking into an energizing, low-impact exercise routine. Learning how to walk with poles allows adults to engage the upper body, distribute physical effort across four contact points, and offload significant stress from sensitive knees, hips, and lower back joints. When practiced with proper form, rhythmic pole walking encourages an active arm swing and opens up the chest for improved breathing efficiency. Pairing this active gait with supportive knee hiking apparel helps protect vulnerable joints during long outdoor walks on neighborhood pavement or park paths.
While dual walking sticks and Nordic fitness poles enhance stability and cardiovascular endurance for active individuals, understanding proper technique remains critical to prevent shoulder fatigue and wrist strain. Sizing poles to achieve a natural elbow angle, utilizing ergonomic wrist straps effectively, and timing each pole plant with the opposite foot strike creates a fluid, confident cadence. Recognizing the clear distinction between fitness walking sticks and medical mobility aids also ensures users select the right equipment for their personal physical stability needs.


Mastering Pole Walking: Mechanics, Sizing, and Safe Gait Technique
Walking with dual poles engages the entire body by transforming an ordinary stroll into an efficient, full-body movement pattern. Propelling forward with two poles coordinates upper body muscle engagement with lower body strides while reducing peak impact on vulnerable joints. Mastering the proper movement sequence takes only a short learning curve when walkers focus on natural rhythm rather than forced mechanics. Establishing a stable foundation begins with understanding how bilateral poles interact with human locomotion.
Biomechanical Principles of Walking with Dual Poles
Natural human walking relies on a reciprocal arm and leg swing where the right arm moves forward alongside the left leg. Walking poles harness this built-in neuromuscular reflex by adding ground contact to each arm extension. Instead of holding poles vertically like static posts, dynamic pole walking uses an angled backward plant that propels the torso forward. This continuous diagonal push lightens the compressive burden on weight-bearing joints with every completed stride.
Distributing impact across four points of contact changes the way gravity affects the lower spine and lower extremities. Clinical biomechanics studies consistently show that active pole use can offload between 15 and 25 percent of body weight from the knees and hips during level walking. Upright posture naturally improves as the chest opens and the shoulders stay relaxed rather than hunching forward. This upright posture reduces lower back strain and allows deeper diaphragmatic breathing during sustained outdoor walks.
Balance stability improves dramatically because two additional contact points widen your overall base of support. Walkers with mild joint hesitation or postural fatigue gain immediate spatial feedback through their hands with every pole strike. The rhythm creates a steady cadence that prevents hesitation on uneven sidewalks, park gravel, or hard-packed dirt trails. This increased stability helps maintain active walking habits across varied neighborhood surfaces.
Sizing Walking Poles for Proper Ergonomic Alignment
Correct pole height determines whether your arms provide forward propulsion or cause rapid shoulder fatigue. To determine your proper baseline height, stand tall on flat ground while wearing your regular walking shoes with your shoulders completely relaxed. Hold the pole grips and adjust the shaft length until your elbows rest at a clean 90-degree angle with your forearms parallel to the floor. Setting the poles too high strains the neck and trapezius muscles, while setting them too low forces your spine to stoop forward.
Manufacturer sizing standards generally divide poles into user height brackets to ensure optimal mechanical leverage. Short pole configurations adjusting between 100 and 120 centimeters typically fit individuals ranging from 4 feet 11 inches to 5 feet 7 inches. Long pole options extending between 115 and 135 centimeters accommodate users between 5 feet 8 inches and 6 feet 4 inches. Confirming your height bracket before heading outside guarantees that telescoping segments lock within safe structural adjustment limits.
Collapsible poles use either outer flip locks or internal spring button detents to secure the telescoping sections. Releasing the outer cam lever allows smooth length adjustments before firmly snapping the clamp shut to prevent slippage. The locking screw opposite the flip lever must provide firm resistance so the shaft cannot collapse under sudden downward body pressure. A quick weight test against the floor confirms that both poles remain locked and rattle-free before you take your first step.
Grip Mechanics and Effective Wrist Strap Utilization
Ergonomic wrist straps are not decorative safety tethers; they are the primary conduit for transferring upper-body power into the ground. Slip your hand upward through the bottom opening of the strap loop rather than inserting it from above. Bring your hand downward to grasp the grip, trapping the webbing flat between your palm, thumb, and the handle surface. This orientation allows your wrist and forearm to bear the pushing force without requiring a tight hand squeeze.
Gripping the handle with a tight fist causes hand cramps, forearm exhaustion, and wrist joint soreness within fifteen minutes of walking. Maintain a relaxed, soft grip on the extended EVA foam handle while relying on the strap to cradle your wrist during the backward push. High-density EVA foam absorbs palm perspiration and provides a slip-resistant texture across hot afternoon strolls or chilly morning outings. Releasing pressure from the fingers at the end of each backward stroke encourages healthy blood circulation in the hands.
Many walking poles feature an extended foam sleeve extending several inches below the primary handle contour. This extended grip allows you to lower your hand placement quickly when navigating sudden steep inclines without stopping to adjust pole length. Choking down on the secondary grip gives immediate climbing leverage while keeping your elbows in an efficient power zone. Returning your hands to the primary grip once the trail flattens out restores your standard upright stride.
Step-by-Step Gait Execution on Level Terrain
Mastering the movement begins with the foundational dragging drill to establish an unforced natural cadence. Start walking down a flat pathway while holding the poles loosely at your sides, allowing the tips to drag freely along the ground behind you. Notice how your arms naturally swing forward in direct opposition to your alternating foot strikes. Once this natural rhythm feels automatic, gently begin planting each pole tip as your opposite heel touches the ground.
Every pole plant should land at an approximate 45-degree angle pointing backward rather than standing straight up in front of your body. Planting the pole tip behind your lead foot positions the shaft to push your body forward into the next step. As the right arm swings forward, the left foot strikes the ground, creating a synchronized bilateral push. Driving downward and backward through the strap propels your hips forward smoothly without jarring your elbow joints.
Complete the arm stroke by pushing through the strap until your hand passes slightly behind your hip line. Open your fingers gently at the rear of the stroke to let the pole follow its natural angle without wrenching your wrist joint. Swing the opposite arm forward from the shoulder joint while keeping your elbow softly extended rather than locked stiff. Repeating this fluid swing creates an energetic walking rhythm that feels effortless across long distances.
Terrain Adaptations: Navigating Slopes, Curbs, and Uneven Ground
Ascending an incline requires slight posture and equipment adjustments to maintain forward momentum without overworking the shoulders. Shorten your pole length by five to ten centimeters or choke your hands down onto the lower foam grip extension. Lean slightly forward from your ankles while keeping your spine straight to maintain an active center of mass over your feet. Plant your poles closer to your body and use shorter, rhythmic steps to power up the slope with assistance from your upper body.
Descending hills places substantial braking force on your quadriceps and patellar tendons, requiring a different tactical approach. Lengthen both poles by five to ten centimeters and place your palms securely over the rounded tops of the handles. Plant both pole tips slightly ahead of your descending feet to act as stable shock absorbers before your lead heel contacts the ground. Keeping your knees slightly bent prevents harsh joint impact and ensures continuous stability on downhill grades.
Stepping over high curbs, drainage gutters, and broken pavement requires intentional tip placement to prevent accidental tripping. Plant both pole tips securely on the elevated surface before lifting your lead foot over the obstacle. Press firmly through both handles to steady your torso as your trailing leg steps forward onto the sidewalk. Never place pole tips inside deep expansion cracks or storm grates where a stuck tip could twist your arm or bend the shaft.
Tip Selection: Rubber Boots, Pavement Feet, and Carbide Tips
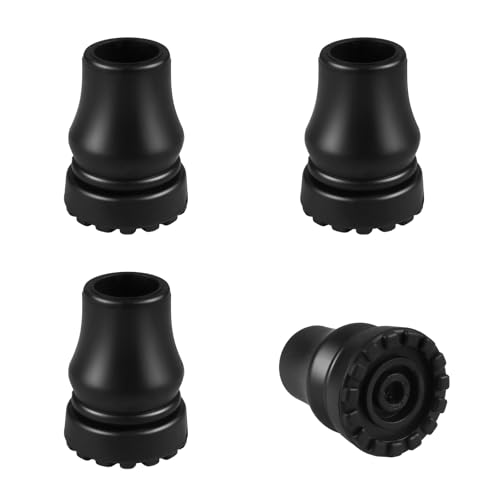
Choosing the correct ground attachment protects your joints from harsh vibration and ensures reliable ground grip. Dense rubber tips or angled Nordic walking boots should always be installed when walking on asphalt, concrete sidewalks, or packed paving stones. The textured rubber compound grips smooth surfaces securely while dampening the sharp shock wave that travels up metal shafts into your wrists and elbows. Rubber tips also prevent noisy clicking sounds that can distract walkers on quiet residential streets.
Venturing onto dirt paths, loose gravel, grass, or icy patches calls for removing the rubber boots to expose the underlying tips. Bare tungsten carbide tips feature sharp, hardened edges that bite directly into compacted soil, shale, and outdoor turf without slipping. These durable steel ends provide biting traction on uneven park ground where rubber tips might slide across loose pebbles. Replace rubber protectors promptly whenever you transition back to concrete to prevent premature carbide wear.
Inspect your rubber tips regularly for signs of friction thinning, cracking, or internal washer puncture. High-quality tips contain an internal steel washer designed to stop the sharp carbide point from punching through the rubber base over time. If you notice the metal tip poking through the bottom rubber tread, replace the tip immediately to maintain safe floor friction. Keep a spare pair of replacement rubber tips in your walking pouch for quick trailside swaps.
Common Technique Mistakes and Practical Corrections
The most frequent beginner mistake involves planting the poles too far forward in front of the body like crutches. Placing pole tips ahead of your lead foot creates an active braking force that halts your forward momentum and jars your shoulder sockets. Focus on keeping the pole shafts angled backward so each plant actively pushes you forward rather than resisting your stride. Trusting the backward push restores natural walking cadence and eliminates unnecessary upper-body braking tension.
Another common mechanical error occurs when walkers move the right pole forward alongside the right foot simultaneously. This unnatural pacing pattern, known as pacing or pass-gait, feels robotic and throws the spine out of balance. If you catch yourself pacing, simply stop walking and let both poles drag behind your feet for ten steps until your natural opposite arm swing returns. Once your natural reciprocal swing feels steady, re-engage the pole plants without forcing the movement.
Clutching the handles with excessive grip pressure frequently leads to hand stiffness, carpal tunnel irritation, and forearm fatigue. Remind yourself periodically to wiggle your fingers and rely on the wrist strap to absorb the pushing force during backward strokes. The handle should guide pole direction while the strap supports the physical workload during forward propulsion. Keeping your fingers relaxed transforms your walk into a fluid, joint-friendly workout that you can sustain for miles.
Distinguishing Fitness Poles from Clinical Mobility Canes
Understanding the strict functional boundary between bilateral fitness walking poles and medical mobility canes protects your personal safety. Walking sticks and trekking poles are engineered for active stability, postural support, and partial joint unloading in mobile individuals. They are not designed or certified to bear direct vertical body weight for non-weight-bearing orthopedic recovery, acute post-surgical rehab, or severe neurological balance deficits. Using fitness poles as medical crutches can lead to sudden tip slippage or structural failure.
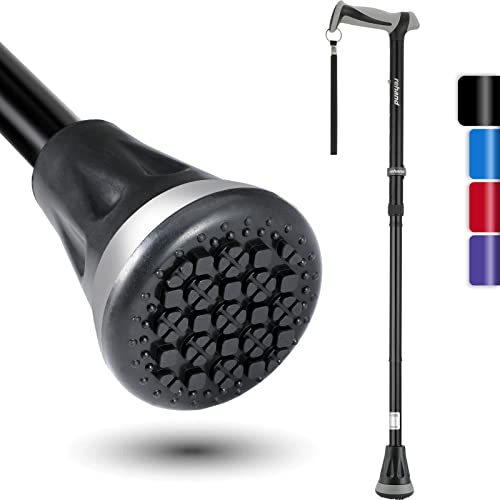
Medical walking canes, quad canes, and offset handle canes provide certified vertical load support with dedicated non-skid bases engineered for indoor floors. A single-point cane or quad base is designed to support 15 to 25 percent of body weight on the side opposite an injured limb under strict medical gait guidelines. Fitness poles lack the heavy static load ratings and broad traction bases necessary for navigating indoor tile, hospital floors, or steep household staircases safely. Individuals recovering from joint replacement surgery should always follow their surgeon’s specific mobility equipment protocol.
Anyone experiencing progressive balance instability, unprovoked stumble events, or severe lower extremity weakness should consult a licensed physical therapist or physician. A formal clinical gait evaluation determines whether a single-point cane, quad cane, or bilateral rolling walker is the safest mobility aid for your daily needs. Fitness poles offer wonderful conditioning benefits for active walkers, but clinical balance deficits demand certified medical equipment prescribed by healthcare professionals.
Collapsible Hardware, Packability, and Travel Readiness
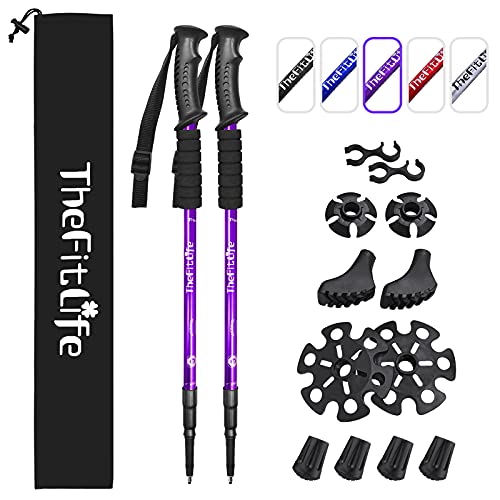
Modern folding walking sticks utilize three-section telescoping shafts joined by high-strength internal cables to maximize portability. High-grade 7075 aluminum alloy tubing provides excellent structural stiffness while keeping the weight of each pole around nine to ten ounces. These three-section designs fold down to roughly 14 inches, slipping easily into standard backpacks, vehicle trunks, or luggage bags. This compact collapsed length makes them ideal companions for neighborhood excursions, weekend park getaways, and airline travel.
Stowing your poles securely during transit prevents bent shafts and damaged locking levers before you reach your walking destination. If you frequently travel with folding poles, consulting a detailed carry on luggage pack guide helps ensure your gear fits cleanly within airline cabin dimensions without damaging internal tension cords. Keeping the protective rubber tip caps installed while packed prevents tungsten steel tips from puncturing luggage fabric or scratching vehicle interiors. Always dry the pole sections thoroughly before folding them away for long-term storage.
Routine Maintenance and Safety Verification
Performing a thirty-second hardware inspection before every outing prevents trailside malfunctions and protects your safety. Check the tension on all cam lever flip locks to verify that each telescoping section resists downward slippage under firm hand pressure. Listen for the distinct audible click of the internal push button locking detent to confirm full mechanical engagement before walking. Inspect the wrist strap adjustment buckle to ensure the webbing stays securely seated without slipping loose under pushing loads.
After walking on damp paths or salty winter walkways, pull the pole segments apart and wipe each aluminum tube with a dry microfiber towel. Moisture trapped inside telescoping tubes can cause internal aluminum oxidation, leading to sticky locking mechanisms or noisy rattling shafts. Keep the internal tension cables free of grit by wiping away dirt before collapsing the sections. Practicing basic preventative maintenance keeps your walking poles operating smoothly, quietly, and safely across hundreds of walking miles.
Building a steady, enjoyable walking routine with dual poles relies on proper posture, relaxed grip technique, and consistent equipment care. Taking time to dial in your elbow height, angle your pole plants backward, and trust your wrist straps unlocks significant joint relief and posture benefits. Whether you stroll along neighborhood sidewalks or explore flat nature trails, walking with poles builds lasting movement confidence with every balanced step.




Write Your Review
No reviews yet. Be the first to share your experience!