


Setting your trekking equipment to the proper height can transform how your body handles rugged trail miles. When you descend steep switchbacks, poles absorb substantial impact that would otherwise strain your knees, hips, and ankles. Even on flat forest paths, an incorrectly sized pole forces your shoulders into unnatural shrugs or leaves your arms dangling without leverage. Dialing in the proper shaft length provides stability across loose gravel, greasy roots, and river crossings.
Learning how to measure for hiking poles ensures that your arms remain in an efficient position to propel you uphill and brace you downhill. Many hikers pair their walking sticks with supportive trail pants for knee comfort to manage long days in high-elevation backcountry terrain. Understanding how to find your baseline height measurement also prevents forearm cramping and palmar blisters from uneven grip pressure. Whether you choose telescoping shafts or tri-fold models, accurate initial setup makes every stride feel balanced and controlled.




Comprehensive Guide on How to Measure for Hiking Poles
Measuring your trekking equipment accurately creates the foundation for joint protection, balance, and efficient trail pacing. When hiking sticks sit at the correct height, your arms absorb downward forces naturally and help drive your body forward. An incorrect measurement can lead to shoulder tension, wrist strain, and unstable footing on uneven terrain. Taking a few minutes to calculate your proper length before hitting the trail prevents unnecessary fatigue on long backcountry trips.
The Fundamental 90-Degree Elbow Baseline
The gold standard for determining trekking pole length starts with the 90-degree elbow rule on level ground. Stand upright on a flat indoor floor or level trail surface while wearing the actual hiking boots or trail runners you plan to use. Bend your elbow so your forearm extends directly forward, creating a clean right angle at the elbow joint. Your forearm should sit parallel to the ground while your upper arm rests comfortably against your side.
Hold the pole grip in your hand with the pole shaft pointing straight down toward the ground. The carbide tip or rubber ferrule should rest firmly on the floor without forcing your shoulder up or pulling your arm down. If your elbow angle opens wider than 90 degrees, the pole is too short and will cause you to lean forward excessively. If your hand sits higher than your elbow, the pole is too tall and will place unnecessary tension across your shoulders and trapezius muscles.
Standing Height Reference and General Sizing Ranges
Hikers who do not have an adjustable pole on hand can estimate their target pole length using overall body height. As a general guideline, hikers standing 5 feet 8 inches or shorter typically need poles adjusted between 39 and 47 inches (100 to 120 centimeters). Hikers measuring 5 feet 9 inches or taller generally benefit from lengths between 45 and 53 inches (115 to 135 centimeters). These baseline numbers offer a dependable starting point before you make subtle trailside adjustments.
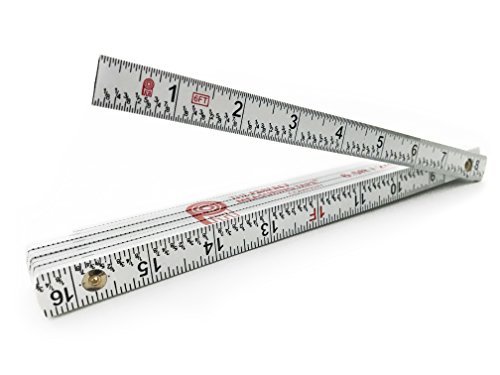
Telescoping aluminum and carbon fiber models, such as the TrailBuddy 3K Carbon Fiber Hiking Poles, frequently provide an expansive adjustment window ranging from 24 to 54 inches. This broad adjustability allows women, men, and seniors of varying heights to find an exact ergonomic fit. When taking manual measurements without a pole, a rigid measuring tool like the Perfect Measuring Tape Co. FR-72 Carpenter’s folding rule helps you record the precise distance from the floor to your palm. Having that exact floor-to-hand measurement eliminates guesswork when setting the initial locking collars.
Individual body proportions also play a significant role in finding your optimal shaft length. People with longer torsos or shorter arms relative to their standing height may need slightly longer poles than standard charts suggest. Conversely, hikers with longer arms might find that a shorter pole setting achieves the desired right-angle elbow bend. Taking the time to verify your arm angle while wearing trail shoes provides a much more accurate fit than relying solely on height charts.
Sizing Tri-Fold Versus Telescoping Pole Designs
Different hiking pole constructions handle length adjustments in distinct ways. Three-section telescoping poles utilize overlapping cylindrical shafts secured by external lever locks or internal twist expanders. Models like the Cascade Mountain Tech Trekking Poles expand from 26 inches to 54 inches, giving you complete freedom to dial in any intermediate length. With telescoping shafts, hikers should adjust both the upper and lower sections by equal amounts to keep the structural tubing balanced and strong.
Tri-fold folding poles operate on an entirely different mechanical framework. Folding models, including the Covacure Hiking Poles Collapsible and Covacure Hiking Poles Collapsible Trekking Poles, use tensioned internal cords to lock three folding segments into a fixed base length while offering a single telescoping upper section for fine-tuning. These designs often provide roughly 20 centimeters of total height adjustment, such as a range from 43 to 51 inches. Because the adjustment range is more focused, hikers must choose the appropriate primary size category before purchasing a folding set.
Packed length also influences how you transport and measure your gear for travel. Telescoping poles collapse to approximately 24 to 26 inches, which fits nicely on pack lash loops but may require full disassembly to pack into standard carry-on luggage. Tri-fold models pack down to less than 14 inches, making them exceptionally compact for stowing inside small daypacks or luggage cases. Understanding these structural differences helps you select a system that matches both your walking posture and your pack storage needs.
Gradient Adjustments for Uphill Climbs and Steep Descents
Your flat-ground 90-degree measurement serves only as a baseline because changing trail gradients require dynamic length adjustments. When you begin ascending a sustained incline, the terrain in front of you rises toward your body. If you leave your poles at their flat-ground setting, you will be forced to plant them high, pushing your hands above your shoulders and causing rapid arm fatigue. Shortening both poles by 2 to 4 inches (5 to 10 centimeters) allows you to plant effectively without overreaching.
Steep downhill descents demand the exact opposite adjustment to provide adequate balance and joint protection. As you step downward, the trail drops away beneath you, meaning your poles must reach further down to make contact before your foot lands. Lengthening your poles by 2 to 4 inches allows you to plant ahead of your body while keeping your torso upright and your knees supported. This adjustment offloads significant braking stress from your quadriceps and patellar tendons during continuous descent.
Sidehill traverses along contouring mountain trails create uneven demands on your left and right arms. In these conditions, the uphill pole should be shortened while the downhill pole is lengthened to keep your shoulders level. Alternatively, poles equipped with an extended lower EVA foam grip, such as the Cascade Mountain Tech Trekking Poles, allow you to choke down on the uphill grip without adjusting the mechanical locks. This secondary grip feature saves valuable trail time when switchbacks constantly alternate your uphill side.
Measuring and Adjusting Wrist Straps for Skeletal Support
Proper strap adjustment is just as critical as shaft length for transferring body weight into the pole. Many hikers mistakenly thread their hands downward through the strap loop, which pinches the wrist and forces an overly tight finger grip. The correct technique requires inserting your hand upward through the bottom of the loop before grasping the handle. This allows the strap webbing to wrap smoothly across the back of your hand and palm swell.
Once your hand is inserted from below, adjust the strap tension so it supports your wrist without cutting off circulation. A properly fitted strap allows you to relax your grip on the handle while still transferring downward body weight through your skeletal frame. Moisture-wicking padded straps, like those found on the TrailBuddy Trekking Poles, help prevent hot spots and wrist chafing during humid summer hikes. If the strap feels too loose, your hand will slide down the grip, effectively shortening your usable pole length.
Measuring External Shaft Diameters for Tips and Accessories
Measuring for hiking poles also involves checking component dimensions when replacing worn trail accessories. The lower segment of most trekking poles narrows to accept specialized baskets, ferrules, and replacement tips. For instance, replacement rubber end covers, such as the Qty: 4pcs 1/2″ (12mm) Small Black Rubber Ferrules, require you to measure the external diameter of the lower tip assembly. If you order the wrong ferrule size, the rubber boot will either fall off in the mud or refuse to slide onto the pole.
Using a composite folding rule or precision caliper ensures you measure the outer shaft diameter accurately before purchasing aftermarket accessories. Rubber tips provide traction on hard asphalt, paved walkways, and slick granite slabs where bare metal tips might skitter uncontrollably. Quality rubber tips also incorporate an internal steel washer to prevent the sharp tungsten carbide flex tip from punching through the rubber base. Swapping between small mud baskets and wide winter snow baskets also relies on matching the threaded attachment points on your lower shafts.
Carbide tips offer exceptional bite on loose dirt, gravel, and muddy trails, but they can cause trail wear and noisy clacking on rock slabs. Slip-on rubber ferrules dampen vibrations and protect fragile natural surfaces along sensitive wilderness corridors. Measuring the lower shaft diameter ensures your protective boots seat snugly and remain secure across varying terrain. Routine inspection of these tips prevents accidental loss during long backcountry adventures.
Backpack Attachment Measurements and Pack Stowage
When you encounter technical rock scrambles or smooth paved road sections, you will need to stow your poles securely on your pack. Using elastic attachments, such as the 4 Pack Black Backpack Hiking Pole Holder Straps, allows you to lash collapsed poles to shoulder straps or pack daisy chains. These elastic cords feature flat lengths around 7.87 inches that stretch over 12.99 inches, accommodating both slim carbon poles and wider aluminum shafts. Tool-free dual-buckle designs allow you to cinch the poles tightly to prevent annoying bouncing or clattering.
Pairing properly measured poles with balanced load distribution improves overall hiking comfort and endurance. When carrying heavy multiday gear, hikers often choose internal frame backpack setups to stabilize their center of gravity while keeping their hands free for pole planting. Stowing your poles neatly along the side of your pack ensures the carbide tips point safely downward away from your neck and face. Taking quick measurements of your pack lash loops ensures your elastic cords hold the poles firmly against the pack frame.
Verification, Clamp Calibration, and Common Setup Errors
After setting your initial height measurements, you must verify the holding power of the locking mechanisms before trusting them with your body weight. External cam lever locks, such as the flip locks on TrailBuddy and Cascade Mountain Tech poles, feature an adjustable tension thumb screw. If the thumb screw is too loose, the telescoping section can slip unexpectedly when you put downward pressure on a steep descent. Tighten the screw until closing the lever requires firm thumb pressure, ensuring the clamp holds securely without crushing the shaft.
One of the most dangerous mistakes hikers make is extending pole sections beyond the printed STOP indicator line. Extending a segment past this boundary leaves too little overlapping tubing inside the joint, which severely compromises structural rigidity. When excessive lateral force or heavy downward pressure is applied, an overextended shaft is prone to bending or catastrophic snapping. Always balance the length between the middle and lower sections so neither segment exceeds its designated extension limit.
Performing a simple downward load test on flat ground confirms that your poles are sized correctly and properly locked. Place both poles on the floor, lean your upper body weight firmly onto the grips, and confirm that your elbows remain near 90 degrees without any shaft slippage. If the locks hold firm and your shoulders feel relaxed, your poles are ready for the trail. Taking the time to dial in your measurements before heading out guarantees maximum stability, joint relief, and trail confidence on every hike.








Write Your Review
No reviews yet. Be the first to share your experience!