


Steep mountain descents with loose scree and repetitive step-downs can place intense compressive pressure on knees, hips, and lower spine joints. Learning how to use leki poles transforms two-legged trail walking into a balanced four-point gait, shifting significant braking shock away from vulnerable lower-body joints. Distributing trail forces into your chest, shoulders, and back muscles not only stabilizes footing across wet river boulders but also creates a steady cadence on strenuous ascents. Pairing stable trekking poles with specialized hiking pants for knee support helps alleviate patellofemoral strain across steep alpine elevation changes.
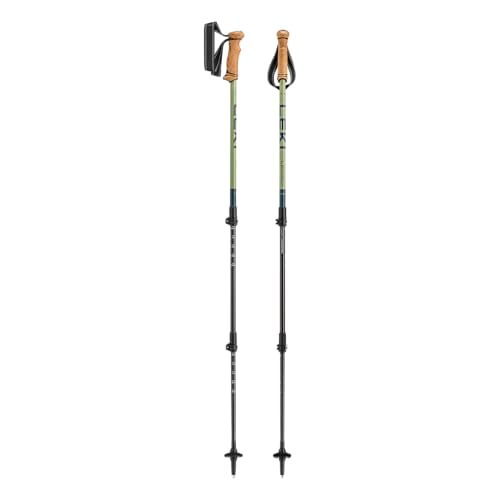
Whether you carry dual telescoping poles like the Makalu Cork Lite or a single walking staff like the Wanderfreund, dialling in the correct mechanical setup is essential before tackling rough trails. Mastering the Speed Lock cam levers, positioning your hands properly through the ergonomic wrist straps, and matching tip accessories to changing trail surfaces prevents sudden shaft slippage and forearm fatigue. By following systematic height calibration and proven biomechanical techniques, hikers can maximize trail efficiency, protect vulnerable joints, and maintain dependable balance on every backcountry mile.


Master Guide: How to Adjust, Grip, and Maintain LEKI Trekking Poles
Using trekking poles effectively requires more than simply gripping the handles and walking forward. To get the maximum benefit from your LEKI equipment, you must configure shaft length to your body geometry, master the locking hardware, and utilize wrist straps to transfer downward forces into your upper skeletal frame. Proper form minimizes upper-body fatigue while absorbing substantial impact that would otherwise strain your lower joints. Following a structured setup process ensures your poles remain dependable tools on every ascent and descent.
Sizing Baseline Length Using the 90-Degree Elbow Angle
Establishing the correct baseline pole length begins on flat ground while wearing your regular trail footwear. Stand upright with your shoulders relaxed and bend your elbows at a 90-degree angle so your forearms rest parallel to the ground. Hold the pole grips naturally with the tips resting on the floor directly beside your feet. The distance from the ground to the top of the grip represents your neutral height setting, which serves as the foundation for all subsequent trail adjustments.
Most three-section LEKI poles feature etched centimeter markings along the upper and lower shaft sections. For optimal structural rigidity and balance, distribute the extension evenly between the middle and lower sections rather than extending one section to its limit while leaving the other collapsed. Never pull any telescoping section past the clearly marked stop line. Exceeding this boundary leaves insufficient shaft overlap inside the joint collar, which can cause severe shaft bending or joint failure under downward body weight.
Adjusting Length for Ascents, Descents, and Sidehill Traverses
Trail elevation constantly shifts, meaning your neutral 90-degree baseline setting must adapt as the slope steepens. When hiking uphill on sustained grades, shorten both poles by 5 to 10 centimeters depending on the pitch of the mountain. Shortening the shafts prevents you from overreaching, keeps your shoulders in a neutral position, and allows you to push downward through your lats and core to propel your body upward. Overly long poles on an ascent force your arms too high, which accelerates shoulder fatigue and reduces upward drive.
Steep downhill sections require the opposite adjustment to protect your knees and maintain stability. Lengthen both poles by 5 to 10 centimeters beyond your baseline flat-ground setting. This additional reach lets you plant the tips ahead of your stride without leaning your torso forward over steep drop-offs. When contouring across a slope during a sidehill traverse, shorten the uphill pole and lengthen the downhill pole to keep your posture centered.
Operating and Calibrating LEKI Speed Lock Lever Mechanisms
Modern LEKI designs utilize external cam lever systems like Speed Lock Plus and Speed Lock 2 to secure shaft sections. To adjust pole length, flip the lever open until it clears the collar housing, slide the section to your desired centimeter mark, and snap the lever back down flush against the shaft. The lever should close with firm thumb resistance. If the clamp closes too loosely, the shaft will slip downward when you place weight on it during a hike.
Calibrating holding tension is straightforward and requires no tools in the field. When the cam lever is open, turn the textured dial or thumb screw clockwise by a quarter turn to increase clamping force. Close the lever again to test the tension, repeating the process until the lever snaps shut firmly without requiring excessive force. Avoid over-tightening the screw, as excessive clamping torque can crack the composite collar or strip the internal threads.
Always verify lock security before stepping onto the trail or beginning a steep descent. Place the pole tips on the ground, grip the handles, and press your full downward upper-body weight into the shafts. If the sections telescope inward even slightly, reopen the lever, tighten the adjustment dial another quarter turn, and test the downward hold again. This simple load test prevents sudden pole collapse when stepping off high trail boulders or crossing streams.
Operating and Calibrating SLS Internal Twist Lock Mechanisms
Certain compact models, including the LEKI Super Micro, utilize an internal Super Lock System (SLS) rather than external cam levers. Internal twist locks rely on an internal expansion plug that spreads against the inner shaft walls when rotated. To adjust an SLS pole, hold the upper shaft firmly with one hand while turning the lower section counterclockwise to loosen the expander. Once loose, adjust the section to your required length, and turn the lower shaft clockwise until the internal mechanism locks tight.
If an internal twist lock spins freely without catching, the expander plug may have vibrated loose or accumulated fine trail dust. To fix this, pull the shaft sections completely apart and inspect the colored plastic expansion wedge on the end of the inner rod. Wipe away any dry silt or trail grime, gently spread the threaded expander wedge with your fingers to restore contact friction, and reinsert the shaft. Twist clockwise until resistance builds, and never use spray lubricants inside the shaft because oil destroys the friction needed for internal locks to grip.
Strap Mechanics: The Upward Hand Insertion Technique
Wrist straps are engineered to bear downward body weight rather than merely keep you from dropping your poles. To utilize straps properly, bring your hand up through the bottom of the webbing loop from beneath, rather than sliding down through the top. Once your hand passes through the opening, grasp the grip handle along with both sides of the strap webbing held flat against your palm. This upward entry allows the strap to cradle the base of your palm and wrist joint smoothly.
When straps are loaded correctly, you can open your fingers and push directly into the webbing loop without clenching your fist around the handle. This relaxed grip reduces forearm fatigue and prevents hand cramps on high-mileage backcountry outings. Adjust the strap tension so it supports your wrist securely without cutting off circulation or binding your skin. During technical scrambling or boulder hopping, slip your hands out of the straps completely so you can drop the poles instantly if you need to catch yourself during a fall.
Utilizing Grip Ergonomics Across Aergon Air, Cor-Tec, and Aergomed Handles
LEKI designs its handles to match specific walking and trekking styles. The Aergon Air grip found on models like the Makalu Cork Lite combines natural cork with an ergonomic forward tilt that keeps your wrist in a neutral anatomical alignment. Natural cork absorbs hand perspiration and molds slightly to your unique grip profile over time, preventing hot spots and blisters during hot summer treks. The rounded egg-shaped grip head also provides a comfortable resting surface when palming the top of the pole on steep descents.
Other trekking models feature EVOCON Cor-Tec grips made from a durable cork and composite blend, offering robust weather resistance and comfortable cushioning. Models equipped with extended foam sleeves beneath the main handle allow you to choke down on the pole during short, steep pitches without stopping to readjust the Speed Lock levers. This feature provides quick versatility when undulating trail terrain changes too rapidly for frequent mechanical length adjustments. Choking down temporarily preserves your momentum and keeps your shoulders relaxed during brief uphill surges.
For hikers who prefer cane-style balance support, single walking staffs like the Wanderfreund High Fives and Wanderfreund Makalu feature the Aergomed grip. This broad, T-shaped cork or composite head rests directly in the palm, delivering direct downward weight-bearing stability for urban travel or moderate walking trails. Sizing an Aergomed handle follows the same 90-degree forearm rule, but users bear weight directly through the palm center rather than relying on wrist strap suspension. This ergonomic shape offers reliable security for travelers navigating uneven cobblestones or recovering from lower-limb injuries.
Selecting Terrain Attachments: Carbide Flex Tips, Baskets, and Rubber Road Tips
The bottom tip assembly dictates how your pole interacts with different ground surfaces. LEKI trekking poles come standard with Flexible Carbide Tips engineered from hard tungsten carbide housed in a flexible plastic jacket. This design can flex up to 30 degrees to prevent shaft damage if the tip catches in a rocky crevice. Carbide points bite securely into hardpack dirt, wet granite, and ice, making bare carbide the standard choice for technical backcountry trails.
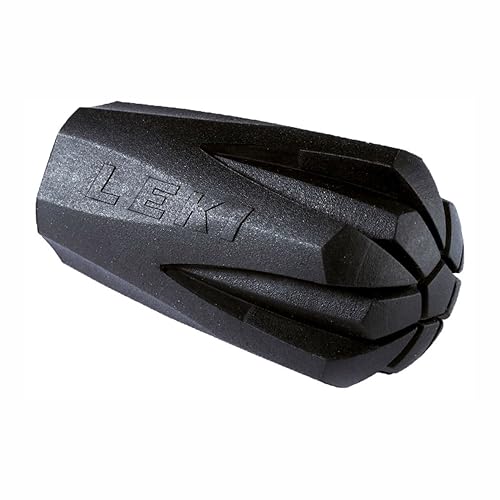
When walking on paved asphalt, concrete paths, or indoor flooring, press vulcanized rubber walking tips over the carbide points. Bare metal tips slip, chatter, and wear down prematurely on hard asphalt while creating unnecessary trail noise. Slip-on rubber tips provide high-friction grip on slick pavement and protect fragile stone or historic cobblestone paths during travel. Remove the rubber caps before entering muddy or unpaved dirt trails, as soft mud will easily pull slip-on rubber tips off the shaft.
Basket selection also influences stability across varied terrain. Low-profile trekking mud baskets prevent the pole tip from sinking too deep into soft dirt, scree, and marshy terrain while avoiding brush snags. Wide winter snow or powder baskets distribute downward pressure over deep snowpacks to maintain flotation for four-season snowshoeing and mountaineering. Both basket types thread directly onto the flex tip housing and can be swapped by hand without specialized tools.
Biomechanics on the Trail: Downhill Braking and Rhythm Control
Effective pole usage relies on fluid, alternating coordination between your arms and legs. On flat and rolling terrain, plant the right pole tip simultaneously with the strike of your left heel, and plant the left pole with your right heel. Keep the poles angled slightly backward so each plant provides subtle forward propulsion rather than acting as a brake. Maintain a relaxed swing, allowing your shoulders and core to guide the poles forward in a natural cadence.
Steep downhill hiking requires deliberate braking biomechanics to relieve compressive strain on your knees and quadriceps. Plant both poles slightly ahead of your feet on steep step-downs, transferring a portion of your body weight through your arms and core before your foot makes contact with the ground. This braking plant dampens the jarring impact force experienced by patellofemoral joints. Carrying heavy backpacks with dedicated frame support increases downward trail forces, making active pole braking essential for long-term knee preservation.
When crossing swift rivers or navigating slick boulder fields, use your poles to maintain three points of contact at all times. Plant both poles firmly into the stream bed or rock surface before moving a single foot, verifying that the carbide tips have a solid bite before shifting your balance. Keep your pole tips away from direct gaps between boulders where wedging forces could bend the lower shaft. Deliberate, synchronized placement provides the balance confidence needed to tackle unpredictable backcountry terrain safely.
Shaft Materials and Load Dynamics: Aluminum HTS vs PRC 1000 Carbon
LEKI constructs shafts from either heat-treated aircraft aluminum, such as HTS 6.0 and HTS 6.5, or carbon fiber composite like PRC 1000. Aluminum shafts offer exceptional ductile toughness and high bend resistance, making them well-suited for rugged alpine scree and multiday backpacking trips. If an aluminum section sustains a heavy strike or minor bend, it often bends slightly rather than snapping catastrophically, allowing you to finish your trip safely. Pairing durable aluminum poles with lightweight trail hiking pants keeps your overall trail weight balanced without sacrificing gear resilience.
Carbon fiber models, such as the Legend Black Carbon, prioritize ultralight swing weight and superior trail vibration damping. Carbon fibers naturally absorb high-frequency trail vibrations, reducing forearm fatigue and wrist strain over long trail days. However, carbon shafts exhibit high axial strength but lower tolerance to lateral shear forces. If a carbon shaft wedges between two granite boulders and your body weight twists sideways, the carbon weave can snap suddenly. Understanding your shaft material allows you to navigate rocky terrain with appropriate care.
Post-Trail Maintenance, Cleaning Silt, and Storage Practices
Regular post-hike maintenance prevents joint seizure and ensures your LEKI poles remain reliable for years of trail use. After returning from a wet or dusty hike, unlock all Speed Lock levers or SLS twist locks and pull the shaft sections completely apart. Fine trail grit and river silt can accumulate inside the telescoping collars, grinding down the metal surfaces and diminishing clamping friction. Wipe each aluminum or carbon section down with a clean, dry microfiber cloth to remove dirt, mud, and mineral deposits.
Allow all disassembled shaft sections to dry completely before reassembling them for storage. Trapping water inside aluminum shafts can cause galvanic oxidation and white corrosion powder that seizes the joints permanently. Never apply grease, WD-40, silicone spray, or petroleum lubricants to the shafts or locking mechanisms, as oils eliminate the friction required to hold clamp tension. Store your poles with the Speed Lock levers left open to relieve long-term mechanical stress on the composite clamp collars.
Mastering these operational techniques ensures your LEKI trekking poles deliver dependable support on every hike. Taking the time to dial in proper height adjustments, verify lever clamp holding power, and utilize your wrist straps correctly transforms your walking efficiency and protects vulnerable joints. Treat your poles with routine cleaning and dry storage after each outing, and your equipment will remain trail-ready for countless seasons of mountain exploration.








Write Your Review
No reviews yet. Be the first to share your experience!