


Engaging your upper body during a brisk walk transforms a casual stroll into an efficient, full-body cardiovascular workout. Learning how to use nordic poles allows fitness walkers to activate the latissimus dorsi, triceps, and abdominal core while simultaneously easing repetitive impact on the hips and knees. When paired with suitable footwear and protective hiking apparel, this rhythmic workout encourages an upright posture that counteracts the forward slouch caused by sedentary desk routines. The movement mimics cross-country skiing across dry asphalt, park paths, or dirt trails.
Unlike standard backcountry trekking where poles are held vertically to brake on steep descents, Nordic walking relies on an active rearward thrust to propel you forward. Mastering the correct technique requires understanding how to adjust your pole length, position the specialized glove straps, and orient the beveled rubber feet against hard pavement. Using quality equipment from established makers like York Nordic or the American Nordic Walking System ensures smooth propulsion without excessive joint vibration. Once you establish the natural arm swing and open-hand release, your stride becomes longer, smoother, and significantly more energetic.
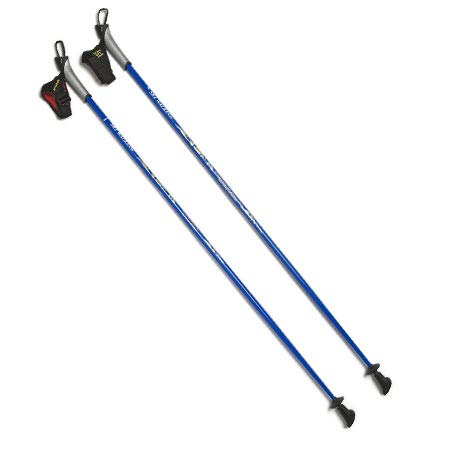


Mastering Nordic Walking Technique, Sizing, and Field Setup
Proper technique forms the foundation of every successful Nordic walking routine, transforming an ordinary walk into a dynamic whole-body exercise. Understanding how to use nordic poles begins with grasping the distinct mechanical differences between fitness walking and mountain trekking. When you coordinate your arm swing with your natural walking cadence, you unlock greater cardiovascular engagement without overloading your lower joints. This guide outlines everything you need to know about setup, stride mechanics, accessory management, and long-term pole maintenance.
The Biomechanics of Nordic Walking Versus Standard Trekking
Many walkers assume that all walking sticks function identically, but Nordic walking serves a completely different biomechanical purpose than wilderness trekking. Backcountry trekking poles are designed primarily for balance, stability, and downhill braking, which requires planting the poles vertically in front of your body. In contrast, Nordic walking poles are engineered for rearward propulsion, planting at an approximate 45-degree angle behind your body to drive you forward. This fundamental distinction alters how your skeletal structure and upper musculature absorb and transfer mechanical force.
By driving the pole backward rather than downward, you recruit the large pulling and pushing muscles across your upper back, shoulders, and arms. The continuous activation of the triceps, latissimus dorsi, and posterior deltoids elevates heart rate and calorie expenditure compared to normal walking without increasing perceived exertion. At the same time, distributing a portion of your body weight through the shafts lessens compressive loads across the knees, ankles, and lumbar spine. This propulsion-first dynamic makes the activity exceptionally beneficial for conditioning, joint rehabilitation, and posture correction.
Calculating the Correct Pole Length for Proper Arm Angles
Achieving the correct pole height is essential for maintaining efficient biomechanics and avoiding upper trapezius strain. The classic baseline calculation for Nordic walking involves multiplying your barefoot height in centimeters by 0.68. For a simple visual check, stand upright on a flat surface while wearing your walking shoes and hold the poles vertically at your sides. Your elbow should rest comfortably at a 90-degree angle, with your forearm parallel to the ground.
Telescoping poles, such as the two-piece aluminum models from York Nordic and FitTrek, feature printed measurement lines that make fine adjustments straightforward. If you frequently walk on paved streets, set your height with the rubber fitness paws installed, as their thick bases slightly elevate the pole shaft. Beginners or individuals recovering from joint injuries often benefit from setting the poles two to three centimeters shorter to reduce shoulder elevation. Conversely, experienced fitness walkers seeking a more aggressive push-off often lengthen their shafts slightly to generate greater forward drive.
Fixed-length, one-piece shafts like the custom-sized SWIX carbon poles from the American Nordic Walking System offer zero joint vibration and exceptional rigidity. Because these single-piece models cannot be adjusted on the fly, getting your exact measurement confirmed prior to purchase remains vital. If your height falls between standard sizing intervals, choosing the slightly shorter length helps prevent awkward shoulder shrugging. A properly sized pole ensures that your hands swing freely past your hips without snagging on the ground.
Calibrating and Using Nordic Glove-Style Straps
The defining feature of dedicated Nordic equipment is the specialized harness strap, which functions more like a supportive glove than a simple hiking loop. These ergonomic wraps encircle the palm, pass between the thumb and forefinger, and secure firmly around the wrist with broad hook-and-loop fasteners. Most designs are anatomically shaped and labeled specifically for the left or right hand. Securing the strap snugly against the back of your hand ensures that pushing forces transfer directly through your skeletal structure rather than straining your finger joints.
Unlike trekking straps that require you to maintain a continuous grip on the handle, Nordic glove straps allow you to completely open your fingers at the end of each stride. As your arm pushes backward, your palm presses firmly into the broad webbing of the strap, propelling your body forward even when your fingers release the cork grip. Quick-release button mechanisms, highlighted on York Nordic and FitTrek models, allow you to click the strap out of the grip quickly when you need to tie a shoe or grab a water bottle. This hands-free convenience prevents the frustration of unfastening Velcro cuffs repeatedly during your training route.
When threading your hand into the harness, position the base of the strap across the fleshy heel of your palm just above the wrist crease. Fasten the hook-and-loop closure firmly enough to eliminate slack, but avoid overtightening to preserve circulation. If you notice numbness in your fingers or chafing around your thumb web, loosen the tension slightly or adjust the strap angle. Proper strap calibration ensures that the pole follows the movement of your hand naturally like an extension of your forearm.
The Fundamental Stride: Plant, Push, and Release Mechanics
Executing the signature Nordic stride requires coordinating an alternating cross-pattern movement that mirrors natural walking. When your left foot steps forward, your right arm swings forward from the shoulder, keeping the elbow relaxed and slightly extended. The pole tip contacts the ground roughly opposite your trailing heel, pointing backward at an acute 45-degree angle. Planting the tip behind your center of gravity ensures that every ounce of upper-body pressure propels you forward rather than checking your forward momentum.
The push phase begins the moment the pole makes contact with the ground surface. Instead of pulling with your biceps, drive through your triceps, latissimus dorsi, and core to push the shaft down and back. Keep your chest open, your shoulder blades gently retracted, and your gaze directed toward the horizon. This deliberate backward thrust lengthens your stride naturally, allowing your hips to rotate slightly and engaging your gluteal muscles more thoroughly than ordinary walking.
As your pushing hand passes behind your hip, open your fingers fully to execute the release phase. Allowing your hand to open lets the pole extend straight backward in line with your arm while the glove strap maintains total control of the shaft. Opening the hand prevents forearm muscle cramping and relieves pressure on the median nerve in the wrist. Once the push-off finishes, your arm naturally swings forward again, your fingers close smoothly around the handle, and the next cycle begins without hesitation.
Orienting Rubber Asphalt Paws Versus Carbide Trail Tips
Nordic walking poles utilize specialized tip systems engineered for distinct walking surfaces. For asphalt streets, paved greenways, and indoor tracks, you must attach the beveled rubber paws, sometimes referred to as asphalt boots or fitness feet. Unlike round, symmetrical hiking tips, Nordic rubber feet have a pronounced angled sole designed to maintain maximum surface contact during the rearward push-off. Orienting the paw correctly is crucial; the toe of the rubber boot must always point backward away from your walking direction.
When the rubber paw is pointed backward, the beveled tread sits flat against the pavement when the shaft reaches its 45-degree planting angle. If you accidentally rotate the boot forward, the rounded heel strikes the ground first, causing the pole to slip unpredictably across the concrete. The high-density vulcanized rubber dampens harsh impact shocks that would otherwise transmit into your wrists and elbows. Furthermore, rubber feet silence the sharp clicking noise of metal tips on sidewalks, making your exercise routine quieter and more pleasant.
When transitioning from pavement to soft grass, forest dirt, packed gravel, or sandy paths, remove the rubber paws to expose the tungsten carbide spikes. Models from American Nordic Walking System and FitTrek include durable carbide tips designed to bite securely into unpaved terrain. The bare carbide tip penetrates topsoil and prevents skidding when pushing against loose dirt or wet pine needles. Store your rubber paws in an accessible pocket or small pouch so you can swap them quickly as path surfaces change.
Shaft Materials: Carbon Fiber Vibration Damping Versus Aluminum Toughness
Shaft construction directly influences how your arms feel after walking several miles across hard surfaces. Carbon fiber shafts, featured prominently in the SWIX models offered by the American Nordic Walking System, provide superior vibration absorption. The composite weave dissipates high-frequency shockwaves generated by continuous ground impacts, significantly reducing stress on sensitive wrist, elbow, and shoulder joints. Pairing high-damping carbon poles with breathable lightweight hiking pants allows fitness walkers to maintain a brisk pace without feeling weighed down by bulky gear.
Aircraft-grade 7075 aluminum shafts, like those used in York Nordic poles, provide dependable bend resistance and high tensile strength. Aluminum handles accidental lateral impacts and knocks against sidewalk curbs without the splintering risks associated with composite tubes. While aluminum conducts slightly more vibration than carbon fiber, it provides exceptional durability for walkers of all body weights. Aluminum poles also represent an accessible entry point for beginners who want a rugged setup that withstands daily neighborhood use.
Grip composition also contributes substantially to your overall comfort and thermoregulation during long fitness sessions. Natural cork grips, featured across several York Nordic, FitTrek, and SWIX models, absorb hand perspiration while molding subtly to the contour of your palms over time. Synthetic foam or contoured rubber grips provide reliable all-weather insulation during cold morning walks, but cork remains the premier choice for preventing hot spots and blisters in warm weather. A comfortable, breathable grip encourages the relaxed hand movement necessary for proper open-palm technique.
Adjusting Technique on Inclines, Declines, and Variable Slopes
Hills require subtle technical modifications to maintain optimal propulsion and joint protection. When climbing an uphill slope, lean your entire body forward slightly from the ankles while maintaining a straight spine. Shorten your walking stride slightly, increase your arm cadence, and plant the poles firmly behind you to drive your body upward. The extra propulsion from your latissimus dorsi and triceps offloads substantial mechanical work from your quadriceps and calves, allowing you to sustain your pace without premature muscular fatigue.
Descending hills requires shifting your mechanics from rearward propulsion to controlled stabilization. On moderate downhills, you can continue using a gentle propulsion push, but steep gradients demand bringing the poles forward to assist with braking. When walking down steep terrain, grip the handles more firmly and place the tips slightly ahead of your feet to help absorb downhill impact forces. This temporary adjustment protects your patellofemoral joints from excessive pounding and provides steady balance on loose gravel or wet pavement.
Traversing uneven dirt paths, parks, or rolling terrain requires extra vigilance regarding tip placement and swing clearance. On mixed terrain, wearing supportive outdoor backpacks ensures your hydration and essentials remain stable without throwing off your rhythmic arm swing. Keep your shoulders relaxed and avoid swinging the poles too high, which can cause the tips to snag on tree roots or tall grass. Adjusting your pole angle to match changing slope angles keeps your stride consistent and secure.
Correcting Common Beginner Mistakes
The most frequent error new Nordic walkers commit is gripping the handle tightly throughout the entire movement. Clenching the grip continuously creates excessive tension in the forearms, which can lead to elbow tendonitis and wrist fatigue. Remember that the specialized glove strap is designed to bear your pushing force, allowing your fingers to relax completely behind your hip. Trusting the strap webbing to support the pole takes practice, but it is the single most important step toward mastering the open-hand technique.
Another common mistake involves planting the pole tips too far forward in front of the body. When you plant the tip ahead of your lead foot, the pole acts as a brake, stalling your momentum and jarring your shoulder joint. The pole must always angle backward, contacting the ground behind your front foot at roughly a 45-degree angle. If you find yourself planting forward, slow down, let the poles drag behind you for several strides, and gradually reintroduce the rearward thrust.
Beginners also frequently misalign their rubber asphalt paws, pointing the beveled toe forward or sideways. A backward-facing boot ensures that the textured tread bites the asphalt squarely, providing predictable traction on every push-off. Check your tip orientation visually before starting your walk, especially after swapping between dirt and paved surfaces. Taking a moment to align your boots properly prevents unexpected slips and ensures maximum power transfer through the stroke.
Cleaning, Lock Calibration, and Long-Term Storage
Regular maintenance ensures that your Nordic poles remain safe, silent, and structurally sound across hundreds of miles of use. If you use telescoping poles, periodically disassemble the shaft sections to wipe away road dust, fine grit, and moisture. Allowing damp aluminum shafts to sit assembled in a closet can lead to internal oxidation and white powder buildup that jams the locking collars. Never use petroleum-based lubricants or oils inside telescoping tubes, as grease destroys the friction needed for secure clamping.
External lever flip locks, such as the mechanisms on York Nordic and FitTrek poles, require occasional tension calibration. If a telescoping section slips under downward pressure, open the lever clamp and tighten the small metal thumb screw by a quarter turn. Close the lever and test the hold by placing full upper-body weight onto the pole on a carpeted floor. The lever should close with firm thumb resistance without requiring excessive force that could crack the composite clamp housing.
Inspect your rubber asphalt paws regularly for uneven tread wear, especially along the rear beveled edge. Worn paws lose their grip on smooth sidewalks and should be replaced promptly with fresh fitness feet to maintain joint-protecting shock absorption. Store your poles in a dry, temperate environment away from direct sunlight, leaving adjustable lever clamps unfastened to relieve tension on the internal hardware. With proper setup, mindful technique, and routine maintenance, your Nordic poles will deliver years of dependable fitness and joint relief.








Write Your Review
No reviews yet. Be the first to share your experience!