


Setting up an ultralight shelter in unpredictable backcountry weather requires dependable vertical support that can withstand shifting winds and sudden downpours. Backcountry enthusiasts frequently wonder how to make tarp poles when standard trees are out of reach or when minimizing base weight requires multifunctional equipment. Dual-purposing trekking poles or creating modular shelter uprights allows you to pitch versatile A-frame or lean-to setups across open ridgelines. When trekking across varied terrain with a supportive iron frame hiking backpack, carrying versatile gear keeps your load manageable without sacrificing camp stability.
Whether you decide to craft homemade uprights from hardware conduit or adapt hiking poles with protective caps, understanding vertical load distribution is critical. High winds exert significant lateral shear forces on shelter poles, requiring dependable locking collars and sturdy ground anchors. Exploring commercial telescoping designs alongside improvised field methods gives you a clear understanding of wall thickness, push-button locks, and tension cord stability. Mastering the fundamentals of shelter upright construction guarantees your campsite stays taut, dry, and secure throughout the night.


Everything You Need to Know About How to Make Tarp Poles and Reliable Shelter Uprights
Pitching a sturdy tarp shelter without nearby trees requires rigid, dependable upright poles that can handle heavy tension. Knowing how to make tarp poles allows you to adapt existing hiking gear or fabricate custom supports for camping, backpacking, and outdoor shade setups. Improvised uprights must manage downward compression, lateral wind sway, and fabric friction without slipping or puncturing expensive waterproof materials. Understanding the differences between field-modified hiking poles, homemade DIY tubing, and dedicated telescoping aluminum poles ensures you select the safest configuration for your backcountry environment.
Repurposing Hiking Poles as Functional Tarp Uprights
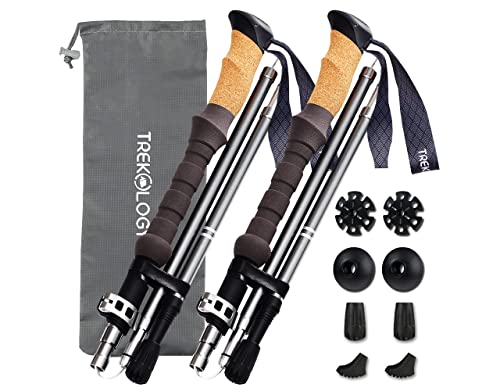
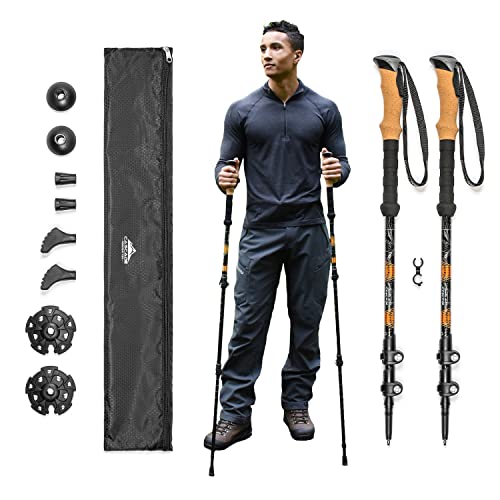
Standard trekking poles provide an immediate, ultralight solution for pitching tarps because they are already present in your pack. To convert hiking poles into shelter uprights, position the handle either directly against the ground or upward into the tarp apex depending on the shelter style. Placing the rubber grip upward provides a broad, blunt surface that minimizes localized pressure against silnylon or polyurethane fabrics. If the pole tip must insert into a corner metal grommet, secure the carbide tip firmly through the ring and anchor the base using guyline tension.
When your shelter configuration demands greater headroom than a single trekking pole can offer, you can lash two poles together to extend their total height. Overlap the lower shaft sections by at least six to eight inches to maintain structural rigidity under vertical compression. Bind the overlapping shafts firmly using polyurethane ski straps, heavy-duty hook-and-loop fasteners, or static utility cord with friction hitches. Ensure the external lever locks on both poles are tightened properly with thumb screws so the telescoping sections do not slide downward under the combined weight of wind and rain.
Improvising uprights from hiking poles works exceptionally well for A-frame tarps, half-pyramid shelters, and lean-to awnings. However, you must avoid applying severe lateral shear force against carbon fiber or thin aluminum trekking poles when tightening your ridge line. Trekking poles are engineered primarily for axial downward loading, meaning sideways deflection from gusty crosswinds can cause thin tubes to bend or fracture. Always angle your primary guylines outward at forty-five degrees to divert wind stress away from the pole shaft and down into the ground stakes.
Building Custom DIY Tarp Poles Using Hardware Conduit
If you prefer a dedicated homemade setup for vehicle camping or base camp shelters, you can build custom poles from hardware conduit or aluminum tubing. Electrical metallic tubing, commonly called EMT conduit, offers high bend resistance and structural rigidity at a very modest financial investment. Anodized aluminum tubing provides a much lighter alternative for backpackers who want rigid vertical support without the heft of steel. Select tubing with an outer diameter between three-quarters of an inch and one inch to balance packable weight against wind deflection resistance.
To build a multi-section modular pole, cut your tubing into uniform lengths between twenty-four and thirty inches using a rotary pipe cutter. Deburr the inner and outer cut edges thoroughly with a round metal file to eliminate sharp edges that could slice cordage or hands. Fit interior aluminum connector sleeves into the top end of each lower section to create snug slip joints. You can drill matching holes and install push-button spring detent clips, allowing the sections to snap securely together without separating during high winds.
Finish your homemade poles by installing specialized hardware at both the ground end and the shelter apex. Insert a heavy-duty rubber crutch tip or chair leg foot on the bottom section to prevent dirt infiltration and stop the pole from sinking into soft mud. At the top end, press-fit a solid wooden dowel or aluminum plug, then thread a stainless steel bolt or metal carriage pin upward to interface with tarp grommets. Wearing durable, lightweight hiking pants with reinforced tool pockets makes the measuring, cutting, and assembly process much easier in your home workshop.
Structural Load Dynamics and Wind-Resistant Tubing Profiles
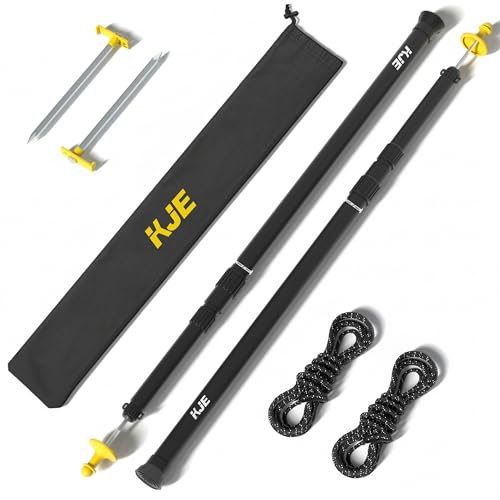
Tarp poles endure complex forces that combine steady axial compression from guyline tension with unpredictable dynamic loads from shifting gusts. A pole with insufficient wall thickness will bow outward in the middle, creating slack across the tarp fabric and allowing water to pool. Modern commercial telescoping tarp poles frequently utilize thickened aluminum tubes with outer diameters reaching 1.26 inches, or 32 millimeters, on their primary base sections. This wider diameter drastically improves bending resistance compared to standard hiking pole shafts that usually measure under three-quarters of an inch.
Telescoping adjustment systems must also prevent vertical collapse when saturated canvas or heavy rain increases the overall downward load. Basic friction-based twist locks can slip if trail dust, sand, or moisture enters the internal expansion plug. Higher-performance designs integrate dual-layer locking collars or mechanical push-button detents that drop into precisely spaced positioning holes. Systems featuring push-lock holes eliminate slipping entirely because the hardened metal pin acts as a direct mechanical stop against downward movement.
When evaluating materials, aviation-grade aluminum alloys deliver superior strength-to-weight ratios while resisting rust and outdoor corrosion. Steel conduit offers immense strength for heavy vehicle awnings and stationary glamping shelters, though its heft makes it impractical for foot travel. Lightweight aluminum tubing, such as 0.75-inch or 1.26-inch extruded alloy, strikes a practical balance between portability and structural survival in open terrain. Maintaining overlapping section length inside telescoping joints further fortifies the pole against bending when wind speeds increase.
Protecting Shelter Fabrics with Caps and Grommet Interfaces
One of the most frequent mistakes when using improvised or homemade poles is allowing sharp metal edges to contact delicate tarp textiles. Silnylon, polyester, and polyethylene can puncture easily when pulled tight over an unprotected pole tip under high wind tension. Purpose-built tarp poles solve this problem by incorporating rounded silicone or rubber protection caps that spread downward pressure across a wide surface area. These bulbous caps measure up to two inches in diameter, preventing the pole apex from punching through seamless fabric corners or custom ridge lines.
Glow-in-the-dark protection caps provide an added advantage around backcountry campsites by identifying pole locations during night navigation. A glowing cap prevents campers from walking into low-hanging tarp eaves or tripping over guyline attachment points in pitch darkness. Additionally, specialized dielectric protection caps offer insulation benefits when setting up tall metal uprights in exposed, stormy environments. While no pole cap can eliminate severe atmospheric lightning hazards, non-conductive rubber barriers reduce static discharge around structural contact points.
When your tarp is fitted with brass or aluminum corner grommets, verify that the pole pin matches the inner diameter of the grommet hole. A pin that is too thick will strain the metal ring, while a pin that is too thin will wobble and cause premature fabric wear around the reinforced corner. Slide the tarp grommet over the upright pin, place the guyline loop on top of the grommet, and cap the entire assembly with a rubber stopper. This sequence ensures the guyline pulls directly against the structural pole rather than peeling the grommet away from the fabric hem.
Guyline Geometries and Base Anchoring Systems
No tarp pole can remain standing without an accurately balanced network of tensioned guylines and solid ground stakes. For an A-frame or ridge pole setup, run two guylines from each main upright outward at approximately forty-five-degree angles to form a stable tripod geometry. Tension these cords using aluminum tensioners or taut-line hitch knots until the fabric displays crisp, wrinkle-free lines without overstraining corner stitching. Pulling guylines taut distributes wind gusts into the ground instead of focusing bending stress directly on the center of the pole shaft.
Base stability is equally crucial because wind vibrations and ground softening can cause pole feet to walk or kick out. Using dedicated base fixing clasps or pole holder anchors provides a dedicated metal eyelet that pins the pole foot firmly to the soil. Devices such as lightweight anchor clasps connect the bottom of the pole directly to a heavy ground stake, eliminating horizontal displacement on wet grass or slick gravel. When securing your shelter footprint across challenging downhill descents, wearing supportive knee hiking pants helps protect joints while kneeling to drive stakes into compacted earth.
In loose sand or deep snow where standard metal stakes fail to hold tension, utilize deadman anchors or heavy field rocks. Tie your guyline around a sturdy branch, bury it horizontal to the pull angle, and pack the soil firmly above the anchor point. When setting poles on solid bedrock where stakes cannot penetrate, anchor the base using heavy flat stones stacked securely around the rubber foot. Keeping the base immobilized ensures your upright remains perfectly vertical, preserving maximum load capacity throughout the storm.
Comparing DIY Builds to Commercial Telescoping Tarp Poles
Deciding between building homemade tarp poles and purchasing manufactured telescoping poles comes down to portability, adjustment range, and intended shelter use. Homemade conduit poles are inexpensive and customizable, making them popular choices for stationary campsite awnings and patio sun shades. However, fixed-length conduit poles do not collapse compactly, making them cumbersome to strap onto backpacks or fit into smaller vehicle trunks. Factory telescoping models collapse down to lengths between twenty-eight and thirty-six inches, slipping easily into dedicated storage bags for simple transport.
Commercial telescoping poles also offer fluid height adjustability that is difficult to recreate accurately in a home workshop without specialized tools. High-grade aluminum models provide rapid adjustment ranges spanning from under three feet up to more than eight and a half feet. Multiple adjustment holes or smooth telescoping collars let you adapt your pitch instantly to changing weather conditions. Lowering your tarp height during intense windstorms decreases surface exposure, while raising the ridge pole during hot afternoons maximizes airflow and shaded living space.
Manufacturing tolerances in factory poles ensure tight interlocking joints that resist annoying rattles and wind-induced play. Premium options from outdoor brands feature rust-proof aviation aluminum alloys, anti-collapse locking mechanisms, and specialized non-slip foot pads engineered for varied terrain. While a DIY project offers creative satisfaction and immediate budget savings, factory telescoping poles provide polished dependability for backpackers who prioritize packable dimensions and rapid campsite deployment. Evaluating your travel method and weight tolerance helps determine whether an improvised or manufactured solution best fits your trail needs.
Field Maintenance and Pre-Trip Shelter Verification
Before carrying any homemade or modified tarp poles into remote backcountry locations, conduct a complete backyard assembly test. Pitch your tarp in realistic dimensions, tighten all guylines, and apply manual downward force to each pole to confirm the locks hold securely. Inspect all connection points, push-button detents, and rubber caps to ensure no micro-cracks or loose fittings threaten structural integrity. Testing your shelter beforehand allows you to adjust guyline lengths, check grommet tolerances, and correct any pole wobble before facing stormy wilderness conditions.
Routine maintenance prolongs the functional lifespan of both DIY conduit poles and commercial telescoping aluminum systems. After trips involving heavy rain, mud, or coastal salt air, pull telescoping sections completely apart and rinse away all grit with clean fresh water. Allow the aluminum tubes to dry thoroughly in an open environment before reassembling to prevent internal oxidation and galvanic corrosion from seizing the joints. Store your poles in a dry, ventilated equipment bag with the locking levers open to relieve continuous spring tension on internal components.
Mastering tarp upright construction turns simple waterproof fabric into a reliable, four-season shelter system. Whether you fashion improvised supports from hiking poles, craft custom tubing, or deploy heavy-duty telescoping models, dependable hardware and balanced guylines remain essential. Taking time to select proper tube diameters, protect contact points, and secure pole feet ensures your campsite remains safe, comfortable, and stable in any environment.





Write Your Review
No reviews yet. Be the first to share your experience!