


Steep mountain descents place immense vertical pressure on your gear, and few trail surprises are more jarring than an unexpected shaft collapse beneath your full body weight. Trekking poles serve as vital third and fourth contact points across loose scree, river crossings, and technical switchbacks, protecting knee joints and maintaining balance under a loaded pack. When a locking collar loosens or trail grit invades an internal shaft, knowing how to fix leki trekking pole hardware quickly keeps your wilderness excursion safe and comfortable. Preparing your equipment properly before departing is just as essential as refining your packing checklist for a backpacking trip before heading into the backcountry.
Most trail malfunctions do not require retiring an expensive pair of poles or filing an immediate warranty return. Modern designs rely on serviceable parts, from external Speed Lock Plus cam levers to threaded expanders, replaceable flex tips, and modular trekking baskets. Understanding how these mechanical components interact allows hikers to diagnose slipping shafts, clear jammed aluminum tubes, and replace worn carbide surfaces in minutes. A basic maintenance routine restores factory clamping tension and ensures your poles support you reliably across demanding backcountry terrain.



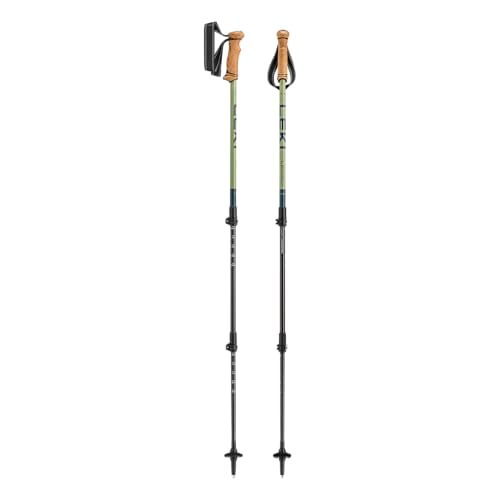


Field Repair, Tension Calibration, and Component Maintenance for LEKI Poles
Diagnosing a failing hiking pole starts with isolating whether the breakdown stems from clamping friction, mechanical contamination, or structural wear. LEKI trekking poles and walking staffs use modular components designed for straightforward field adjustment and direct part replacement. Addressing minor slippage or sticking joints early prevents sudden falls and protects your joints on steep mountain descents. The following procedures outline the steps required to resolve common mechanical issues safely.
Calibrating External Speed Lock and Speed Lock Plus Levers
External cam lever locks, including the Speed Lock Plus and Speed Lock 2 systems, rely on consistent mechanical pressure around the outer shaft diameter. When a pole section slides inward under downward force, the lever clamp has simply lost its calibrated clamping tension. This common issue occurs naturally after miles of vibration, temperature shifts, or slight material settling. Resolving the problem requires no special tools because the tension mechanism uses an integrated knurled adjustment dial.
To recalibrate the holding power, release the cam lever into the fully open position so that the clamping collar relaxes completely. Turn the knurled plastic dial clockwise by a quarter to a half turn to narrow the gap inside the collar mechanism. Close the lever firmly and observe the resistance required to push the cam flat against the shaft sleeve. The lever should close with distinct thumb resistance without forcing the plastic hardware to bend or crack under excessive torque.
Once the lever is snapped shut, test the vertical holding force by placing the tip firmly on the ground and pressing down with your upper body weight. If the telescoping section still slides upward into the larger shaft, reopen the lever and tighten the knurled dial another partial turn. Avoid over-tightening the mechanism, as extreme pressure can strip the metal adjustment bolt or split the molded collar. Proper tension strikes a balance where the clamp remains completely rigid under vertical loads yet opens smoothly when adjusting length.
Troubleshooting Internal Twist Lock Expansion Plugs
Older telescoping models and traditional staff designs often feature the internal Super Lock twist mechanism rather than external levers. These internal systems utilize an expandable plastic wedge plug threaded onto an internal metal spindle. When you twist the shaft sections in opposite directions, the wedge expands outward against the inner aluminum wall to create a tight friction hold. If the pole spins endlessly without locking, the expansion plug has lost its initial contact with the internal tube walls.
Separate the two offending pole sections completely by pulling the lower shaft straight out of the upper sleeve. Inspect the colored plastic expansion wedge at the top of the internal rod for loose threads, cracked plastic, or accumulated dirt. Gently turn the expander plug by hand clockwise until it widens just enough to create light friction when reinserted into the upper shaft. Slide the section back inside and twist clockwise to allow the expanded wedge to bite into the inner tube wall and lock firmly.
Never apply lubricating oils, grease, or spray lubricants such as WD-40 to the internal shaft walls or expansion plugs. Lubricants destroy the friction necessary for the wedge to grip the aluminum tubing, causing constant slippage under load. If you discover oily residue or greasy grime inside the tube, clean the bare metal using isopropyl alcohol and a clean cloth wrapped around a dowel. Ensuring dry, oil-free internal surfaces restores dependable holding force across all weather conditions.
Clearing Stuck Shafts and Removing Silt Contaminants
Telescoping aluminum poles made from HTS 6.0 or HTS 6.5 alloys can seize unexpectedly when fine trail silt, mud, or mineral-rich water dries inside the joints. This problem frequently appears after multi-day backpacking trips where wet conditions cause slight surface oxidation between tight-fitting aluminum tubes. Forcing a seized pole with excessive lateral torque can bend the metal tubing permanently, rendering the pole unusable. Gentle, systematic cleaning is the safest method to restore smooth telescoping movement.
If a shaft section resists moving, apply gentle warmth around the outer collar using warm tap water or a damp cloth to expand the outer metal slightly. Pull the seized section straight out with steady inline tension rather than twisting violently across the joint axis. Once separated, inspect the bare metal for white powdery aluminum oxidation, gritty sand particles, or dried mud deposits. Wipe down the entire length of both inner and outer shafts using a damp cloth and mild dish soap to remove all abrasive particles.
Allow every pole section to dry completely in the open air before reassembling the pieces for storage or trail use. Storing damp trekking poles inside a tight gear closet traps moisture and accelerates galvanic corrosion over time. Backpackers who regularly hike in wet climates should make shaft disassembly and drying a standard post-trail habit. When packing your gear for an extended journey, pairing clean poles with an organized approach to securing equipment to your backpack ensures everything remains dry and accessible.
Replacing Damaged Flex Tips and Carbide Endpoints
The lower tip assembly takes the brunt of trail abuse, constantly striking granite boulders, gravel beds, and exposed tree roots. LEKI poles utilize a modular Flex Tip system, which features a rugged plastic sleeve housing an ultra-hard tungsten carbide point. While the carbide point is designed to withstand extensive trail abrasion, the surrounding plastic sleeve can crack or snap when wedged into narrow rock fissures. Replacing a worn or broken Flex Tip restores aggressive trail traction and protects the primary aluminum shaft from direct impact damage.
Removing a damaged Flex Tip requires overcoming the high-friction press fit that secures the plastic collar onto the lower shaft. Submerge the lower three inches of the pole tip in boiling water for approximately two to three minutes to soften the specialized adhesive and expand the plastic sleeve. Grasp the warmed tip firmly with a pair of pliers and pull straight off the shaft while gently twisting. Protect the bare aluminum shaft with a rag during this process to avoid scratching or denting the lower tubing.
Clean any residual adhesive or dirt from the tapered aluminum tip using a dry cloth before installing the replacement component. Align the new Flex Tip Short or standard replacement tip with the shaft taper and tap the carbide end firmly against a wooden board on the floor. The downward impact seats the tapered sleeve snugly onto the shaft without damaging the hard carbide core. Allow the assembly to cool completely before using the pole on rocky trails.
Maintaining Rubber Walking Tips and Basket Hardware
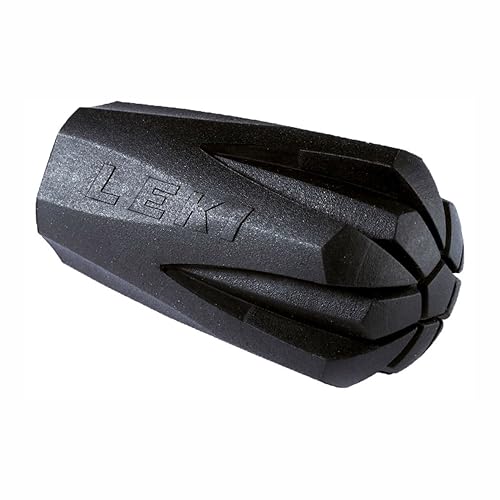
Hiking across asphalt, concrete, or slick cobblestones requires protective rubber walking tips fitted over the standard carbide ends. Vulcanized rubber tips dampen trail vibrations, eliminate clicking noises, and prevent sharp carbide points from skidding across hard surfaces. Over time, the internal metal washer inside a rubber walking tip can wear through, allowing the carbide spike to punch through the bottom. Inspecting rubber tips periodically ensures safe pavement traction and protects indoor surfaces during travel.
Replacing a worn rubber walking tip or fitness traction tip is as simple as pulling off the degraded pad and pressing a fresh unit firmly onto the Flex Tip. Selecting rugged vulcanized rubber tips designed for standard flex tips ensures a snug friction fit that resists popping off in mud or pavement cracks. For rocky scree and wet soil, modular baskets such as the Trekking Basket 2.0 prevent pole tips from sinking too deeply between stones. Baskets thread onto the collar above the tip and can be swapped by hand without requiring tools.
If a basket becomes loose or spins freely, inspect the plastic retaining threads on the Flex Tip collar for dirt or wear. Unscrew the basket, clear away any accumulated grit from the threads, and twist the replacement basket clockwise until it clicks into its retaining groove. Using the correct basket diameter keeps your pole stable on boggy trails while minimizing the risk of snagging in dense brush. Routine basket inspections prevent unexpected loss when trekking through heavy mud or loose scree.
Inspecting Folding Systems and Carbon Fiber Shafts
Folding models such as the Ultratrail FX.One use internal tension cords and spring-loaded push-button mechanisms rather than traditional telescoping clamps. When a push button fails to pop out into its locked position, dried mud or fine dust has likely jammed the internal spring mechanism. Pull each folding section firmly to verify that the internal cord has seated the joints completely into their aluminum connecting ferrules. If the push-button pin remains stuck flush with the shaft, apply a small drop of water or isopropyl alcohol around the pin opening to dissolve trapped grime.
Carbon fiber shafts offer exceptional stiffness and featherweight performance, but they require different inspection habits than aluminum poles. Unlike aluminum, which bends under extreme lateral stress, carbon fiber composite can develop internal micro-fractures after hard impacts against sharp rocks. Run your fingers carefully along the exterior carbon surface to feel for splintering, deep gouges, or soft spots in the composite matrix. Never attempt to glue, tape, or repair a cracked carbon fiber shaft in the field because structural failure under full body weight presents a severe safety hazard.
If you discover structural cracking or splintered fibers on a carbon section, retire that specific section immediately and order a replacement segment. Maintaining the cleanliness of connecting ferrules ensures that folding poles assemble cleanly without stressing the carbon weave. Keeping the push-button mechanism free of trail grit ensures fast, reliable deployment when training or racing across technical mountain terrain.
Servicing Grips, Straps, and Ergonomic Hardware
Hiking comfort depends heavily on the condition of your handle grips and wrist strap systems over long trail days. Whether your poles feature natural cork, EVOCON Cor-Tec composite, or supportive cane-style Aergomed grips, routine cleaning prevents sweat salts from degrading the materials. Built-up body oils and dried grime can make grips slippery, increasing hand fatigue and blister formation during warm weather hikes. Washing grips with warm water, mild soap, and a soft brush restores original texture and comfort.
Adjustable wrist straps play a vital biomechanical role by transferring upper-body downward force directly to the pole without requiring a death grip on the handle. If a strap slips loose under tension, inspect the internal locking wedge located at the top of the grip cavity. Pulling the strap upward unlocks the internal cam wedge on standard grips, allowing you to lengthen or shorten the loop before pulling downward to lock the wedge in place. Ensure the webbing lies flat without twists so it sits comfortably against your wrist during long ascents.
For specialized trail running models featuring detachable mesh straps and the Trail Trigger Shark system, keep the connection loop clear of sand and pine needles. The spring-loaded catch mechanism at the grip apex should click cleanly when the strap loop inserts into the channel. If the release button feels stiff, flush the mechanism with clean water to remove abrasive particles that could impede rapid detachment. Well-maintained straps ensure efficient power transfer on steep climbs while allowing quick release when needed.
Determining When to Repair versus Replace Hardware
Practical gear maintenance requires understanding the clear boundary between simple field fixes and irrecoverable structural failures. Worn carbide tips, slipping cam levers, missing baskets, and degraded rubber pads are routine maintenance items that take only minutes to resolve. In contrast, an aluminum shaft that has bent significantly from a severe fall cannot be safely bent back into alignment. Bending aluminum a second time induces metal fatigue, drastically weakening the alloy and risking sudden collapse under downhill loads.
If a middle or lower aluminum section suffers a visible bend, replacing that individual shaft section is the safest course of action. LEKI manufactures modular replacement sections for most popular models, allowing you to retain your grips, upper shafts, and locking collars without purchasing an entirely new pair. Similarly, stripped plastic lever bodies or stripped adjustment screws should be replaced with genuine hardware kits rather than makeshift trail wire. Inspecting your gear thoroughly before embarking on a challenging backcountry trek keeps you safe and self-reliant.
Proper trail preparation also means understanding the environmental demands of your route and carrying appropriate backup hardware. Backpackers heading into remote wilderness often carry a spare rubber tip, an extra basket, and a compact multitool to adjust lever tension in camp. Balancing gear maintenance with thoughtful trip planning, such as reviewing a comprehensive hiking trail safety and clothing guide, guarantees you stay prepared for changing mountain conditions. Taking proactive care of your equipment extends its usable lifespan and ensures dependable joint relief on every trail.
Pre-Trail Load Verification and Long-Term Gear Storage
Before stepping onto the trailhead, always perform a full downward load verification on both poles to confirm that all clamps are secure. Extend the sections to your preferred hiking height, close the levers completely, and lean your upper body weight directly onto the handles while standing on level ground. The shafts should remain rock solid with zero slipping, creaking, or telescoping movement. This simple five-second test prevents painful collapses on steep trail drops where an unexpected failure could lead to a fall.
When returning home from a trek, disassemble every telescoping section and pull apart folding segments before packing them into long-term storage. Wipe down each tube with a dry microfiber cloth to remove residual moisture, trail silt, and mineral deposits. Store the disassembled sections in a dry, ventilated environment away from direct sunlight and extreme temperature fluctuations. Leaving the cam levers in the open position during storage prevents continuous tension on the plastic collar assemblies, preserving elasticity for years to come.
Regular care and timely mechanical adjustments transform your trekking poles into lifelong trail companions that protect your body across rugged terrain. By understanding how external cam levers, internal expanders, and modular tips function, you can address any performance issue with confidence. Clean components, calibrated locking tension, and sound structural shafts ensure you enjoy stable footing, balanced strides, and reduced joint fatigue wherever your adventures lead.







Write Your Review
No reviews yet. Be the first to share your experience!