


Trekking poles take tremendous abuse on technical descents, rocky talus, and paved approaches. Over hundreds of trail miles, the metal points wear down to dull nubs, or the protective rubber boots split after catching in root mazes and boulder cracks. Learning how to replace black diamond trekking pole tips keeps your hiking poles gripping slick granite and packed dirt securely while preventing costly structural damage to the lower shaft ferrules. Proper tip maintenance also restores vibration dampening, ensuring your joints receive maximum support whether you are climbing steep switchbacks or carrying a heavy load on an extended trek.
Swapping out worn trail hardware does not require specialized workshop machinery, but knowing whether your poles utilize press-fit rubber covers, standard 11mm slip-on protectors, or dedicated interchangeable Tech Tips is critical before starting. Black Diamond produces several lower assembly designs, ranging from standard three-section trail poles to compact folding Z-poles, each requiring a slightly different replacement approach. Preparing your gear properly alongside your checklist for a multi-day backpacking trip ensures you never face unexpected equipment failure far from the trailhead. A few minutes of basic inspection and maintenance will keep your walking sticks quiet, stable, and ready for demanding wilderness miles.




Complete Guide to Replacing Black Diamond Trekking Pole Tips and Protectors
Replacing worn tips on Black Diamond trekking poles restores essential traction and prevents irreversible damage to your pole shafts. The exact replacement process depends directly on whether you are refreshing a slip-on rubber protector cap, changing an interchangeable Tech Tip, or swapping the entire lower plastic flex ferrule. Understanding which component has reached the end of its lifespan ensures you purchase the correct replacement hardware and complete the repair quickly. With the right technique, trail hardware maintenance takes only a few minutes and keeps your poles performing reliably on demanding wilderness trails.
Distinguishing Slip-On Protectors, Tech Tips, and Flex Ferrules
Black Diamond utilizes a modular tip system across its pole lines, but different parts perform distinct roles. Most standard models feature a plastic lower housing called the flex tip ferrule, which connects directly to the aluminum or carbon fiber shaft. At the very bottom of this housing, compatible models accept interchangeable Tech Tips, which are small threaded or press-fit inserts in carbide or rubber. Understanding the difference between these interchangeable inserts and external slip-on rubber protectors prevents costly mistakes when ordering replacement parts.
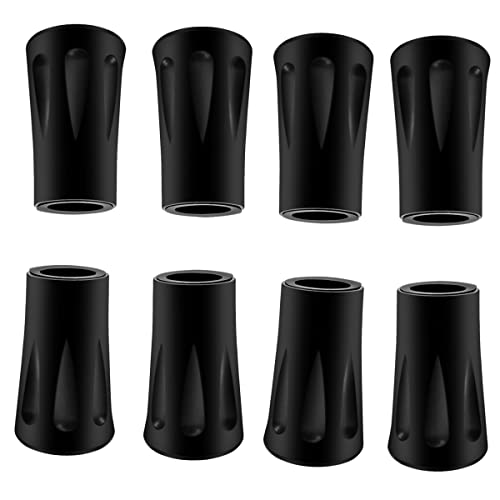
Products like the BLACK DIAMOND Carbide Tech Tips Enhanced Traction and the BLACK DIAMOND Replacement Rubber Tech Tips for BD seat directly into the lower ferrule socket to provide either biting trail traction or quiet road performance. In contrast, universal slip-on caps such as the 8Pcs Trekking Pole Tips Replacement Protectors and the 8 Pack 11mm Trekking Pole Tip Protectors use an 11mm internal socket that slides over the exterior of the existing tip. These friction-fit rubber covers protect pack fabrics during transit and prevent surface scarring on delicate sandstone or asphalt. Identifying whether you need an internal Tech Tip insert or an external slip-on cover ensures your poles receive the proper hardware.
Step-by-Step Replacement for Slip-On Rubber Tip Protectors
Replacing slip-on rubber protectors is a quick process that requires no specialized tools. Start by removing the old rubber boot by grasping it firmly with a dry cloth and pulling straight off with a slight twist. If dried silt or mud has locked the cap in place, soaking the tip in warm water for a minute will loosen the debris without harming the plastic ferrule. Inspect the underlying metal spike once the old cap is removed to confirm that no small stones or grit remain wedged around the crown. Wipe down the plastic sleeve with a clean cloth so the new rubber cap can establish a solid friction fit.
Select a quality replacement cap equipped with an internal metal washer, such as the Trekking Pole Tip Protectors Replacement Caps or the Montem Trekking Pole Tip Protectors/Hiking Pole. The built-in steel washer is vital because it stops the sharp carbide spike from puncturing through the bottom rubber under downward body weight. Align the opening of the replacement cap squarely with the pole tip and push it firmly upward until it seats against the ferrule shoulder. Tap the pole straight down onto a solid floor or flat rock to ensure the protector is fully seated and straight. Carrying spare slip-on caps in your pack is always wise since deep mud and rock fissures can pull friction caps off unexpectedly.
Installing Interchangeable Carbide and Rubber Tech Tips
Poles compatible with Black Diamond Tech Tips allow hikers to replace worn traction points or alternate between carbide points and non-marking rubber. To remove a worn Tech Tip, grip the textured base or molded wrench flats firmly with standard slip-joint pliers. Turn the tip counterclockwise to break the initial friction seal and carefully back the threaded post out of the plastic housing. Turn the tool slowly and keep the pliers perpendicular to the shaft to avoid stripping the female threads molded into the plastic ferrule. Once the old tip is out, clear any packed dirt or sand from the internal socket using an old toothbrush.
Take your replacement tip, such as a fresh carbide insert or rubber Tech Tip, and start threading it clockwise into the clean socket by hand. Hand-threading the initial turns guarantees that the threads align cleanly without cross-threading into the plastic ferrule. Once the threads engage smoothly, use your pliers to tighten the tip until it sits firmly flush against the plastic base. Snug the fitting firmly, but do not apply excessive force that could crack the plastic collar or strip the internal threads. Check the completed assembly by tugging on the tip by hand to confirm a secure, wobble-free installation.
Swapping Complete Lower Flex Tip Ferrules with Hot Water
If the lower plastic flex ferrule cracks, bends severely, or suffers stripped threads, the entire plastic assembly must be replaced. Black Diamond secures these plastic ferrules to the bottom pole shafts using a heat-activated industrial adhesive. Trying to twist or pry off a cold ferrule with brute force can splinter carbon fiber layers or permanently bend aluminum shafts. The standard method for releasing this adhesive bond relies on hot water to soften the glue without risking thermal damage to the shaft materials. This approach allows you to remove damaged ferrules cleanly right at home.
Separate the bottom shaft section from the rest of your trekking pole before beginning the heating process. Bring a pot of water to a gentle boil, remove it from the heat source, and submerge the bottom three inches of the plastic ferrule for about three to five minutes. Wear heat-resistant work gloves and wrap an old towel around the heated plastic tip to protect your skin. Grasp the pole shaft with one gloved hand and use the towel to twist the plastic ferrule steadily while pulling straight away from the shaft. If the ferrule remains stuck, reheat it for an additional two minutes until the adhesive releases its hold completely.
After sliding off the old ferrule, clean any residual adhesive from the bare shaft end using a rag or fine plastic scraper. Apply a light ring of heat-activated outdoor glue or flexible epoxy around the circumference of the cleaned shaft tip. Slide the new replacement flex tip ferrule straight onto the shaft with a single, firm pushing motion until it bottoms out against the stop line. Quickly verify that any basket threads or index marks are aligned properly before the adhesive cools and sets. Allow the repaired pole section to cure undisturbed for several hours before attaching baskets or loading weight on the trail.
Special Considerations and Cord Care for Black Diamond Z-Poles
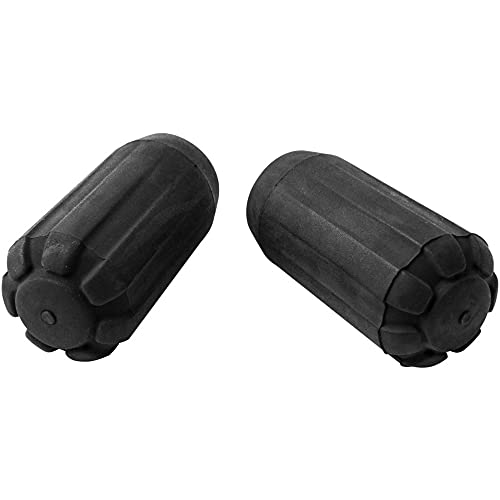
Black Diamond Z-Poles feature a folding multi-section design connected by an internal tension cord, requiring specific precautions during maintenance. Many Z-Poles use specialized low-profile tip geometry designed for running and fastpacking, such as the BLACK DIAMOND Replacement Trekking Z Pole Rubber. Standard bulky trekking pole protectors can fit loosely on these sleeker ferrules and slide off during brisk movement. Always verify that replacement caps specify compatibility with Z-Pole dimensions before hitting technical trails. Ensuring proper sizing keeps your tips secure and maintains the light swing weight these folding poles are known for.
When servicing tips on folding models, never pull aggressively against the tip while the pole is collapsed, as this strains the internal Dyneema or Kevlar tension cord. Fully extend and lock the Z-Pole into its rigid walking configuration before using pliers or applying force to the tip assembly. If you need to submerge a Z-Pole ferrule in hot water, ensure the internal cord remains dry and shielded from hot steam. Protecting the tension cord preserves the quick-deployment mechanism and prevents premature fraying of internal cables. Following these precautions keeps your ultralight folding poles functioning reliably across demanding backcountry miles.
Wear Indicators and Matching Tip Materials to Trail Surfaces
Recognizing the early warning signs of tip wear prevents slips and protects the structural integrity of your trekking poles. Hardened carbide tips initially feature sharp, concave crowns that bite aggressively into rock faces, firm soil, and icy patches. Over hundreds of trail miles, these edges wear down into smooth, rounded nubs that skid off wet roots and slick granite. Inspect the metallic crowns regularly to catch severe rounding before you tackle steep technical descents. Replacing dull carbide tips restores secure pole placement and helps offload joint stress from your knees and ankles.
Slip-on rubber protectors and rubber tech tips also display distinct signs when they need replacement. Inspect products like the 8 Pcs Black Diamond Trekking Poles or the Trekking Pole Tips Protectors Walking Stick Tips for tread wear or splits. Once the bottom tread wears smooth or the internal metal washer becomes visible, discard the cap immediately. Continuing to hike on worn rubber allows the metal spike underneath to punch through the base, scarring rock and creating slipping hazards. Using protective trail wear like wearing protective hiking pants keeps your legs shielded from trail debris while your trekking poles maintain confident contact with rugged ground.
Selecting the right tip material for the trail surface optimizes traction while protecting sensitive outdoor environments. Hardened carbide tips deliver unmatched grip on loose scree, dirt, and icy approaches where rubber tends to slip. Conversely, rubber caps and TPU options like the BLACK DIAMOND Replacement Trekking Pole provide quiet, non-marking contact on asphalt, rock slabs, and indoor flooring. Many wilderness areas and park organizations advocate rubber tips to prevent rock scarring and trail erosion on popular routes. Carrying both tip styles in your kit allows you to adapt to changing terrain smoothly throughout your trek.
Field Maintenance, Mud Bogs, and Preventing Lost Tips
Losing slip-on rubber tip protectors in deep mud is a frequent frustration for backcountry hikers. Saturated soil and thick clay create a strong vacuum around the rubber cap as the pole sinks into the ground. When you lift the pole, the suction often pulls the cap off while the tapered shaft pulls free. Removing rubber caps before crossing muddy terrain and storing them in your pocket prevents this common loss. Installing mud baskets above the ferrule also keeps poles from sinking too deep, reducing suction force on the tip assembly.
Regular cleaning after muddy or dusty outings preserves both your tips and your pole shafts. Disassemble the lower sections to rinse grit, silt, and dried debris from the ferrule threads and tip cavities. Trapped grit can cause annoying clicking noises and accelerate wear on the plastic socket over time. When transporting your poles, secure them point-down with protective rubber caps installed to guard neighboring fabrics from punctures. Following disciplined gear packing techniques similar to attaching bulky gear to a backpack ensures your trekking hardware arrives at the trailhead undamaged.
Carrying a compact spare set of rubber tips and checking Tech Tip tightness before each trip guarantees dependable trail stability. If a tip works loose or wears through unexpectedly, having extras on hand lets you make quick field corrections without disrupting your hike. Regular inspections ensure your Black Diamond poles remain an effective tool for balance, rhythm, and joint impact reduction on every journey. Taking a few proactive minutes to maintain your pole hardware pays massive dividends in comfort and safety across rugged terrain. Confident footing begins with well-maintained equipment that you can trust on every step of the trail.








Write Your Review
No reviews yet. Be the first to share your experience!