


Walking with specialized poles provides an effective way to offload joint stress while engaging the upper body and promoting an upright, balanced posture. Learning how to nordic walk for beginners starts with understanding how rhythmic pole coordination transforms a standard walk into a full-body fitness and mobility exercise. Unlike ordinary strolls, this technique utilizes deliberate push-offs through wrist straps to propel the body forward and distribute impact away from the knees and hips. Wearing supportive hiking pants for knee comfort can further enhance joint ease as you establish a smooth walking routine.
Many beginners discover Nordic walking while seeking low-impact cardiovascular conditioning or working to regain balance confidence on outdoor pathways. When practiced with correct posture and stride mechanics, the activity can relieve up to twenty percent of lower-limb joint strain while stimulating core stability and arm drive. Trusted instructional resources, including published guides from Bloomsbury and independent coaches, emphasize that proper mechanics prevent shoulder tension and optimize propulsion. Approaching this movement pattern step by step ensures that you build stamina safely while enjoying improved stability on paved trails and park paths.


Mastering the Fundamentals of Nordic Walking for Beginners
Starting your journey with fitness poles requires setting aside old habits and focusing on natural body movement. Rather than treating poles like rigid medical canes, Nordic walking uses them as dynamic levers that propel your stride forward. Developing a clean rhythm takes a bit of deliberate practice, but the mechanical advantages become clear once your upper and lower body move in harmony.
The Core Biomechanics of Nordic Walking
The fundamental appeal of Nordic walking lies in how it redistributes muscular effort across the entire skeletal frame. When you walk normally, your legs, hips, and lower back bear virtually all of the ground reaction forces with every heel strike. Nordic walking recruits the pectorals, latissimus dorsi, triceps, and abdominal stabilizers through active pole propulsion. This dynamic engagement lightens the load on your lower extremities while significantly boosting caloric expenditure compared to standard walking.
Maintaining a slight forward lean from the ankles, rather than bending at the waist, serves as the postural cornerstone of this discipline. Hinging forward from the hips compresses the lumbar spine and inhibits the full swing of your arms. By keeping your spine neutral and your gaze forward toward the horizon, your center of gravity aligns naturally over each landing foot. This upright stance opens the rib cage, enhances breathing efficiency, and allows your shoulders to remain relaxed and low throughout each stride.
Beginners often worry that coordinating four limbs at once will feel unnatural or awkward during their first few sessions. In reality, the coordination follows the exact reciprocal cross-crawl pattern that human beings use during ordinary walking. Your left arm naturally swings forward in tandem with your right leg, while your right arm coordinates with your left leg. The poles simply amplify this organic rhythm, giving you broader ground contact and a grounded sense of security on every surface.
Proper Pole Sizing and Hand Strap Adjustment
Selecting the proper pole length is the single most critical equipment step you can take before beginning your training. If your poles are adjusted too tall, your shoulders will hike upward, causing muscle spasms across the trapezius and neck. Conversely, poles that are too short force you to slouch, cutting your stride length short and eliminating the propulsion benefits. For most adults, multiplying your standing height in centimeters by zero point six eight gives an ideal starting length.
You can easily verify your sizing by holding the grips with the poles resting vertically on the floor beside your feet. When standing upright with your shoulders relaxed, your elbows should rest at approximately a ninety-degree angle. Adjustable telescoping poles with internal twist locks or external lever clamps allow you to fine-tune this height by small increments. Beginners should ensure that locking mechanisms are securely clamped before placing downward force on the grips, preventing accidental shaft slippage during a workout.
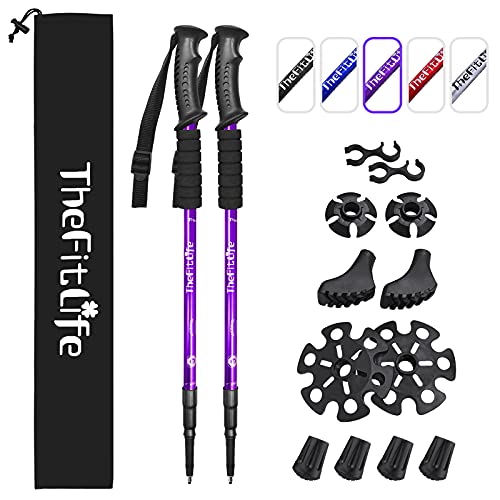
The wrist strap system on genuine Nordic walking poles differs fundamentally from the loose loops found on backcountry hiking poles. These ergonomic straps wrap snugly around the palm and wrist, functioning like fingerless gloves that transfer force directly from your arm into the shaft. You do not need to squeeze the plastic or cork handle with a tight fist to propel yourself forward. Adjust the hook-and-loop strap so it cradles your hand comfortably without pinching circulation, allowing you to open your palm completely at the finish of each push.
Step-by-Step Technique: The Natural Arm Swing and Stride
Learning the stride mechanics begins by stripping away the poles temporarily so you can isolate your arm swing. The best introductory drill involves walking briskly across flat ground while letting the poles drag passively behind you by their wrist straps. Keep your hands completely relaxed, letting your arms swing freely from the shoulder joints like loose pendulums. Resist the urge to grab the handles or lift the tips off the ground during this initial calibration exercise.
As you maintain a steady walking cadence, notice how your hands naturally swing forward to approximately naval or chest height before swinging backward. Once this organic reciprocal rhythm feels completely effortless, lightly close your fingers around the grips as your hand swings forward. The pole tip will naturally touch the ground behind your lead heel at an angle of roughly forty-five degrees. This angled placement is essential because a vertical pole merely acts as a brake rather than an engine for forward motion.
Your footwork should complement this rhythmic arm action through a smooth, deliberate heel-to-toe rolling movement. Strike the ground softly with the center of your heel, roll your weight smoothly along the outer edge of the foot, and push off firmly from your big toe. Wearing flexible, lightweight walking pants allows your hips and knees to cycle through their full range of motion without binding. This complete foot articulation absorbs shock and activates the calf pump, improving circulation during longer walking sessions.
Mastering the Pole Plant and Propulsion Phase
Propulsion in Nordic walking occurs when you actively push down and back through the wrist strap as your arm swings past your hip. As the pole tip grips the ground behind your body, press firmly into the strap using the muscles of your triceps and upper back. This rearward thrust gently pushes your torso forward, lengthening your stride without requiring additional leg effort. It is this specific push phase that elevates Nordic walking above standard walking by increasing muscular activation and joint relief.
At the conclusion of the backward push, your arm should extend almost straight behind your hip in a smooth, continuous line. At this precise moment, release your grip on the handle and allow your fingers to open fully. The wrist strap will keep the pole securely attached to your hand, preventing it from dropping to the path. Releasing the grip relaxes the forearm flexors and prevents chronic wrist fatigue, tennis elbow, and repetitive strain injuries during extended walks.
Once your arm finishes its backward extension, the natural rebound of your stride brings the arm swinging forward again. As your hand passes your hip on the forward swing, lightly close your fingers around the grip to prepare for the subsequent plant. Beginners should focus on keeping this transition smooth and fluid rather than snappy or mechanical. Think of the movement as an extended, continuous handshake where your hand reaches forward naturally and relaxes completely as it pushes past your hip.
Selecting Tips for Asphalt, Gravel, and Natural Trails
Nordic walking poles feature specialized ground tips designed to provide secure traction across diverse walking environments. Bare carbide or tungsten tips provide aggressive bite on loose gravel, dirt trails, grass, and forest paths. However, using bare metal tips on hard asphalt or concrete generates jarring vibrations that travel directly into your wrists and elbows. Metal tips also produce an annoying clacking sound and can slip unpredictably on smooth pavement surfaces.
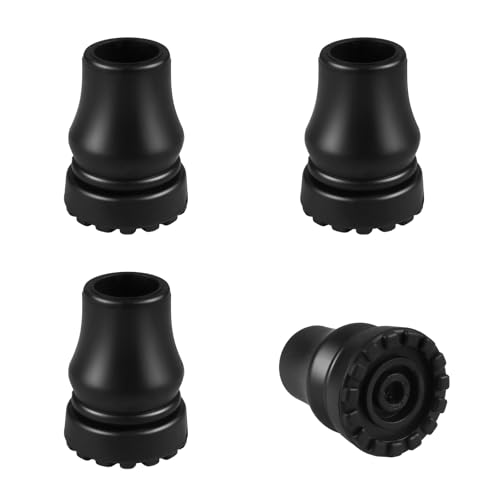
To protect your joints on paved surfaces, snap angled rubber paws over the metal spikes before stepping onto sidewalks or roads. These durable rubber pads are shaped like miniature boots and feature directional tread that grips asphalt securely when angled backward. Ensure that the toe of the rubber paw points backward, directly matching the angle of your propulsion stroke. Inspect the rubber tread periodically for excessive wear, as smooth or worn-through paws lose their traction and transmit unnecessary impact into your upper body.
Common Beginner Form Errors and How to Correct Them
One of the most frequent errors among novice Nordic walkers is planting the pole tips too far forward in front of the body. When you plant a pole ahead of your lead foot, you create a mechanical braking force that halts your momentum and jars your shoulder joints. Remember that the pole should always point diagonally backward at approximately forty-five degrees, with the tip striking the terrain behind your front heel. If you see the pole tip landing ahead of your toes, immediately soften your arm swing and focus on pushing backward rather than reaching forward.
Another common misstep involves squeezing the pole grips with a death grip throughout the entire duration of the walk. White-knuckling the handles causes severe muscle tightness across your forearms, wrists, and shoulders within just a few minutes of walking. Trust the engineered wrist straps to carry the propulsion load so your fingers remain loose and relaxed. Opening your hand at the back of each stroke provides a rhythmic release of tension that keeps your upper body loose and comfortable.
Beginners also tend to bend excessively at the elbows, turning the dynamic whole-arm swing into a jerky bicep curl. The swinging motion must originate from the ball-and-socket joint of the shoulder, keeping the elbow relatively straight with only a soft, natural flexion. Bending your elbows at sharp angles reduces the arc of your swing, limits stride extension, and negates the core engagement benefits of the exercise. Visualize swinging your arms from your shoulder blades to maintain long, fluid levers that propel you forward effortlessly.
Nordic Walking Poles vs. Medical Walking Canes: Understanding the Differences
While Nordic walking offers outstanding mobility conditioning, beginners must clearly understand the fundamental differences between fitness poles and medical walking canes. Nordic poles are designed for dynamic bilateral exercise, cardiovascular training, and symmetrical gait encouragement among mobile individuals. They rely on angled ground placement and rapid reciprocal turnover to generate momentum. They are not engineered to support full vertical body weight or to serve as static balance aids for acute mobility impairments.
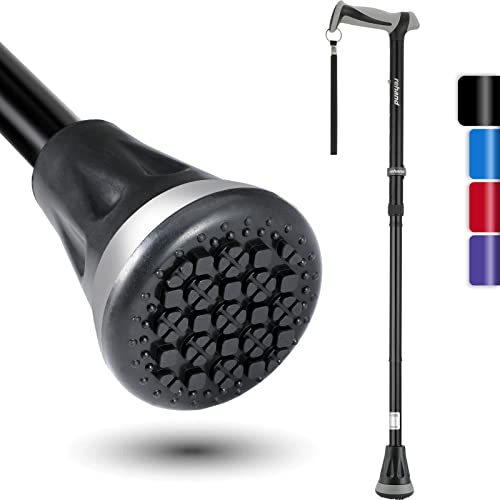
Medical walking canes, including single-point aluminum canes, quad canes, and offset handle designs, serve an entirely different clinical purpose. A walking cane is typically held unilaterally in the hand opposite a weak or injured lower extremity to offload fifteen to twenty-five percent of body weight. The shaft of a cane is designed to stay vertical, directly transferring downward load through a wide rubber ferrule into the ground. Individuals recovering from hip replacements, knee surgeries, or severe vestibular balance disorders require this dedicated vertical stability rather than dynamic fitness poles.
Substituting fitness walking poles for a prescribed medical cane can introduce serious safety hazards for individuals with severe gait instability. The flexible shafts, narrow tips, and angled planting mechanics of Nordic poles cannot stabilize an abrupt loss of balance or compensate for foot drop. Also, navigating indoor staircases or tight home hallways with long Nordic poles is awkward and increases your fall risk. If your primary goal is clinical balance support or orthopedic unloading, rely on an appropriately fitted medical mobility cane instead of exercise poles.
Progression Strategies, Safety Checks, and Clinical Guidance
Building endurance with Nordic walking requires a gradual approach that gives your upper body and postural muscles time to adapt. Start with fifteen to twenty-minute sessions on flat, predictable terrain such as a running track or a smooth park loop. Focus entirely on rhythm, posture, and clean pole releases before attempting to increase your walking speed or tackle steep inclines. As your shoulder endurance and core stability improve over several weeks, you can comfortably extend your outings to forty-five minutes or more.
Always perform a brief equipment check before heading out, confirming that twist locks are snug and rubber paws are firmly seated. If you experience lingering joint discomfort, sharp hip pain, or persistent balance hesitation during your walks, pause your routine and consult a licensed physical therapist or physician. A professional gait assessment can confirm whether Nordic walking suits your musculoskeletal profile or if you would benefit more from a structured rehabilitation plan using clinical mobility aids. Approaching your training with patience and sound biomechanics ensures a rewarding, lifelong walking practice that protects your joints and enhances your overall vitality.





Write Your Review
No reviews yet. Be the first to share your experience!