


Maintaining steady mobility and upright posture requires precise equipment alignment, especially when recovering from lower limb surgery or managing chronic joint weakness. When walking aids sit at an improper elevation, users frequently suffer shoulder elevation, wrist fatigue, and unnatural spinal sway that compromise balance. Learning exactly how to adjust height of quad cane hardware ensures downward force transfers cleanly through the vertical shaft rather than straining delicate arm joints. Pairing an accurately configured walking aid with knee joint support apparel helps protect vulnerable joints during daily rehabilitation routines. A properly adjusted device delivers immediate balance confidence while reducing muscular fatigue over long walking sessions.
Quad canes deliver substantial stability benefits over standard single-point sticks because their four-point platform distributes downward forces across a broader footprint. Achieving optimal support depends on positioning the handle directly level with the wrist crease while maintaining a comfortable elbow flexion of 15 to 20 degrees. Setting the telescoping shaft correctly allows the walking aid to offload up to twenty-five percent of lower-extremity body weight from painful hips, knees, or ankles. Taking a few deliberate minutes to align the brass push buttons and secure the threaded locking collar prevents hazardous shaft rattle and protects against sudden slips.


Step-by-Step Guide: How to Adjust Height of Quad Cane for Optimal Stability
Adjusting a quad cane requires aligning the physical hardware to your unique anatomical measurements before taking a single weight-bearing step. A correctly calibrated cane promotes a natural gait pattern, keeps your shoulders level, and prevents dangerous compensatory leaning. Setting up the device involves measuring your wrist height, loosening the threaded locking collar, setting the telescoping push buttons, and orienting the four-point base correctly relative to your legs. Following systematic adjustments protects your joints from repetitive strain and establishes reliable floor traction across every stride.
Anatomical Sizing Landmarks: The Wrist Crease and Greater Trochanter
Accurate height measurement begins by identifying two primary anatomical reference points on your body: the distal wrist crease and the greater trochanter of the femur. The distal wrist crease represents the natural flexion fold on the palm side of your wrist joint when your hand rests loosely at your side. The greater trochanter is the prominent bony protrusion located at the upper outside edge of your hip bone. In clinical mobility evaluations, both of these anatomical landmarks align horizontally at nearly identical distances from the floor.
Setting the top surface of the cane handle level with your wrist crease establishes proper biomechanical leverage during the stance phase of walking. When your hand rests on the grip at this height, your elbow naturally bends at an angle between fifteen and twenty degrees. This slight elbow flexion acts as a built-in shock absorber that dampens ground-strike impacts and prevents your arm muscles from tiring prematurely. If you set the handle too high, your shoulder hikes upward into an uncomfortable shrug that strains neck muscles. If you set the handle too low, your spine rounds forward, increasing downward shear forces on your lower back.
Footwear and Posture Alignment for Accurate Measuring
Measuring your cane height requires standing in the exact footwear you intend to wear during typical daily activities. Thick rubber running shoe soles, orthotic inserts, or low-heeled walking shoes alter your floor-to-wrist distance by anywhere from half an inch to more than an inch. Measuring while barefoot or wearing thin bedroom slippers produces a cane that sits noticeably too short when you step outdoors in supportive sneakers. Put on your regular walking shoes before beginning any measurement or pin adjustment sequence.
Stand erect on a firm, level floor with your back straight, feet placed shoulder-width apart, and weight balanced evenly across both heels. Allow your arms to dangle naturally at your sides with relaxed shoulders, avoiding any conscious reaching downward or tensing upward. Having a family member or caregiver hold a tape measure from the floor to your wrist crease ensures the most precise reading. If you measure alone, stand beside a wall or sturdy table to maintain balance while noting your approximate height mark against the cane shaft.
Operating the Telescoping Pin and Locking Collar Mechanism
Most modern adjustable quad canes utilize a telescoping aluminum shaft assembly governed by a spring-loaded brass detent pin and an anti-rattle locking nut. Models like the Carex Quad Cane with Small Base and the Hugo Mobility Adjustable Offset Quadpod Cane feature multiple pre-drilled adjustment holes spaced in one-inch increments. The BeneCane Quad Cane Adjustable Walking Cane and McKesson Quad Cane similarly rely on this push-button architecture paired with a central threaded coupling joint. Understanding how these two locking elements cooperate ensures the shaft remains rigid under downward weight.
Begin by loosening the threaded anti-rattle collar located where the upper inner tube slides into the lower outer tube. Turn this plastic or aluminum locking nut counterclockwise by hand until it unseats from the joint and spins freely along the shaft. Depress the silver or brass push button firmly with your thumb so it sinks flush into the adjustment hole. While holding the pin depressed, slide the inner telescoping tube upward to lengthen the shaft or downward to shorten it.
Guide the inner tube until the spring pin snaps completely into the target adjustment hole corresponding to your measured wrist crease height. You must visually inspect the pin to confirm that its rounded head pops fully outward through the hole aperture. A partially engaged pin can slip under sudden downward body weight and cause the cane to collapse unexpectedly. Once the pin is fully seated, twist the threaded locking nut clockwise with firm hand pressure to eliminate internal shaft vibration and lock the telescoping section in place.
Reversing Base Orientation for Left or Right Hand Clearance
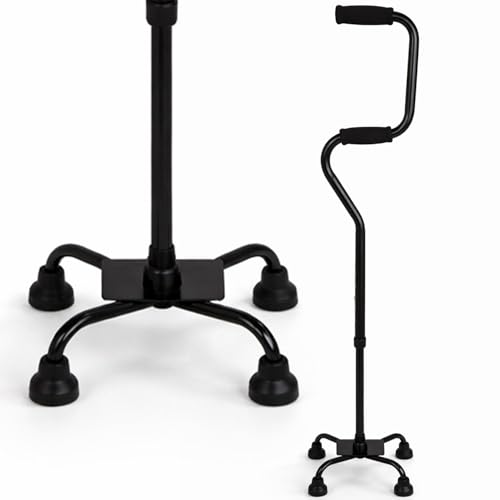
Quad cane bases feature an asymmetrical geometric layout specifically engineered to prevent tripping hazards during forward movement. The four supporting legs form a distinct profile with two straight, vertical legs on one side and two flared, outward-angled legs on the opposing side. The straight, flat edge of the base must always face inward toward your body, while the flared legs extend outward away from your feet. This structural layout provides wide lateral tip stability while leaving clear foot clearance so you do not kick the cane frame while walking.
Switching a quad cane from right-hand use to left-hand use requires rotating the handle one hundred eighty degrees relative to the base plate. To accomplish this on standard small-base and large-base models, depress the adjustment pin fully and pull the handle shaft entirely out of the lower base tube. Rotate the handle half a turn until the grip faces forward and the flat edge of the base aligns toward your opposite leg. Reinsert the shaft into the base tube, engage the spring pin into the correct height hole, and re-tighten the anti-rattle nut firmly.
Never operate a quad cane with the flared legs positioned toward your body. If the extended legs angle inward toward your ankles, your swinging foot will catch on the protruding metal tubing during mid-swing. Such accidental base contact creates an immediate trip hazard that can precipitate severe falls. Always double-check that the flat vertical side of the base rests directly parallel to your hip and thigh before taking your first steps.
Handle Biomechanics: Why Offset Shapes Center Your Weight
Handle design plays a critical role in transferring vertical body weight cleanly through the quad base. Traditional straight-shaft walking sticks place the grip directly behind or beside the vertical center line, creating an awkward bending moment when downward force is applied. In contrast, offset handle designs, such as those found on the BeneCane and Hugo models, incorporate an intentional forward curve in the upper neck. This curvature aligns the user’s hand and palm directly over the central axis of the cane shaft.
Centering your downward force over the vertical shaft ensures that load transfers evenly across all four rubber tips resting on the floor. An offset grip distributes palm pressure evenly across the thenar eminence, reducing focused compression on the median nerve in your wrist. Padded foam grips and textured rubber contours further cushion joint impact for individuals managing osteoarthritis, rheumatoid arthritis, or carpal tunnel syndrome. Choosing the right handle geometry allows you to bear partial weight comfortably without inducing wrist fatigue or grip cramp.
Contralateral Placement and Proper Reciprocal Gait Mechanics
A fundamental rule of clinical gait rehabilitation requires holding your walking cane in the hand opposite your injured, painful, or recovering leg. This contralateral positioning mirrors the natural reciprocal arm swing of human walking, where your opposite arm moves forward in harmony with each stepping leg. If your right knee is painful or recovering from surgery, you hold the quad cane in your left hand. Holding the cane on the unaffected side broadens your base of support and offloads significant biomechanical stress from the vulnerable joint.
When walking on level ground, advance the quad cane forward roughly one comfortable step length alongside your weaker leg. Place all four rubber tips flat against the floor simultaneously rather than landing on the outer edge or rocking the base. Step forward with your weaker leg first, bearing partial weight across the cane grip, and then step past with your stronger, unaffected leg. This synchronized gait pattern allows the quad cane to absorb fifteen to twenty-five percent of your total body weight during weight-bearing stance.
When walking outdoors for extended rehabilitation sessions, wearing lightweight flexible walking apparel ensures your legs move freely without fabric catching on the cane base. Maintaining an upright spinal posture prevents compensatory hip tilting and promotes steady balance. Keep your eyes looking forward toward the horizon rather than staring continuously down at your feet. Looking straight ahead preserves your vestibular balance reactions and helps you spot upcoming floor transitions early.
Quad Base Footprint Dynamics: Small Base versus Large Base
Quad canes fall into two distinct structural categories: small-base platforms and large-base platforms. Small-base quad canes, such as the Carex Small Base model, feature a compact footprint that typically measures around six inches by eight inches. This narrower footprint navigates tight indoor hallways, narrow bathroom doorways, and crowded living rooms with ease. Small-base models also weigh less, making them easier to lift and advance for users with limited upper-body stamina.
Large-base quad canes, exemplified by heavy-duty steel options like the McKesson Quad Cane, utilize an expansive footprint that spans up to eight inches by twelve inches. This broader stance offers superior static stability, allowing the cane to stand completely upright on its own when you release the grip. However, the wider steel frame adds noticeable carry weight and requires wider clearance through narrow doorways. Choosing between base dimensions involves balancing maximum standing balance support against daily walking maneuverability and physical lifting strength.
Articulating Pivot Pods versus Rigid Four-Prong Bases
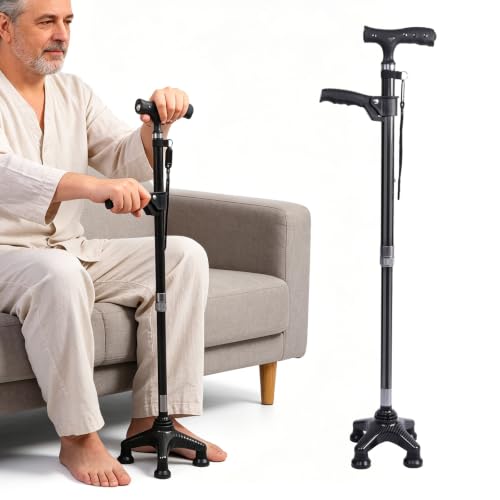
Innovations in mobility aids have produced hybrid bases like articulating pivot pods alongside traditional rigid four-legged frames. The NOVA Foldable Quad Cane features a compact four-tip base connected to the shaft through a pivoting joint that flexes smoothly. Similarly, the SILAIDESI carbon fiber model incorporates a rotatable quad foot that maintains surface contact across slightly sloped ground. These articulating designs adapt fluidly when walking over uneven outdoor pavers, gravel walkways, or outdoor ramp transitions.
For users who travel frequently by air with folding quad canes, coordinating your walking aid alongside carry on travel packs keeps essential items hands-free. Rigid four-pronged bases, by comparison, do not flex, demanding that the user maintain the shaft strictly perpendicular to the ground to keep all four tips planted. While rigid bases offer firmer static support for individuals who lean heavily during transfers, articulating bases deliver smoother continuous rolling action during outdoor walking strides. Matching the base flexibility to your daily environment ensures reliable floor grip wherever you walk.
Stair Navigation Rules and Step Clearance Warnings
Navigating staircases with a quad cane demands rigorous technique because standard stair treads are often narrower than the base footprint of the cane. Whenever possible, use a wall-mounted handrail for primary stability while holding the quad cane in your free hand. When ascending stairs, remember the clinical safety phrase: up with the good, down with the bad. Lead upward with your stronger, unaffected leg first, then lift your weaker leg and the quad cane together onto the same step riser.
When descending stairs, reverse the sequence by moving the quad cane and your weaker leg down to the lower step simultaneously. Once the cane tips and your recovering foot are firmly planted, step down with your stronger leg onto that same tread. You must ensure that all four rubber feet sit completely flat on the stair tread surface before transferring any body weight downward. If the step tread is too narrow to hold all four feet, turn the quad cane sideways so the base fits fully within the step boundary.
Never let the outer legs of a quad cane hang over the edge of a step tread. Overhanging tips can slip off the stair lip under pressure, tilting the shaft sharply and causing catastrophic balance loss. If your home has exceptionally steep, narrow stairs that cannot accommodate a quad base safely, consult a physical therapist about using a standard single-point cane or installing dual handrails. Safety on staircases takes absolute priority over convenience.
Hardware Maintenance and Stability Verification Checks
Routine inspection of your quad cane hardware maintains structural integrity and prevents hazardous mid-stride mechanical failures. Every week, examine the four molded rubber tips located on the bottom of the base prongs. Inspect the bottom tread patterns for uneven wear, smooth bald spots, or cracking rubber compounding. Quality replacement tips feature internal steel reinforcement washers that prevent the hollow metal cane legs from cutting through the rubber bottom under continuous load.
Check the push-button spring tension by depressing the pin and confirming that it snaps firmly back into place with crisp audible feedback. Tighten the central anti-rattle locking nut whenever you notice metallic clicking, rattling, or rotational play during floor strikes. A clicking noise almost always signals that the threaded collar has loosened, allowing the inner aluminum tube to vibrate against the outer casing. Keeping the collar tightened firmly preserves shaft rigidity and silences annoying walking noise.
Recognizing When to Transition from a Quad Cane to a Walker
Quad canes deliver reliable unilateral support, but they cannot replace the bilateral balance stabilization provided by standard walkers or wheeled rollators. Canes are designed to offload only fifteen to twenty-five percent of lower-limb weight and require adequate balance control from your remaining limbs. If you experience frequent near-falls, profound weakness across both legs, or progressive neurological balance decline, relying solely on a cane can become hazardous. Recognizing the functional boundaries of your mobility aid is critical for personal fall prevention.
Symptoms indicating the need for bilateral support include sudden freezing of gait, severe dizziness, or an inability to stand upright without leaning heavily to one side. If you find yourself needing to hold furniture with both hands while using your cane, schedule a formal mobility assessment with a licensed physical therapist or physician. A professional clinical gait evaluation can determine whether a wheeled rollator or two-wheeled walker provides the safer mobility platform for your daily needs.
Taking the time to accurately measure, adjust, and lock your quad cane establishes a secure foundation for safe daily walking and rehabilitation. Verify that your handle height aligns with your wrist crease, ensure the flat edge of the base faces inward, and confirm the locking collar remains tightly seated before setting out. When configured with care and maintained regularly, an adjustable quad cane restores balance confidence, protects vulnerable lower-extremity joints, and supports independent mobility across every stride.







Write Your Review
No reviews yet. Be the first to share your experience!