


Walking with an improperly fitted mobility aid can quietly sabotage your posture, strain your shoulders, and increase the risk of accidental tripping. Whether recovering from an orthopedic procedure or seeking everyday balance stability, learning how to adjust walking cane height ensures your body weight transfers smoothly through the cane shaft rather than stressing vulnerable joints. When a cane sits at the wrong elevation, your body compensates by hiking the shoulder upward or slouching forward, undermining natural balance. Matching the handle position directly to your anatomy restores an upright, confident gait that offloads up to twenty-five percent of lower-limb pressure.
Achieving the right fit involves measuring your wrist crease while standing tall in your everyday walking footwear. Telescoping aluminum frames from brands like Medline, Vive, and REHAND feature push-button detents and threaded locking rings that make sizing straightforward once you recognize your anatomical reference points. Active individuals managing lower-extremity stiffness often pair stable walking aids with knee joint support apparel to maintain mobility across daily errands. Setting your cane to the precise notch allows your elbow to rest at a comfortable fifteen-to-twenty-degree flex, giving you dependable lever support with every step.


The Complete Guide to Cane Height Adjustment and Gait Alignment
Adjusting a walking cane to the correct height is the single most critical step in establishing safe mobility and balanced walking mechanics. When the cane handle aligns precisely with your body frame, it allows the upper body to transfer weight naturally while protecting your spine from awkward twisting. A properly sized mobility aid acts as a natural extension of your arm, providing immediate ground feedback and reducing strain across the lower joints. Taking time to establish this fit ensures that your mobility aid delivers stability rather than introducing new physical fatigue.
Why Proper Sizing Protects Posture and Joint Mechanics
A walking cane is designed to offload between fifteen and twenty-five percent of body weight away from a weakened or recovering lower extremity. When the shaft is adjusted correctly, that load transfers smoothly from your palm through the vertical tubing and straight into the rubber base. This mechanical offload reduces peak forces on the hip, knee, and ankle joints during the midstance phase of walking. Without proper alignment, downward forces fail to travel through the cane efficiently, forcing your upper back and wrist to absorb unnecessary stress.
Improper handle elevation forces the body into unnatural compensatory postures that compromise long-term joint health. If the handle rests even two inches too high, you must elevate your shoulder girdle on every forward stride, triggering muscular tension in the trapezius and neck. Conversely, a cane that sits too low forces you to lean forward, curving the thoracic spine and placing excessive pressure on the lumbar vertebrae. Maintaining an upright posture preserves your natural balance centers and prevents secondary musculoskeletal pain during daily walks.
Measuring Accurate Cane Height with Footwear
Accurate height measurement begins with standing in the exact footwear you intend to wear during regular daily outings. Shoe outsole thickness can vary by more than an inch between thin house slippers, walking sneakers, and supportive outdoor shoes. Measuring without shoes or while wearing footwear with atypical heel heights leads to an inaccurate adjustment that compromises stability outdoors. Stand on a firm, level surface with your feet roughly shoulder-width apart to create a stable, natural standing base.
Your posture during measurement determines the final accuracy of the cane shaft setting. Stand as tall as comfortably possible while letting your shoulders rest back and down in a relaxed position. Allow your arms to hang naturally at your sides without forcing your elbows completely stiff. The primary anatomical landmark for cane height is the distal crease of your wrist, which is the skin fold where your hand meets your forearm. When measured correctly, the top surface of the cane handle should align directly with this wrist crease.
Operating Telescoping Push-Button Pins and Silencing Collars
Most modern mobility aids utilize a telescoping aluminum shaft equipped with a spring-loaded brass push-button detent system. To begin the adjustment, loosen the threaded anti-rattle collar or lock nut located near the adjustment holes by turning it counterclockwise. Depress the brass push-pin firmly with your thumb so it slides inside the outer tubing. Slide the inner aluminum shaft up or down until the desired height increment aligns with the outer casing, and let the pin snap fully into the selected hole.
Securing the threaded locking collar is an essential safety step that many cane users overlook during initial setup. Once the push-pin is fully engaged in its designated hole, rotate the locking collar clockwise until it rests firmly against the outer tube joint. This threaded ring tightens the tolerance between the overlapping aluminum tubes, eliminating shaft wobble and preventing annoying clicking noises during each stride. A firmly tightened locking collar also acts as a redundant safeguard against sudden pin slippage during weight bearing.
Confirming the 15-to-20-Degree Elbow Bend
Once the push-button pin is locked into place, you must verify that your arm maintains an optimal fifteen-to-twenty-degree bend at the elbow. Place the rubber tip of the cane approximately four to six inches forward and two inches outward from the pinky toe of your foot. Rest your hand comfortably on the grip while standing upright with your shoulders completely relaxed. A fifteen-to-twenty-degree bend looks like a slight, natural flex that prevents your arm from locking out into full extension while avoiding an acute ninety-degree crook.
This specific joint angle serves a vital biomechanical purpose during active ambulation. An elbow maintained at a slight flex acts like a biological shock absorber, dampening ground impact forces before they travel into your shoulder and cervical spine. It also provides functional leverage, allowing your triceps and forearm muscles to push down effectively when extra balance support is required. If your arm is completely straight, you lose mechanical advantage and risk jarring your shoulder joint with every forward heel strike.
Contralateral Hand Placement and Proper Walking Cadence
A critical rule of safe cane ambulation is holding the mobility aid in the hand opposite your injured, recovering, or weaker leg. Clinical mobility standards refer to this method as contralateral placement, which mirrors the natural reciprocal arm swing of human gait. If your left knee is painful or recovering from surgery, you hold the walking cane in your right hand. Holding the device on the same side disrupts your center of gravity and increases sideways sway, which substantially raises your risk of stumbling.
Contralateral positioning stabilizes your pelvis by shifting weight away from the compromised hip or knee during movement. As you step forward with the affected leg, you simultaneously advance the cane forward to meet the ground at the same moment. This dual contact creates a wide, supportive tripod base between your sound leg, the affected leg, and the cane tip. Your body weight distributes evenly across both contact points, relieving joint pressure and restoring a smooth, symmetrical walking cadence.
Negotiating Stairs and Curbs Safely
Staircases and outdoor curbs present complex balance challenges where improper cane height and poor stepping sequences can cause serious falls. Physical therapists teach the universal sequencing guideline known as stepping up with the good leg and down with the bad leg. When ascending stairs, your stronger, unaffected limb leads upward onto the step first to lift your body weight. Once your sound foot is securely planted on the upper tread, bring your recovering leg and the cane up to join it on the same step.
Descending stairs reverses this mechanical progression to protect your recovering joints from high downward impact forces. When moving down, place the cane down onto the lower step first, followed immediately by your affected or recovering leg. Your stronger leg remains on the upper step, bending slowly to control your descent until the cane and injured foot have established stable footing below. Finally, bring your sound leg down onto the lower step so both feet and the cane rest securely together before attempting the next tread.
Handle Styles and Grip Elevation Alignment
Handle geometry directly influences how downward weight is directed through the cane shaft and impacts the perceived handle height. Offset handles, such as those found on the Vive Offset Walking Cane and Medline models, curve forward before connecting with the main shaft. This structural curve aligns the user palm directly over the vertical axis of the cane rather than slightly behind it. Centering downward force directly over the base tip provides superior stability and prevents the cane from kicking outward during forceful weight bearing.
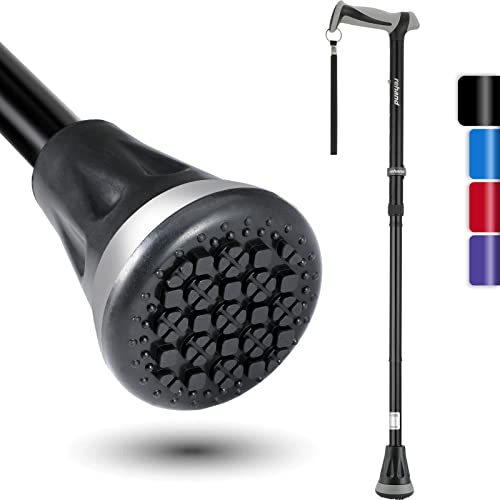
Ergonomic palm-contoured grips distribute downward pressure across the broad surface of the palm rather than concentrating force into narrow nerve pathways. Traditional narrow crook or T-shaped handles can pinch the ulnar nerve or aggravate carpal tunnel syndrome during extended walks. Models like the REHAND Walking Cane utilize an innovative handle that is longer and wider than traditional grips, combining hard polypropylene for structural support with soft thermoplastic rubber for comfort. Spreading hand contact across the thenar eminence significantly reduces palm fatigue and prevents cramping for individuals managing osteoarthritis.
Height Sizing for Folding and Pivot Base Canes
Collapsible walking aids offer immense convenience for active adults, but their folding joints require careful inspection during height adjustment. Canes like the PELEGON Folding Cane and REHAND foldable model feature segmented aluminum shafts connected by internal elastic shock cords. These canes break down into compact lengths of ten to twelve inches, allowing them to tuck neatly into totes, vehicle compartments, or backpacks. When deploying a folding cane, ensure that each aluminum joint sleeve seats completely into its neighboring segment before applying downward weight.
Frequent travelers often choose folding canes to navigate airport terminals, rideshares, and public transit without managing cumbersome equipment. Reviewing practical carry on luggage volume guides helps you choose bags with adequate internal clearance for folded mobility aids alongside personal gear. Canes like the PELEGON model collapse down to ten and a half inches, making them effortless to stow under airline seating or in overhead bins. Once at your destination, reassembling the shaft takes mere seconds, restoring your verified height setting without requiring tools.
Self-standing pivot bases introduce another dimension to balance support by maintaining full floor contact across uneven ground surfaces. The HONEYBULL Walking Cane incorporates an extra-wide four-inch base with three rubber tips that stands upright independently on flat floors. This self-standing capability eliminates the frustrating hassle of propping your cane against tables or bending down to retrieve it after it topples. Articulating pivot mechanisms flex smoothly during your forward stride, keeping the rubber tread flat against sloped driveways, curb ramps, and tiled floors.
Troubleshooting Height Faults and Mechanical Clicking
Identifying subtle physical warning signs can alert you to an incorrect height setting before it causes chronic muscle pain or joint injury. If your cane is set too tall, you will notice your shoulder riding upward toward your ear every time the tip contacts the ground. A cane that is too high also forces your arm into an unnatural backward angle, reducing forward propulsion and slowing your walking rhythm. You may also experience aching in the upper shoulder blade or tension headaches from sustained muscular contraction.
Conversely, a cane adjusted too short forces you to stoop forward, rounding your shoulders and compromising your visual field during ambulation. Walking with a low cane strains the lumbar extensor muscles, often leading to dull lower back pain after just fifteen minutes of walking. It also forces your elbow into near-complete extension, eliminating the shock-absorbing cushion needed when stepping onto hard concrete or tile. If you find yourself leaning heavily to one side or looking downward constantly, your cane likely needs to be raised by one or two notches.
Weight Capacity Thresholds and When to Consider a Walker
Every walking cane is engineered to meet specific weight-bearing thresholds that dictate its safety and structural rigidity. Standard aluminum models like the Vive Offset Cane, PELEGON Folding Cane, and Medline Offset Canes are rated to support users up to 300 pounds. Reinforced options such as the REHAND Adjustable Cane feature certified capacities up to 350 pounds, accommodating heavier statures with enhanced stability. Users must understand that these ratings represent partial weight offloading rather than full-body suspension.
Recognizing when balance decline necessitates upgrading from a cane to bilateral support is critical for ongoing fall prevention. If you experience frequent near-falls, freezing of gait, severe bilateral leg weakness, or extreme balance instability, a single walking aid is no longer safe. Bilateral mobility devices such as four-wheeled rollators or front-wheeled walkers provide dual-sided stability and a broad support base. When uncertainty arises regarding your mobility needs, schedule a formal gait evaluation with a physical therapist or physician to select the safest medical device for your condition.
Pre-Walk Verification and Rubber Tip Maintenance
Performing a brief safety inspection before stepping outdoors prevents unexpected equipment failures and maintains optimal stability. Check that the push-button pin is fully locked through its adjustment hole and that the silencing nut remains hand-tight. Examine the bottom rubber tip to ensure the tread sipes are clean, free of embedded gravel, and deep enough to channel away water. Firmly push down on the cane handle while standing on a carpeted floor to confirm that the shaft supports your weight without slipping or creaking.
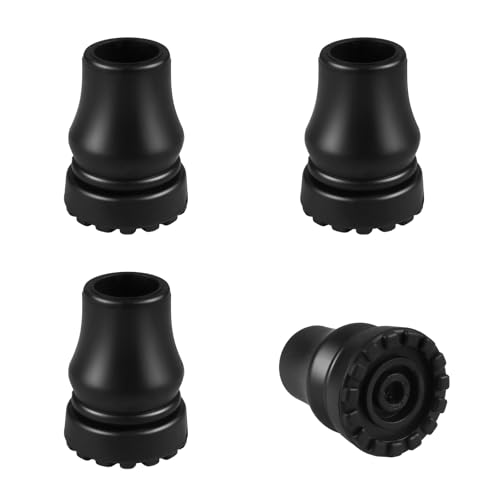
Rubber cane tips wear down gradually over time through daily friction against concrete, asphalt, and tile floors. Most high-quality rubber tips incorporate an internal metal washer designed to prevent the sharp aluminum tubing from punching through the rubber base. Once the tread grooves wear smooth or the internal washer becomes visible, replace the rubber ferrule immediately to prevent sudden slip accidents. Routine maintenance ensures that your adjusted cane remains a dependable, confidence-inspiring tool for daily mobility and safe independence.





Write Your Review
No reviews yet. Be the first to share your experience!