


Walking with specialized poles provides a proven way to restore upright posture, offload lower body joints, and maintain rhythmic cadence during everyday movement. Many individuals managing mild balance instability or joint discomfort turn to how to do nordic pole walking to reduce pressure on hips and knees while engaging stabilizing core muscles. Unlike standard single-point walking canes that provide unilateral support, dual walking poles encourage bilateral symmetry and steady weight distribution across varied surfaces. Pairing an active routine with comfortable gear such as supportive knee hiking pants helps maintain lower-body comfort while you focus on upright stability.
Mastering how to do nordic pole walking correctly requires understanding proper pole height, strap engagement, and coordinated arm swing mechanics. Whether you choose ergonomic fitness poles or specialized rehabilitation models with dedicated palm ledges, setting the correct shaft length prevents unnecessary shoulder hiking and wrist strain. High-density rubber tips, often called asphalt paws, grip concrete sidewalks securely while carbide tips bite into natural dirt paths. With the right adjustments and fundamental walking mechanics, you can enjoy confident outdoor exercise while taking strain off sensitive joints.

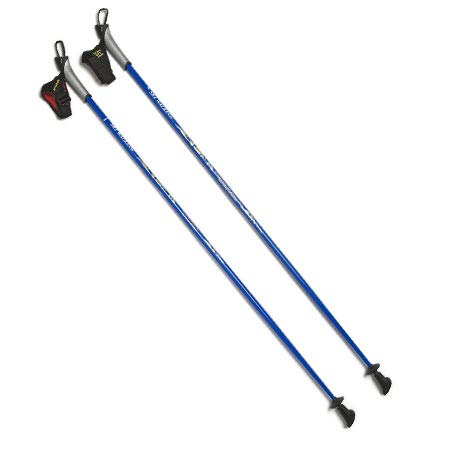


Mastering Nordic Pole Walking for Stability, Fitness, and Joint Relief
Learning how to do nordic pole walking transforms an ordinary stroll into an active exercise that enhances balance and protects sensitive joints. By coordinating arm movements with a natural walking stride, dual poles distribute weight across your upper body and reduce impact on lower joints. Mastering this technique begins with understanding how your body interacts with the ground through each pole plant.
Understanding the Biomechanics of Nordic Pole Walking
Human walking relies on a natural reciprocal arm swing that balances the spine as each leg moves forward. Integrating poles engages the latissimus dorsi, chest muscles, and core stabilizers with every stride. This upper body recruitment helps propel your body forward while maintaining an upright posture that relieves lower back fatigue.
Joint offloading is one of the greatest biomechanical advantages of walking with poles. Placing weight through the handles transfers downward force away from the lumbar spine, hips, knees, and ankles. The bilateral support of two poles creates a wider base of support, reducing the fear of falling that often limits outdoor mobility.
Two distinct movement styles exist within this discipline, depending on your mobility goals. Classic fitness technique angles the poles backward to generate propulsive thrust and increase cardiovascular conditioning. In contrast, rehabilitation poling places poles more upright to maximize stability and downward joint offloading.
Choosing Between Fitness Straps and Strapless Rehabilitation Grips
Pole handles dictate how force transfers from your upper body into the ground. Traditional fitness poles, such as those made by the American Nordic Walking System, feature wrap-around glove straps that secure the handle to the palm. These glove-style straps allow walkers to open their hands completely at the end of each backward push, preventing hand fatigue and encouraging fluid circulation.
Rehabilitation designs prioritize safety and weight support over propulsion. Models like the Urban Poling ACTIVATOR use strapless ergonomic handles featuring a wide contoured base ledge called a CoreGrip. The wide palm ledge supports downward pressure through the heel of your hand, maintaining your wrist in a neutral position throughout each step without trapping your fingers in straps.
Walkers managing hand osteoarthritis or reduced grip strength often prefer specialized grip contours. Designs like the York Nordic Motivator incorporate patented contoured thumb rests that reduce strain on the thumb carpometacarpal joint. Resting the thumb comfortably on top of the grip allows secure pole guidance without requiring a tight fist during longer outings.
How to Accurately Size and Adjust Your Walking Poles
Proper pole height is essential for maintaining natural posture and preventing shoulder strain. To determine your ideal pole length, stand tall on a flat surface while wearing your everyday walking shoes. Relax your shoulders completely and bend your elbows at a right angle so your forearms rest parallel to the floor, maintaining a comfortable 90-degree bend.
A standard mathematical calculation can also verify your height setting before you head outside. Multiplying your height in inches by 0.68 provides an accurate baseline length for fitness walking. Setting poles too high causes neck tension, while setting them too low forces your torso into an undesirable forward slump that limits breathing.
Fixed-length one-piece poles offer exceptional rigidity and vibration dampening for regular fitness walkers. Telescoping poles, such as two-piece aluminum models with lever locks or push buttons, provide easy height adjustments and convenient travel storage. Testing shaft stability against the ground before your walk ensures the locking mechanisms will not slip unexpectedly under downward pressure.
Setting Up Your Tips: Rubber Paws Versus Carbide Spikes
The contact point between your pole and the ground dictates both traction and joint comfort. Most walking poles feature bare tungsten carbide tips underneath removable rubber covers. Bare metal tips pierce soft ground to provide dependable grip on dirt paths, but they slip dangerously and produce harsh vibrations when planted on hard asphalt.
Walking on sidewalks, roads, or indoor tracks requires installing angled rubber tips, commonly known as asphalt paws. Accessories like the York Nordic tapered rubber tips absorb ground strike vibrations and provide exceptional grip on hard pavement. These rubber boots feature an angled profile designed to maintain flat surface contact when the pole is planted at a backward angle.
Proper rubber paw orientation is critical for safety and effective traction. The elongated toe of the rubber paw must point backward toward your heels, with the flat tread resting flush against the ground. If the paw is twisted sideways, the narrow edge will skip across the pavement and compromise your stability.
Step-by-Step Technique: The Classic Nordic Walking Gait
Mastering the classic propulsion gait begins with establishing natural arm and leg coordination. Start by securing your wrist straps and walking normally across a flat path while letting your poles drag freely behind you. Notice how your left arm naturally swings forward as your right heel strikes the ground, establishing a relaxed reciprocal cadence.
Once your natural rhythm feels smooth, lightly grasp the handles and begin planting the rubber tips behind your body. In classic fitness walking, the pole tip strikes the pavement roughly opposite your trailing heel at an angle of approximately 45 degrees. Planting behind your center of gravity encourages forward propulsion with every stride without creating an abrupt braking force.
As your lead foot steps forward, push downward and backward through the grip and strap to drive your body ahead. Extend your arm behind your hip and release your fingers slightly from the handle, allowing the strap to transfer the final push. As the push concludes, swing the trailing pole forward smoothly to prepare for the next plant.
Maintain an upright posture with your chest open and your abdominal muscles gently engaged throughout the exercise. Keep your gaze directed about ten to fifteen feet ahead of you rather than staring directly down at your shoes. A smooth, relaxed rhythm prevents muscle tension and allows you to walk with confident, continuous momentum.
The Stability and Rehabilitation Technique for Balance Support
The rehabilitation poling technique differs substantially from the classic fitness stride because its primary goal is balance enhancement and joint protection. Instead of angling poles backward for speed, rehabilitation walkers position their poles more vertically alongside their body. Using poles like the Urban Poling ACTIVATOR, the tip plants close to your lead foot to create a dependable platform for immediate weight offloading.
Downforce mechanics are central to the stability technique. Rather than pushing backward to accelerate, you apply downward pressure through the wide base of the ergonomic palm ledge with every step. Walking in flexible, breathable attire such as lightweight walking pants ensures full leg mobility while you concentrate on deliberate, stable footsteps.
Gait sequencing during balance poling can be adapted to individual stability needs. Many physical therapy patients begin with a step-to gait, moving both poles forward first before stepping their feet into the supported zone. As strength and confidence improve, walkers progress to a reciprocal pattern where the opposite pole and foot move forward in unison.
Navigating Curbs, Incline Slopes, and Staircases
Managing elevation changes requires deliberate adjustments to your body position and pole placement. When walking up an incline, shorten your stride slightly and lean forward from your ankles while keeping your spine straight. Plant your poles closer to your body and press downward firmly to help lift your body weight up the hill.
Walking downhill requires prioritizing knee protection and controlled braking. Plant your poles slightly ahead of your feet to create a stable braking system that moderates your descent speed. Lowering your body weight gently through the pole grips reduces the jarring compressive forces that often cause knee discomfort during downhill walks.
Staircases and curb thresholds demand extra caution to prevent tripping. When stepping up a curb, place your lead foot onto the surface first, followed by your poles and trailing foot. If you are negotiating a full staircase with handrails, hold both poles in one hand by their shafts and grip the sturdy railing with your other hand.
Common Technique Mistakes and How to Correct Them
One of the most frequent beginner errors is pacing, where the walker swings the arm and leg on the same side forward together. This unnatural movement disrupts balance, causes robotic posture, and feels awkward almost immediately. If you find yourself pacing, stop walking, let the poles drag freely behind you, and resume walking until your natural arm swing returns.
Another common mistake in fitness walking is over-reaching, which occurs when a walker plants the pole too far forward. Sticking the pole in front of your lead foot creates a braking reaction that works against your forward progress and strains your shoulder joints. Keeping the plant angle behind your heel line ensures smooth propulsion without joint jarring.
Grip tension is another area where many walkers struggle initially. Tightly clutching the handles throughout your entire walk leads to forearm fatigue, finger stiffness, and unnecessary shoulder tightness. Trusting your glove straps or resting your palm on an ergonomic CoreGrip allows you to maintain a relaxed grip between plants.
Hardware Inspection, Locking Mechanisms, and Tip Maintenance
Routine inspection of your walking poles is essential for ensuring reliable stability on every outing. For adjustable poles, check the locking mechanisms regularly to ensure the internal cams, lever locks, or push buttons hold securely. Options like the York Nordic Motivator use robust push-button locks designed to support substantial weight capacities up to 500 lbs.
Rubber tips require regular monitoring for wear and tear, especially if you walk frequently on rough city asphalt. High-grade replacement tips, such as the York Nordic vulcanized rubber replacements, include embedded metal washers that prevent the sharp carbide tip from piercing through the rubber. Replacing worn paws promptly maintains reliable grip on slick sidewalks and protects your pole shafts.
Cleaning your poles after walking in dusty, sandy, or wet conditions prolongs the lifespan of all moving parts. Wipe down the aluminum shafts with a dry cloth and allow collapsible segments to dry completely before storing them in a closet. Keeping your equipment clean and dry ensures smooth height adjustments whenever you are ready to walk.
Clinical Considerations and Knowing When to Transition
Nordic walking poles serve as an exceptional mobility tool for individuals managing mild balance hesitation or post-surgical recovery. However, bilateral poles are designed for individuals who possess functional independent ambulation and moderate balance control. Poles provide dynamic balance assistance and partial weight offloading, but they are not intended to replace formal medical weight-bearing devices like axillary crutches after acute fractures.
Certain clinical signs indicate when dual walking poles are no longer sufficient for daily safety. If you experience frequent freezing of gait, severe dizziness, or an inability to bear partial weight on one leg, bilateral poles can increase fall risks. In these situations, transitioning to a stable four-wheeled rollator or a standard walker provides the continuous bilateral base of support required to prevent falls.
Incorporating dual walking poles into your daily lifestyle can revitalize your walking routine and restore confidence on the sidewalk. By setting your poles to the correct height, mastering natural reciprocal arm swing, and choosing the proper tips for your terrain, you gain an effective tool for active mobility. Consistent practice with proper technique turns every walk into an enjoyable, joint-friendly exercise that supports long-term physical well-being.







Write Your Review
No reviews yet. Be the first to share your experience!