


Recovering from joint surgery or navigating mild balance hesitation requires equipment that matches user anatomy precisely. An improperly sized walking stick forces the shoulder to hike or causes the spine to tilt, increasing joint fatigue instead of relieving it. Understanding how to fit a cane for walking allows individuals to offload up to twenty-five percent of body weight from painful knees, hips, or ankles while keeping an upright posture. A properly adjusted mobility device also restores rhythmic gait cadence, easing tension across the lower back and neck during routine daily walks.
Finding the correct balance between handle height, grip ergonomics, and base stability transforms a simple walking stick into an effective rehabilitation tool. Modern designs feature telescoping push-button adjustments, non-skid rubber feet, and anatomical hand grips that reduce strain on arthritic wrists. A collapsible shaft makes transport seamless, allowing users to pack their support stick alongside a carry-on travel pack when boarding flights or commuting. By confirming the correct measurement landmarks before stepping out, walkers can protect their joints and navigate indoor and outdoor surfaces with steady confidence.



The Biomechanical Guide on How to Fit a Cane for Walking
Achieving a secure fit with an adult mobility aid is essential for protecting posture, restoring confidence, and preventing accidental falls. When a walking stick rests at the wrong height, it alters spinal alignment and causes compensatory muscle strain throughout the upper back. Learning how to fit a cane for walking starts with basic anatomical measurements and ends with verifying natural joint flexion. Taking a systematic approach ensures that every step receives reliable ground support while minimizing physical exhaustion.
Measuring Floor to Wrist Crease: Finding the Correct Anatomical Landmark
Accurate measurement begins by establishing a natural standing posture on a flat, even floor. The user must wear their everyday walking shoes during this process, as sole thickness directly affects the distance between the hand and the floor. Standing with feet shoulder-width apart allows the body weight to settle naturally across both heels. Caregivers or family members should assist during this measurement to keep the user from bending over or distorting their posture.
The primary anatomical landmark for cane sizing is the distal wrist crease, located on the underside of the wrist joint. With the arm hanging loosely at the user’s side, this small skin fold indicates where the top of the handle should align. Alternatively, clinicians frequently reference the greater trochanter, which is the bony protrusion on the side of the upper hip. Both landmarks provide an identical height reference that keeps the cane handle positioned for optimal mechanical leverage.
Looking downward while measuring is one of the most frequent mistakes that disrupts accurate sizing. When a person tilts their head or bends their torso to view the ruler, the entire shoulder girdle drops by an inch or more. This distortion results in a stick that is cut or adjusted too short, forcing a slouched gait. Having a second person measure from the floor to the wrist crease keeps the user standing straight and tall.
The Fifteen to Twenty Degree Elbow Bend: Biomechanical Leverage
Proper cane height must create a slight bend at the elbow joint when the user rests their palm on the handle. Physical therapy standards recommend an elbow flexion angle between fifteen and twenty degrees. This slight bend acts as a biological shock absorber, dampening ground impact forces before they reach the shoulder or neck. A gentle angle also allows the triceps and latissimus dorsi muscles to engage efficiently when pushing down.
When a walking stick is adjusted too high, the elbow is forced into an excessive bend exceeding thirty degrees. This acute angle overtaxes the forearm muscles and requires continuous triceps contraction to maintain stability. Over time, an overly tall cane forces the shoulder upward into a chronic hike, leading to rotator cuff strain and neck stiffness. It also reduces downward pushing leverage, making it difficult to offload weight from an injured leg.
Conversely, an overly low cane straightens the arm completely, locking the elbow into full extension. Walking with a locked elbow transfers harsh mechanical vibrations directly into the shoulder joint and spine with every footstrike. It also pulls the user’s torso forward into a forward bend, increasing fatigue across the lumbar muscles. Verifying a comfortable fifteen-degree elbow flex in a mirror provides quick visual confirmation that the shaft length is balanced.
Adjusting Telescoping Shafts and Anti-Rattle Locking Rings
Modern aluminum walking sticks utilize telescoping tubular shafts with spring-loaded brass detent pins for rapid adjustment. To change the length, press the dual locking pins inward while gently sliding the inner section up or down. Align the pin with the matching pre-drilled adjustment hole until it clicks firmly into position. Always pull and push on the shaft to ensure the pin is completely engaged before trusting it with body weight.
Telescoping adjustment ranges vary widely across different cane models and manufacturers. For example, the REHAND Walking Cane – Foldable, Adjustable offers eight distinct height settings spanning from thirty-one to thirty-eight inches, accommodating adults from five feet to six feet five inches tall. Another model, the REHAND Adjustable Walking Cane for Seniors Adults, provides ten height settings ranging from forty to forty-nine inches for taller individuals. Shorter options like the Comfkey Folding Lightweight Walking Stick adjust between thirty-three and thirty-seven inches, giving users diverse sizing choices.
Many telescoping canes incorporate a threaded locking collar or silencer ring located just below the adjustment holes. Once the brass push-button is securely locked into place, hand-tighten this collar clockwise until it is snug against the outer shaft. This ring compresses the internal joint, eliminating loose clicking noises and annoying shaft play during movement. Checking the tightness of this collar weekly prevents annoying vibration and keeps the cane structurally rigid.
Trimming Solid Hardwood Canes for a Permanent Fit
Traditional wooden walking canes offer classic styling and quiet performance, but they lack telescoping buttons and require manual trimming. Sizing a solid hardwood cane is a permanent procedure that demands careful measurement before making a cut. The rule of measuring twice and cutting once is particularly critical here, as an over-shortened wooden stick cannot be lengthened. Users should always err on the side of leaving the cane slightly longer on the initial cut.
To trim a wooden stick, remove the rubber ferrule from the bottom of the shaft using a firm twisting motion. Stand in everyday walking shoes on a level surface, holding the un-cut cane alongside the leg with the handle resting against the palm. Mark the shaft with a pencil exactly at the level of the distal wrist crease. Use a miter box and a fine-tooth handsaw to make a clean, ninety-degree perpendicular cut across the marked line.
After sawing, smooth the cut edge using medium-grit sandpaper to remove rough splinters and burrs. Inspect the rubber ferrule to confirm that its internal steel reinforcement washer is clean and intact. Push the rubber tip firmly onto the trimmed wooden base, tapping it gently on a solid floor to seat it fully. The steel washer prevents the wooden shaft from cutting through the rubber base over months of walking.
Contralateral Placement: Holding the Cane on the Opposite Side
One of the most widespread misunderstandings in mobility support is which hand should hold the walking stick. Unless specifically directed by a physical therapist, a cane must always be held in the hand opposite the injured, weak, or painful leg. This biomechanical arrangement is known as contralateral placement. Holding the device on the unaffected side mimics the natural reciprocal arm swing of human walking, maintaining normal rhythm.
Contralateral positioning widens the base of support and keeps the center of gravity centered between the feet. When stepping forward with the weak leg, the cane moves forward at the exact same moment. As weight settles onto both the foot and the cane tip, fifteen to twenty-five percent of the load transfers away from the vulnerable joint. This load-sharing reduces joint contact forces across the hip, knee, or ankle, relieving sharp discomfort.
Placing the cane on the same side as the painful limb creates an awkward, asymmetrical limp known as an ipsilateral gait. In this incorrect configuration, the user must lean heavily sideways over the cane, pulling the spine out of alignment. This lateral shift strains the lower back and increases lateral instability, significantly raising the risk of stumbling. Keeping the cane on the opposite hand preserves an upright, symmetric posture during every stride.
Handle Geometries: Matching Grip Contours to Hand Comfort
Handle design plays a massive role in user compliance, hand comfort, and long-term joint health. Traditional crook or tourist handles curve like an umbrella, which concentrates downward pressure into a narrow strip across the palm. For seniors managing rheumatoid arthritis or carpal tunnel syndrome, this focal pressure can cause numbness and soreness. Modern ergonomic handles distribute force more broadly across the thenar eminence, protecting sensitive nerve pathways.
Offset handle canes feature a deliberate swan-neck curve that positions the grip directly above the vertical center of the shaft. This alignment directs downward body weight straight through the rubber tip, minimizing rotational torque on the wrist. Straight-shaft models like the Travel Folding Trekking Hiking Pole with Carrying feature contoured EVA foam grips designed for outdoor hand comfort and vibration reduction. Meanwhile, models with dual-material grips combine rigid internal polypropylene for structural strength with soft thermoplastic rubber for cushioned stability.
Anatomical or palm-molded grips are sculpted specifically to fit the distinct contours of the left or right hand. These specialized grips provide a wide resting platform that supports the palm without requiring a tight, exhausting finger grasp. Users with severe osteoarthritis or reduced grip strength often experience immediate relief from joint fatigue with anatomical handles. Because anatomical grips are hand-specific, buyers must ensure they select the correct side corresponding to their contralateral hand placement.
Base Configurations and Rubber Traction: Stability vs. Agility
The bottom contact point of a walking aid determines how securely it grips the floor and how easily it maneuvers. Standard single-point rubber ferrules offer excellent agility and light carry weight, making them ideal for individuals with minor balance hesitation. However, single-point canes fall over when propped against tables or counters, requiring uncomfortable bending to retrieve. Replacing a standard tip with a self-standing quad or multi-prong base resolves this daily annoyance.
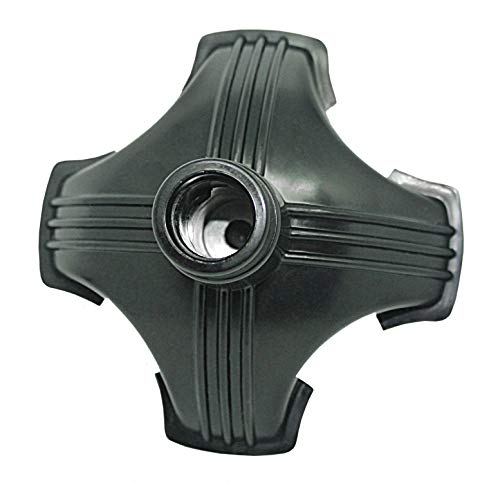
Aftermarket bases like the RMS Cane Tip – Self Standing Quad Base Replacement and the supregear Cane Tip 3/4″ fit standard three-quarter-inch cane shafts. These multi-prong rubber bases provide a wide footprint that allows the walking stick to stand upright on flat floors independently. Similarly, the Cane Tip PANZHENG 3/4 inch 6 Support Cane Feet utilizes six contact points to absorb walking impact while maintaining ground grip across stairs and uneven surfaces. These broad bases significantly reduce bending strain for adults with spinal stiffness or limited flexibility.
Walkers managing chronic patellar discomfort often pair their mobility aid with supportive knee apparel to further stabilize joint alignment during long recovery walks. Combining dependable non-slip rubber traction with joint-friendly clothing provides comprehensive physical support across diverse walking terrains. Inspecting rubber tread grooves on a monthly basis ensures that the base maintains strong friction against slick tile and wet pavement. Hardened or worn-down rubber should be replaced promptly before traction becomes compromised.
Step-by-Step Gait Technique: Flat Ground, Curbs, and Stairs
Walking smoothly on level ground requires coordinating the cane with the legs in a natural three-point cadence. Begin by holding the cane roughly two inches forward and four inches lateral to the outside of the shoe. Advance the walking stick and the weaker leg forward simultaneously for a comfortable stride length. Then, step forward with the stronger leg, placing it slightly past the cane tip while pushing down through the handle.
Negotiating outdoor curbs requires careful sequencing to maintain continuous balance without losing footing. When stepping up onto a curb, always lead with the stronger leg, pressing through that foot to lift the body upward. Once the strong foot is firmly on the sidewalk, bring the cane and the weaker leg up together onto the higher surface. When stepping down off a curb, reverse the sequence by moving the cane and weaker leg down first, followed by the stronger leg.
Stair navigation follows the time-tested clinical rule of stepping up with the good leg and down with the bad leg. When ascending stairs, grasp the handrail with one hand and hold the cane in the other hand. Step up onto the first riser with the uninjured leg, then bring the affected leg and cane up onto the same step. When descending stairs, lower the cane and the affected leg down to the step first, followed by the stronger leg.
Exercising extreme caution is necessary when carrying quad canes or multi-prong bases on narrow stairways. Wide multi-leg bases often exceed the depth of standard residential stair treads, creating an unstable rocking hazard if the feet overhang the edge. If the base cannot sit completely flat on each step, turn the cane sideways or rely primarily on the fixed wall handrail. Never place a multi-point base partially over the edge of a step tread.
Recognizing When to Transition from a Cane to a Walker
A walking cane is designed for mild balance deficits and unilateral weight offloading of fifteen to twenty-five percent. It is not an appropriate tool for non-weight-bearing recovery or severe bilateral lower-extremity weakness. Recognizing when a cane is no longer sufficient is critical for avoiding catastrophic falls and severe injuries. As mobility needs change, transitioning to a two-wheeled walker or four-wheeled rollator provides bilateral stability.
Several behavioral and physical warning signs indicate that a walker may be required. These include persistent staggering, frequent episodes of balance loss, dragging the feet, or leaning heavily over the cane handle. Individuals managing advanced neurological conditions, significant peripheral neuropathy, or bilateral knee osteoarthritis often struggle to maintain stability with a single contact point. When walking requires intense concentration or causes extreme anxiety, bilateral support is generally warranted.
Consulting a licensed physical therapist or physician is always recommended for a comprehensive gait evaluation and mobility aid prescription. A clinical professional can evaluate muscle strength, proprioception, and cardiovascular stamina to prescribe the ideal assistive device. They can also ensure that telescoping adjustments and handle shapes meet unique anatomical requirements. Taking advantage of professional guidance ensures maximum independence while prioritizing everyday walking safety.
Pre-Walk Safety Verification and Ongoing Equipment Maintenance
Conducting a quick mechanical safety check before every walk ensures that your equipment remains dependable. Inspect the push-button brass pins to confirm that they protrude fully through the telescoping adjustment holes without slippage. Check the anti-rattle locking ring to verify that it remains hand-tight and free of wobbling. Ensure the rubber ferrule is firmly seated on the shaft without tears, cracks, or excessive tread thinning.
Folding canes also require occasional checks of their internal elastic shock cords to ensure adequate tension across joint sleeves. Wiping the aluminum shaft clean of grit and outdoor debris prevents abrasive binding within telescoping tubes. Taking a proactive approach to fitting and maintaining your walking aid preserves upright posture and restores natural walking cadence. Consistent attention to proper sizing allows you to step forward with lasting balance, comfort, and safety.





Write Your Review
No reviews yet. Be the first to share your experience!