


Maintaining proper balance and stability begins long before taking your first assisted step outdoors. When a mobility aid sits at an improper height, every stride can force unwanted tension into your shoulders, neck, and lower lumbar spine. Learning how to measure for a walking cane allows you to align the handle directly with your natural biomechanics, offloading up to twenty-five percent of body weight away from painful lower extremities. Pairing this mechanical alignment with comfortable footwear and knee joint support gear helps preserve smooth mobility throughout your daily routine. Taking a few moments to verify these physical measurements protects your posture and restores walking confidence.
An improperly fitted walking stick often leads to awkward compensatory movements, such as hiking the shoulder or leaning awkwardly to one side. By mastering how to measure for a walking cane, you ensure that your elbow maintains an optimal slight bend while your arm hangs naturally at rest. Standard telescoping models from reputable manufacturers offer secure push-button pin settings to accommodate different statures with reliable precision. Proper sizing transforms a simple walking stick into an effective biomechanical extension of your body, safeguarding you against preventable slips and chronic fatigue.


Comprehensive Guide to Measuring and Adjusting a Walking Cane
Accurately determining cane height is the foundation of safe and effective mobility support. When a mobility aid is set to the correct physical dimension, it offloads joint stress and promotes an upright, balanced posture. The entire sizing process takes only a few minutes and requires minimal equipment. By understanding your anatomical landmarks and adjustment mechanisms, you can configure your cane to deliver optimal leverage and dependable daily stability.
Biomechanical Effects of Cane Height on Posture and Joint Stress
A walking cane is engineered to redistribute between fifteen and twenty-five percent of your lower-extremity body weight away from a compromised limb. If the cane handle is positioned too high, your arm cannot straighten properly, forcing your shoulder upward into an unnatural shrug. This persistent muscular contraction strains the upper neck and trapezius muscles, frequently causing tension headaches and upper back discomfort. An excessively tall cane also reduces downward mechanical leverage, compromising stability during mid-stance.
Using a cane that sits too low creates a different set of physical challenges. When the handle does not meet your hand at the proper level, you must stoop forward and flex your spine to reach the ground. This continuous forward pitch places excessive mechanical strain on your lumbar discs, accelerating lower back fatigue. Walking stooped also shifts your center of gravity ahead of your base of support, increasing your risk of tripping.
Essential Preparation: Setting Up Footwear and Natural Posture
Accurate measurement begins with establishing your true walking height. You should always wear your typical daily walking shoes during the measurement process. Different types of footwear, such as athletic sneakers, orthopedic shoes, or hard-soled dress shoes, can add between half an inch and two inches of heel height. Measuring in stocking feet or bare feet results in a cane that will feel noticeably too short once you put on regular footwear to leave the house.
Once your walking shoes are on, stand upright on a flat, firm, and level floor surface. Position your feet approximately shoulder-width apart to replicate your natural standing posture. Stand as tall as comfortably possible without hyperextending your knees or thrusting your hips forward. Allow both arms to hang down naturally at your sides with relaxed shoulders, looking straight ahead rather than glancing down at your feet.
The Standard Wrist Crease Measurement Procedure
The most reliable anatomical landmark for sizing a walking cane is the distal wrist crease. To locate this landmark, let your arm hang loose at your side and gently bend your hand backward at the wrist joint. The primary horizontal skin fold where your palm meets your forearm marks the target point. This specific anatomical landmark corresponds precisely to the top surface of the cane handle when the cane rests vertically on the floor.
Have an assistant place the end of a flexible tape measure flat on the floor alongside the outer edge of your heel. Extend the tape straight upward along your outer leg until it aligns level with that distal wrist crease. Record this measurement to the nearest half inch. Alternatively, the greater trochanter, which is the prominent bony projection on the side of your upper femur near the hip joint, serves as a secondary clinical landmark at the same approximate height.
Verifying the Optimal Elbow Flexion Angle
Once you adjust the cane to your measured wrist crease height, you must confirm the fit dynamically by holding the grip. Grasp the cane handle firmly and place the rubber tip approximately two inches to the side and four to six inches in front of your small toe. In this natural ready position, your elbow should form a gentle bend of fifteen to twenty degrees. This slight angle is the clinical hallmark of an appropriately sized mobility device.
Maintaining a fifteen to twenty degree elbow bend allows your arm to act like a natural shock absorber during heel strike. A joint locked into full extension transmits mechanical vibration directly through the wrist, elbow, and shoulder joints with every ground impact. If your elbow flexes beyond thirty degrees, the cane is adjusted too high, forcing your arm muscles to work continuously just to maintain grip contact. Adjust the height up or down until this natural bend feels relaxed and supportive.
Adjusting Push-Button Telescoping Aluminum Canes
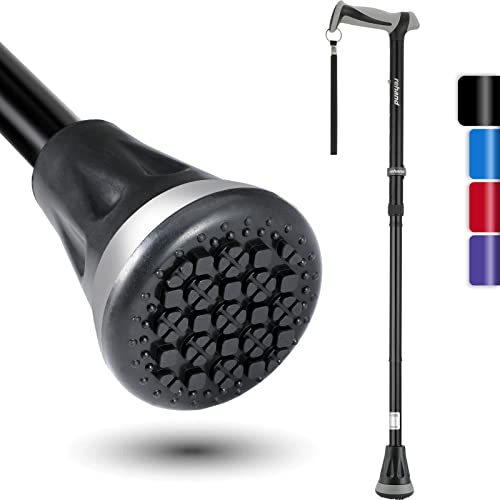
Modern mobility aids, including lightweight models from manufacturers like Vive, KINGGEAR, and Comfkey, utilize telescoping aluminum shafts equipped with spring-loaded brass detent pins. These telescoping mechanisms typically feature pre-drilled adjustment holes spaced in precise one-inch increments along the lower shaft. The Vive folding cane, for example, offers height settings ranging from thirty-three to thirty-seven inches, while models like REHAND provide extended settings reaching from forty up to forty-nine inches.
To adjust a telescoping aluminum cane, locate the threaded silencer nut or locking collar positioned near the adjustment junction. Loosen this collar by rotating it counterclockwise until it turns freely. Depress the dual brass push-button pins inward and slide the lower shaft up or down until the desired hole aligns with the spring pins. After locking the pins securely with an audible click, tighten the threaded silencer collar clockwise to eliminate rattling.
Sizing and Trimming Traditional Solid Wooden Canes
Traditional solid hardwood walking sticks offer timeless appearance and dependable structural rigidity, but they lack telescoping push-button adjustments. Because wooden canes cannot be adjusted with the press of a pin, they require permanent sizing by trimming the lower shaft. Before making any permanent cuts, double-check your floor-to-wrist measurement multiple times while wearing your standard footwear. Cutting a wooden shaft too short is an irreversible mistake that ruins the cane.
Begin by removing the rubber ferrule tip from the bottom of the wooden cane to expose the bare wood. Measure from the highest point of the handle down the shaft to your target measurement height, subtracting the base thickness of your replacement rubber tip. Wrap a strip of masking tape around the shaft at your planned cut line to prevent wood splintering during sawing. Use a fine-tooth saw to make a clean, square cut, smooth the end with sandpaper, and reseat the rubber tip firmly.
Proper Contralateral Placement and Walking Dynamics
A common mistake among new cane users is holding the aid on the same side as the weak, painful, or recovering leg. Proper gait mechanics require holding your walking cane in the hand opposite the affected limb, a technique known clinically as contralateral placement. For example, if you have right knee discomfort or are recovering from left hip surgery, you should carry the cane in your left hand or right hand, respectively. This setup keeps your balance stable without awkward leaning.
Contralateral positioning preserves the body natural reciprocal gait pattern, where opposite arms and legs swing forward simultaneously. When you step forward with your injured leg, the cane moves forward at the exact same moment. As you plant both your affected foot and the cane tip on the ground, your body weight splits across both points of contact. Holding a cane on the injured side forces you to hitch your hip and creates an awkward, fatiguing gait.
Base Configurations and Ground Clearance Nuances
The type of base installed on your cane influences how the mobility aid interacts with the ground and how stable it feels under load. Standard single-point rubber tips provide excellent maneuverability and lightweight handling, making them ideal for individuals who require minimal balance assistance. However, single-point tips require the user to maintain a consistent angle of contact to keep the traction tread flat against the walking surface.
Self-standing quad canes and multi-foot bases, such as the KINGGEAR model with its four-point footprint or articulating pivot bases like the TIRAROME design, offer broader surface contact. These wide configurations stand independently on level floors, eliminating the need to bend over to retrieve fallen aids. Always ensure the flatter side of a quad base faces inward toward your body, while the flared legs face outward to prevent tripping your trailing foot.
Handle Ergonomics and Grip Thickness Considerations
Handle geometry plays an important role in effective sizing and upper-extremity comfort. Offset handles, such as those featured on many aluminum models, curve the upper neck forward to position your hand directly above the center of the vertical tubing. This forward alignment channels your downward body weight straight through the shaft, maximizing stability and minimizing wrist torque. Traditional crook handles place the grip slightly behind the shaft axis, which can increase forearm strain.
Grip styles also dictate how body weight distributes across your palm during each step. Anatomical palm-contoured grips widen the contact surface beneath the thenar eminence, relieving focal pressure on the median nerve. This broad pressure distribution offers substantial relief for users managing carpal tunnel syndrome, rheumatoid arthritis, or diminished grip strength. If you install an aftermarket padded grip cover, you may need to lower your push-button adjustment by one setting to compensate for the added material.
Negotiating Stairs and Curbs with Measured Canes
Navigating elevation changes requires disciplined gait sequencing and heightened awareness of cane positioning. The widely taught clinical rule for stair negotiation is simple: step up with the good leg first, and step down with the bad leg first. When ascending stairs, your unaffected, stronger leg steps up onto the higher riser first, bearing your full body weight to lift you upward. The cane and your recovering leg then follow together onto that same step.
When descending stairs, reverse the progression by leading with your mobility aid and your affected limb simultaneously. Lower the cane tip and your recovering foot onto the step below, allowing your stronger trailing leg to control the descent smoothly. Once the cane and recovering foot are firmly planted, bring your stronger leg down to meet them on the lower step. Exercise caution with quad canes on stairs, as narrow step treads may not accommodate wide bases safely.
Maintenance, Tip Inspection, and Travel Foldability
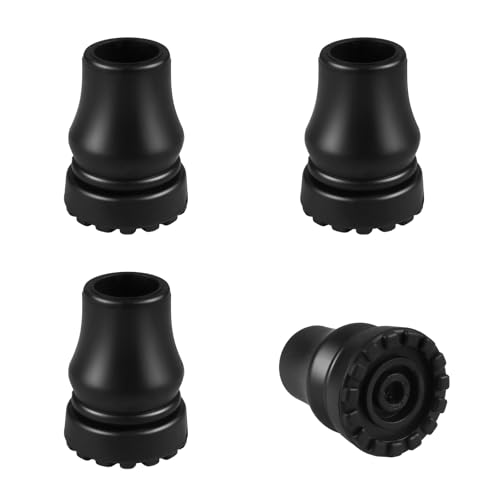
Even a perfectly sized walking cane will lose stability if its hardware and contact surfaces are neglected. The rubber ferrule at the base of the cane is your primary point of traction on smooth surfaces like tile and hardwood. Inspect the bottom tread pattern every few weeks to ensure the siping grooves remain deep and flexible. If the rubber wears smooth, or if the internal metal reinforcement washer begins piercing through the bottom, replace the ferrule immediately.
Folding travel canes, such as models from Vive or Comfkey that break down into compact sections, require periodic inspection of their internal elastic shock cords. These elastic cords maintain joint tension across the folding segments, ensuring the shaft remains rigid while you walk. For users who travel frequently, verifying carry on luggage pack sizing allows you to stow your folded cane neatly into overhead compartments or personal bags without damaging the structural joints. Keep the aluminum tubing clean to prevent grit from fouling the joints.
Clinical Transition Points and Bilateral Support Considerations
A walking cane is intended for individuals who experience mild to moderate balance hesitation or require partial unilateral weight offloading. It is crucial to recognize the clinical limits of single-point and quad cane mobility aids. If you find yourself leaning your entire upper body over the cane or experiencing frequent stumbling episodes, a single mobility aid may no longer provide sufficient balance protection. In such situations, pushing through with a cane can actually increase fall risks.
When balance deficits become bilateral or lower-limb weakness impacts both legs, transitioning to a two-handed mobility device becomes essential. Standard walkers and four-wheeled rollators provide a wide, stable base that surrounds your center of mass, offering comprehensive support that a single cane cannot match. Always consult a licensed physical therapist or physician for personalized gait evaluation and mobility aid prescription. Professional guidance ensures your mobility equipment evolves alongside your physical capabilities.
Taking the time to measure your walking cane accurately transforms a simple walking stick into an effective biomechanical aid. By setting the handle level with your wrist crease and maintaining a slight elbow flex, you protect your spinal alignment and maximize balance support across every environment. Recheck your adjustment pins, inspect your rubber traction ferrules periodically, and maintain proper contralateral placement to enjoy smooth, dignified mobility for years to come.





Write Your Review
No reviews yet. Be the first to share your experience!