


Walking canes deliver dependable stability and offload joint pressure only when the bottom rubber ferrule maintains full surface traction across smooth floors. Over months of regular use, abrasive concrete, moisture, and downward weight wear down rubber tread patterns, leaving users searching for how to remove rubber tip from cane shafts without damaging the structural tubing. Old rubber tips often seize tightly onto the cane bottom due to vacuum suction, grit accumulation, and natural friction against the metal or wood. Individuals recovering from lower-extremity procedures who wear supportive knee joint apparel often discover that a worn tip increases slipping hazards on polished tile or damp pavement.
Taking off a stubborn, stuck tip does not require specialized workshop machinery, but pulling blindly with bare hands frequently leads to wrist strain or bent aluminum shafts. Safe removal techniques rely on gentle heat expansion, rotational mechanics, and simple household tools to break the stubborn vacuum seal cleanly. Once the old rubber foot comes off, inspecting the tubing for corrosion and checking the shaft diameter ensures that your new replacement ferrule seats securely. Mastering this quick maintenance task protects mobility confidence and restores critical non-slip contact with every step.
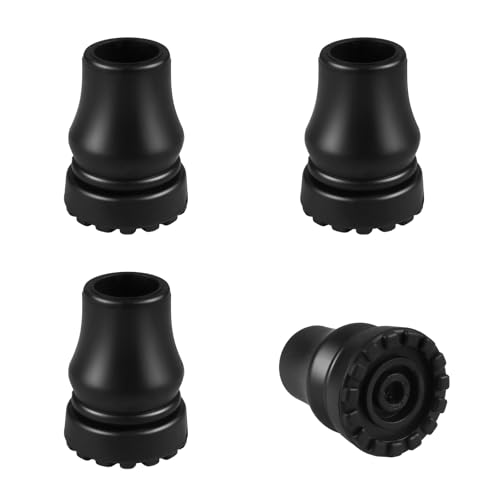


Removing and Replacing Stubborn Walking Cane Tips Safely
Removing a worn rubber ferrule from a walking cane requires breaking the powerful friction bond and vacuum seal that forms after months of bearing downward weight. Forcing the tip with excessive linear pulling rarely succeeds and can bend telescoping adjustment shafts or strain hand joints. Understanding the mechanical connection between the cane shaft and the rubber compound allows you to free the stuck tip quickly using gentle physical leverage or thermal expansion. Once the old rubber is removed, you can clean the exposed cane shaft, verify structural integrity, and seat a durable replacement ferrule that restores safe floor contact.
Why Rubber Cane Tips Seize to the Tubing
Daily walking forces body weight straight down through the cane shaft, compressing the rubber ferrule against hard surfaces thousands of times per week. This continuous downward pressure expels air from the internal cavity, creating a strong vacuum seal between the inner rubber walls and the cane tubing. Over time, moisture, outdoor dirt, and fine road grit work their way into microscopic gaps along the upper collar. This particulate buildup acts like an adhesive, cementing the flexible rubber collar tightly to the smooth aluminum or hardwood surface.
Natural chemical aging of rubber also contributes to severe bonding through slow atmospheric vulcanization. Ambient heat, ultraviolet sunlight, and floor cleaning agents cause older rubber compounds to soften, slightly melt, and stick directly to metal finishes. In canes that lack a protective internal metal barrier, the sharp lower edge of the tubular shaft can bite into the internal rubber floor. That cutting action anchors the tip mechanically, making standard straight-line pulling almost impossible for individuals with limited grip strength.
Warning Signs That Your Cane Tip Needs Immediate Replacement
Regular visual inspection of your cane tip protects against unexpected falls and joint strain. The clearest indicator for immediate replacement is bald tread where molded traction channels have worn completely smooth. When tread siping disappears, the rubber base loses its ability to channel away moisture on wet tile, smooth hardwood, and outdoor ramps. An angled wear pattern across the base also indicates that your gait is loading the cane unevenly, which compromises traction during heel-strike and push-off phases.
Cracking, hardening, or crumbling along the outer rubber perimeter signals advanced material breakdown. If pressing your thumbnail into the rubber base leaves no indentation, the material has hardened and will slip easily across slick floors. A clicking metallic sound while walking is an urgent warning sign that the cane shaft has punched through the internal rubber base. When metal contacts bare flooring, slip resistance drops to zero, and the hollow cane tubing will mushroom outward if you delay replacing the tip.
Essential Workspace Setup and Safety Precautions
Preparing a dedicated work area prevents floor damage and makes the removal process far more manageable. Choose a well-lit table or workbench and lay down a thick towel to cushion the cane shaft against accidental scratches. Wearing rubberized utility gloves or silicone grip pads provides maximum friction without requiring painful hand pinching. If your cane features telescoping height adjustments, make sure the push-button brass pin is fully locked into a hole so the inner tube does not twist loose during handling.
Gathering simple household items beforehand ensures you can progress smoothly through removal methods without interruption. Helpful items include a bowl of hot tap water, a standard hair dryer, a flathead screwdriver with a taped blade, and clean shop towels. Avoid using oily lubricants, penetrating sprays, or petroleum jelly around the cane base to free the tip. Oil breaks down rubber, leaves slick residues that make gripping impossible, and contaminates the cane shaft, preventing future replacement tips from gripping securely.
Method 1: The Twist and Pull Grip Technique
The twist and pull approach should always be your first attempt because it requires no heat or mechanical tools. Sit comfortably in a stable chair and secure the upper portion of the cane shaft firmly between your knees or under your arm. Grasp the rubber ferrule firmly with both hands using rubberized gloves or a textured silicone jar opener. Rather than pulling straight downward, focus all your initial effort on rotating the rubber tip in a circular twisting motion around the shaft.
Twisting breaks the mechanical friction and air seal that holds the rubber against the metal tubing. As you feel the tip begin to rotate freely, maintain the twisting motion while applying steady downward pressure away from the cane body. Work slowly back and forth in alternating quarter turns rather than wrenching the tip violently. If the tip rotates slightly but refuses to slide downward, the internal vacuum seal is still intact, indicating you should proceed to gentle thermal expansion.
Method 2: Warm Water Immersion for Thermal Expansion
Warm water immersion is an exceptionally safe and effective way to relax stubborn rubber without harming cane finishes. Fill a small bucket or deep mixing bowl with hot tap water at approximately one hundred twenty degrees. Submerge the bottom two to three inches of the cane tip completely in the water for five to ten minutes. The hot water softens hardened rubber polymers, expanding the internal diameter slightly while breaking up trapped dirt and dried debris along the seam.
Remove the cane from the water and immediately dry the outer rubber and metal shaft with a clean cotton towel. Wrap a silicone jar gripper around the warm rubber ferrule to protect your hands and maximize friction. Twist the tip back and forth while pulling downward, and the softened collar should slide off the tubing smoothly. This water immersion method is especially beneficial for aluminum mobility canes, but wooden canes should not be submerged for more than three minutes to prevent water penetration into the grain.
Method 3: Controlled Hair Dryer Heat for Hardened Rubber
Applying warm airflow with a handheld hair dryer provides dry thermal expansion when water immersion is inconvenient. Hold the hair dryer four to six inches away from the rubber collar on medium heat setting. Rotate the cane continuously for two to three minutes so the heat warms the rubber evenly on all sides. Keep the warm airflow focused strictly on the upper rubber sleeve rather than heating the bare aluminum shaft directly.
Gentle warming makes dense rubber compounds pliable enough to stretch over minor shaft ridges or flared edges. Put on insulated work gloves once the rubber feels warm and flexible to the touch. Twist the ferrule firmly in alternating directions to break the softened bond and pull it straight off the cane end. Never use an open flame, heat gun, or stove burner, as intense temperatures will melt rubber, release harmful fumes, and ruin the protective powder coating on your walking aid.
Method 4: Prying the Vacuum Seal with Blunt Leverage
Stubborn vacuum seals that resist heat often release quickly when you introduce a tiny pocket of air under the rim. Wrap two layers of electrical tape around the flat blade of a small screwdriver to create a cushioned, non-marring tool. Carefully slide the taped blade between the top edge of the rubber ferrule and the metal cane tubing. Gently pry the rubber collar outward by just a fraction of an inch to let outside air enter the sealed internal chamber.
Work your way around the circumference of the collar, prying gently at three or four equidistant points. You will often hear a faint hiss as atmospheric pressure equalizes inside the tip. Once the vacuum seal breaks, grasp the ferrule with your rubber gloves and apply a combined twisting and pulling motion. Never use a sharp, untaped metal blade or utility screwdriver with rough edges, as gouging the aluminum tubing creates burrs that prevent new tips from seating flat.
Method 5: The Slit and Peel Cut for Severely Vulcanized Tips
Severely vulcanized tips that have fused to the cane shaft over several years may require careful cutting to remove. Place the cane flat across a solid workbench and secure the shaft so it cannot roll or shift under hand pressure. Using a sharp utility knife, place the blade against the top rim of the rubber collar, angling the cut away from your body. Score a shallow vertical line downward through the rubber sleeve, taking care to cut only three-quarters of the way through the material.
Avoid pressing the blade all the way through to the metal or wood tubing, which preserves the structural integrity of your cane. Insert your flathead screwdriver into the scored groove and twist the handle to split the remaining rubber apart. Peel the split rubber collar away from the cane shaft like an orange peel, releasing the mechanical grip entirely. While travelers organizing carry-on luggage capacity guidelines often pack folding canes, maintaining rigid, clean cane tubing is essential for any travel mobility aid.
Handling Screw-In Fasteners on Swivel and Articulating Base Tips
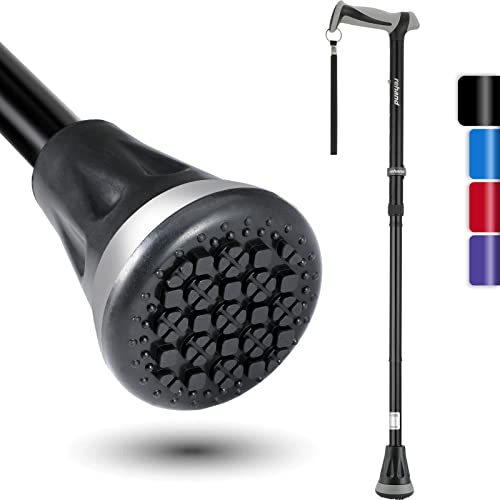
Certain modern mobility aids use mechanical fasteners rather than standard press-fit friction sleeves. Canes with pivoting bases or specialized shock-absorbing feet often utilize a central retaining screw concealed beneath the ground contact pad. Replacement packs such as the DORANMI Rubber Cane Tips Replacement, Screw-in feature dedicated fasteners designed for canes with a swivel base. Before yanking on a modern articulating tip, examine the underside of the base pod to see if a central screw or retaining nut holds the assembly together.
To service these designs, clean out any packed mud or debris from the recessed screw head on the bottom of the foot pad. Insert the correct size screwdriver into the central channel, holding the swivel base stationary with your free hand. Turn the screw counterclockwise to back out the fastener completely, allowing the worn rubber pad to slide off smoothly. Keep the old screws handy until you confirm whether the replacement set includes identical replacement hardware compatible with your specific swivel mechanism.
Inspecting, Cleaning, and Sizing the Bare Cane Shaft
Exposing the bare bottom of the cane provides an excellent opportunity to evaluate the structural condition of your mobility aid. Examine the lower rim of the aluminum tubing to ensure it remains round without flares, cracks, or jagged metal burrs. If the cane was used while the old tip was worn through, lightly smooth away any rough metal burrs using fine-grit sandpaper so the tubing does not tear your new replacement rubber. Clean the exposed shaft surface thoroughly with warm soapy water to remove accumulated grime, drying it completely before proceeding.
Measure across the circular opening of the bare cane tubing with a ruler to determine your exact shaft diameter. Most standard walking canes use shafts measuring three-quarters of an inch, which match replacement models such as the BBTO Replacement Cane Tips Set, OXDFK Cane Tips 3/4 Inch, Heavy Duty Rubber Cane Tips, OBTANIM 4 Pack 3/4 Inch Replacement Rubber Cane, and MOTOFITOOL 6 Pack Rubber Cane Tips. Heavier wooden canes often require one-inch options like the Harvy 1″ Heavy Duty Black Rubber Replacement Cane. While active users enjoying comfortable lightweight walking apparel expect durable gear, a properly sized cane tip is the single most critical factor for walking traction.
Installing the New Tip and Verifying Biomechanical Fit
Quality replacement rubber tips feature an internal metal washer that shields the rubber base from being sliced by the hollow cane shaft. Options like the MOTOFITOOL 6 Pack Rubber Cane Tips incorporate an internal aluminum plate, while the Pilipane Premium Rubber Cane Tips with 6 Pillar add shock-absorbing base geometries. To install the new tip, center the rubber socket over the clean cane tubing and push it firmly upward with a slight twisting motion. Stand the cane upright on a carpeted floor, lean your downward body weight onto the handle, and tap it several times to seat the shaft firmly against the internal metal washer.
After installing the tip, stand upright with your walking shoes on to verify that your cane handle aligns accurately with your wrist crease. When grasping the handle, your elbow should maintain a natural fifteen to twenty degree bend to ensure optimal joint offloading. Take several test steps, holding the cane on the side opposite your weaker or recovering leg to maintain proper reciprocal gait rhythm. If you notice persistent balance hesitation or cane instability after replacing the tip, consult a physical therapist for a formal gait assessment.





Write Your Review
No reviews yet. Be the first to share your experience!