


Maintaining upright posture, steady balance, and joint relief starts with dialing in your equipment correctly. When you learn how to set walking pole height, you immediately reduce unnecessary joint strain on painful hips, knees, and lower back structures. An improper adjustment forces your shoulders toward your ears or makes you slouch forward, which defeats the purpose of bilateral stability aids. By establishing the correct pole elevation, you unlock natural reciprocal arm swing and maximize upright stability on every walk.
Whether you manage chronic joint stiffness, recover from lower-extremity surgery, or seek daily balance support, ergonomic walking poles help offload joint stress when paired with supportive knee joint apparel. Using the right technique aligns your wrist in a neutral posture and ensures your elbow sits at an optimal angle for smooth weight transfer. Taking a few moments to measure your dimensions while wearing standard walking footwear prevents wrist irritation and builds walking confidence. This guide walks you through the exact measurements, locking mechanisms, and biomechanical principles needed for a steady stride.


Complete Guide to Walking Pole and Mobility Aid Height Adjustment
Setting the correct height on walking poles transforms your daily stroll from an awkward chore into a stable, posture-supporting exercise. When your poles sit at the right height, your upper body absorbs impact while your legs experience welcome pressure relief. Bypassing this crucial adjustment often leads to neck tension, shoulder fatigue, or reduced floor traction. Taking the time to understand proper alignment ensures that every step feels natural, secure, and balanced.
Biomechanical Alignment and the Right Elbow Angle
The foundation of walking pole stability rests on the angle of your elbow joint. When you stand tall with your shoulders relaxed, holding your pole handles should create a clean 90-degree right angle at the elbow. Your forearms should run parallel to the ground while the pole tips rest flat beside your feet. This right-angle configuration provides the greatest mechanical advantage, allowing your pectoral, latissimus, and arm muscles to assist your legs efficiently.
Specialized rehabilitation poles, such as the Urban Poling ACTIVATOR models, rely on this 90-degree arm position to support upright core engagement. Their patented CoreGrip design keeps the wrist in a neutral position to reduce joint strain and prevent ulnar nerve compression. If the grip sits too high, the wrist bends backward into hyperextension, transferring shock directly into the delicate carpometacarpal joints. Keeping the elbow at a right angle protects your wrists while maximizing upper-body load bearing.
This 90-degree standard differs slightly from standard single-point medical canes. Traditional mobility canes require a 15- to 20-degree elbow bend, aligning the top of the handle with the user’s wrist crease. Bilateral walking poles, by contrast, use the steeper 90-degree flexion because they serve as active propulsion and stability struts rather than purely passive crutches. Recognizing this distinction prevents users from setting their walking poles too low and hunching their shoulders.
Step-by-Step Measurement Procedure for Everyday Walkers
Achieving an accurate height adjustment requires proper footwear and a flat, level testing surface. Stand on a hard floor wearing the supportive walking shoes or sneakers you intend to wear during your daily walks. Stand tall with your feet shoulder-width apart, roll your shoulders back, and let your arms hang loosely at your sides. Measuring while barefoot or wearing soft slippers distorts the measurement by up to two inches, resulting in poles that feel too short on outdoor pavement.
Bend your elbows so your forearms point straight ahead, forming a crisp 90-degree angle with your upper arms. Have a helper measure the vertical distance from the floor up to the crease of your palms. This measurement represents your baseline pole length from the bottom of the rubber tip to the top of the handgrip. If you measure alone, position the pole vertically next to your body and adjust the shaft until your hand rests comfortably on the grip ledge with your forearm level.
You can also use a reliable mathematical formula as a quick baseline check. Multiply your overall standing height in centimeters by 0.68 to estimate your standard Nordic walking pole length. For example, a walker measuring 170 centimeters tall would multiply 170 by 0.68 to arrive at a starting length of approximately 115 centimeters. While mathematical formulas provide an excellent reference point, physical verification of your elbow angle remains the gold standard for long-term comfort.
Adjusting Telescoping and Collapsible Pole Locking Systems
Adjustable walking poles employ several mechanical locking systems to maintain their set height under downward pressure. Models like the Trekology Trek-Z utilize quick flip-lock levers with durable metal stoppers that clamp securely around the aluminum shaft. To adjust these poles, flip the lever open, slide the telescoping section to your desired centimeter marking, and press the lever firmly back into place. If the shaft slips under weight, tighten the thumb screw on the lever clamp before snapping it closed.
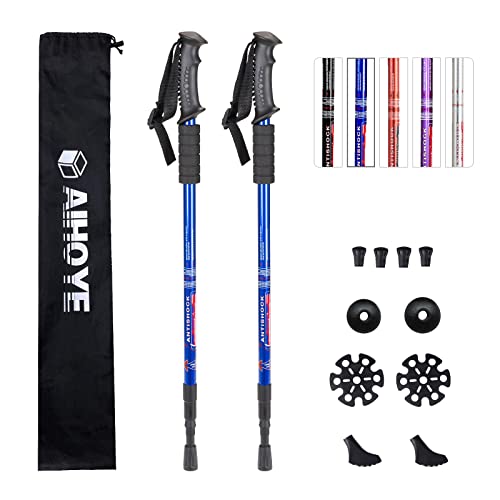
Other designs, such as the Urban Poling ACTIVATOR models, combine internal twist locks with external push-button security. The push-button mechanism clicks securely into pre-drilled adjustment holes, preventing unexpected slippage during weight-bearing rehabilitation walks. Twist-locking models, such as the Aihoye adjustable poles, require twisting the shaft sections in opposite directions to expand an internal wedge against the tube walls. Always confirm that internal expanders seat tightly before trusting the poles with your full balance.
When adjusting multi-section poles, distribute the extension evenly across both the lower and middle segments. Extending one section completely while leaving the other fully collapsed creates uneven stress concentrations that can cause shaft bowing. Pay strict attention to the printed stop lines on each segment. Never extend a pole section past its maximum indicator line, as doing so leaves insufficient shaft overlap inside the joint and risks catastrophic structural failure under load.
Fixed-Length Custom Poles Versus Telescoping Shafts
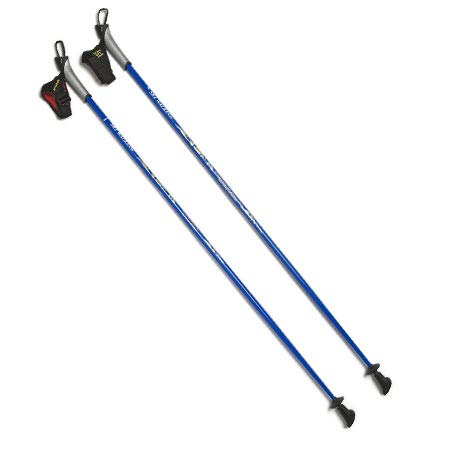
While adjustable poles offer versatility, fixed-length single-piece poles provide distinct mechanical advantages for dedicated fitness and balance walkers. Brands like the American Nordic Walking System produce one-piece SWIX poles custom-fitted to your exact height across dozens of specific lengths. Because one-piece poles eliminate telescoping joints, locking collars, and internal expanders, they are exceptionally rigid and completely silent during ground strikes. Walkers who struggle with hand arthritis often prefer fixed poles because they require zero fiddling with tight adjustment levers.
Single-piece construction also eliminates the annoying vibration and rattling that can occur in worn telescoping shafts. The uninterrupted aluminum or composite shaft dissipates ground impact smoothly, protecting sensitive wrist and elbow joints. Seniors with pronounced balance challenges often find peace of mind in knowing that a solid pole cannot suddenly collapse under sudden downward force. The primary drawback of fixed poles is portability, as their full length cannot collapse into a compact suitcase.
Telescoping and tri-fold poles solve the transport dilemma by collapsing down to compact lengths between 15 and 29 inches. Collapsible models fit easily into standard luggage or car trunks, making them ideal companions for road trips or community outings. When packing mobility poles for commercial flights, remember to review carry-on luggage sizing considerations before heading to the airport. Transportation security guidelines generally require walking poles with metal tips to be stowed in checked baggage rather than carried into the passenger cabin.
Handle Ergonomics and Grip Alignment for Joint Relief
Grip geometry directly impacts how effectively you transfer weight into your walking poles without causing palm discomfort. The Urban Poling ACTIVATOR series features specialized CoreGrip handles that have earned Ease of Use certification from the Arthritis Foundation. These grips feature an extended lower ledge that cradles the outer edge of your hand, allowing you to push downward through the heel of your palm. This ledge eliminates the need to squeeze the handle tightly, relieving joint tension for individuals managing osteoarthritis.
Strapless ergonomic handles are specifically recommended for rehabilitation and balance support over traditional strapped Nordic poles. While wrist straps allow competitive cross-country skiers to release and catch the pole, they pose a serious fracture risk if an unstable walker experiences a sudden stumble. Strapless CoreGrip handles allow users to release the poles instantly in an emergency, letting hands break a fall freely. Furthermore, the strapless contour encourages a natural wrist alignment that prevents median nerve pinching.
Grip materials also influence long-term hand comfort and security during extended walking sessions. Models from Trekology and Aihoye incorporate moisture-wicking EVA foam grips and textured rubber contours that absorb hand sweat and prevent slipping in hot or wet weather. Many designs also include secondary foam sleeves extending down the upper shaft. These lower grab areas let you temporarily choke down on the pole when navigating brief obstacles without readjusting the mechanical locking levers.
Fine-Tuning Pole Height for Incline, Descent, and Stairs
While a 90-degree elbow angle serves as your primary baseline on flat ground, outdoor terrain sometimes calls for minor height tweaks. When walking uphill on steep inclines, the ground rises up to meet your stride earlier, making standard poles feel uncomfortably tall. Shortening each pole by two to three inches, or five to eight centimeters, restores your mechanical advantage. This adjustment prevents your shoulders from hunching and lets your chest remain open for unrestricted breathing.
Conversely, descending steep hills requires extending your walking poles by two to three inches beyond your baseline flat-ground setting. As you step downhill, the ground drops away beneath your feet, which can tempt you to lean forward and compromise your center of gravity. Longer poles allow you to plant the tips ahead of your descent while maintaining an upright torso. This forward bracing action takes substantial braking pressure off your kneecaps and quadriceps muscles.
Navigating stairs and curbs requires strict adherence to physical therapy sequencing rather than frequent mechanical readjustment. When stepping up a curb or flight of stairs, step up with your stronger leg first, followed by your weaker leg and the walking poles. When stepping down, reverse the sequence by placing your poles and weaker leg down first, followed by your stronger limb. Remembering the classic rehabilitation adage of “up with the good, down with the bad” protects your joints and ensures firm stability on every riser.
Tip Selection and Ground Traction Across Surfaces
The traction interface at the base of your walking pole dictates both stability and height calibration on different surfaces. For indoor rehabilitation and smooth pavement walking, wide bell-shaped rubber tips provide maximum surface contact and slip resistance. The Urban Poling ACTIVATOR uses stable bell-shaped rubber ferrules that remain planted firmly on tile, hardwood, and smooth asphalt. Adding or removing thick rubber boot tips can alter your effective pole height by up to an inch, so always calibrate your shaft with the specific tips installed.
Outdoor surfaces demand different tip profiles to maintain secure purchase without sliding. Angled Nordic walking boot tips provide forward-rolling traction on sidewalks and packed park paths, promoting an active backward push. When walking on grass, dirt trails, sand, or winter slush, remove the rubber covers to expose the durable carbide metal tips underneath. These sharp carbide points bite directly into uneven earth or ice, providing unyielding stability where soft rubber might slip.
Routine inspection of your rubber tips is essential for maintaining safe floor grip and structural integrity. Over time, friction against rough concrete wears down the tread grooves and exposes the internal metal shaft. Most high-quality tips incorporate an internal steel washer to stop the metal pole from punching through the rubber, but this washer can wear thin after heavy use. Inspect your tips monthly and replace any rubber caps that show rounded tread edges, cracks, or visible thinning.
Troubleshooting Discomfort and Common Height Errors
Physical discomfort during or after a walk often signals an improper height adjustment that needs immediate correction. Setting your walking poles too high forces your shoulders into an elevated, hunched posture throughout your stride. This chronic muscle tension frequently leads to upper back stiffness, neck aches, and soreness in the trapezius muscles. If you notice your shoulders creeping toward your ears while walking, lower each pole by one or two inches to let your shoulder girdle relax.
Setting your poles too low creates an entirely different set of posture faults. When poles are too short, users instinctively bend forward at the waist to plant the tips, rounding their lower back and drooping their head. This forward hunch increases shear stress across the lumbar spine and reduces the offloading benefits for arthritic knees. If your gaze drifts toward your shoes rather than the horizon, extend your poles until your torso naturally stands upright.
Mechanical slipping during walking represents a major safety hazard that requires instant troubleshooting. If a telescoping pole gradually loses height as you bear weight, the internal locking wedge or external clamp is loose. For flip-lock poles, open the lever and tighten the tension screw clockwise by a half turn before snapping the clamp closed. For twist-lock poles, disassemble the sections to wipe away fine road grit from the internal expander, then reassemble and twist firmly until tight.
Safety Boundaries and Bilateral Mobility Transitions
Understanding the functional limits of walking poles ensures you select the safest mobility aid for your personal balance profile. Bilateral walking poles excel at offloading approximately 15 to 25 percent of lower-extremity body weight, making them wonderful tools for mild joint pain, post-surgical recovery, and posture retraining. Urban Poling ACTIVATOR models feature a weight-bearing capacity of 200 to 225 pounds per pole, supporting active gait rehabilitation. However, walking poles cannot support your entire body weight like axillary crutches or rigid medical walkers.
If you experience severe vestibular vertigo, frequent freezing of gait from Parkinson’s disease, or sudden leg weakness, walking poles may not provide adequate fall protection. In these clinical scenarios, transitioning to a four-wheeled rollator or a rigid medical walker provides a wide, continuous base of support that walking poles cannot match. Always consult a licensed physical therapist or physician for a thorough gait evaluation before using walking poles as a primary mobility aid. A professional can assess your balance deficits, prescribe the exact equipment suited to your pathology, and verify your height settings in person.
Dialing in your walking poles correctly unlocks a safer, more upright, and energizing walking experience. By establishing a comfortable 90-degree elbow bend, securing your locking mechanisms tightly, and choosing the right rubber tips for your terrain, you protect your joints from premature fatigue. Take a moment before every walk to verify your height settings and test the firmness of each shaft against the floor. A well-adjusted pair of walking poles serves as a dependable partner, supporting your independence and stability every step of the way.







Write Your Review
No reviews yet. Be the first to share your experience!