


Walking with an improperly sized mobility stick can quickly turn a helpful tool into a source of muscle fatigue and aching joints. When someone experiences knee discomfort or unsteady footing, establishing what is the best height for a walking cane is the essential first step toward reclaiming smooth, natural movement. Leaning excessively over a shaft that sits too low strains the lower back and pulls the shoulders out of alignment. Conversely, propping an arm on a handle that rests too high creates tension through the trapezius and wrist, preventing the user from offloading up to twenty-five percent of lower-extremity body weight effectively.
Matching the cane handle precisely to your body mechanics ensures upright posture, steady balance, and dependable joint relief across every step. Pairing proper cane sizing with appropriate footwear and supportive knee apparel helps reduce daily stress on vulnerable ligaments during recovery or routine walks. Understanding the correct anatomical measurement landmarks allows you to adjust modern telescoping aluminum canes or trim solid wooden shafts with absolute confidence. Once your handle aligns accurately with your wrist joint, each stride feels coordinated, secure, and far less tiring throughout the day.



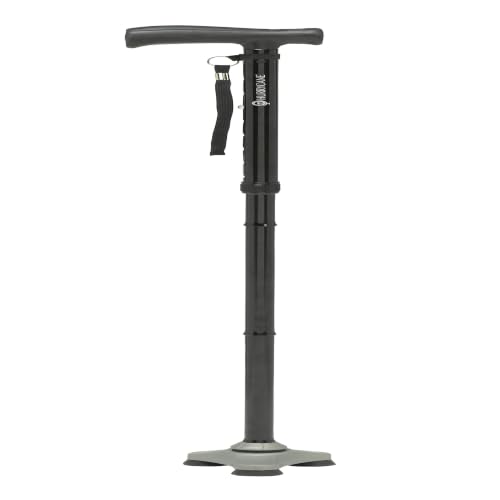

The Biomechanical Standard for Walking Cane Height
Establishing the correct cane height is the foundation of safe and pain-free mobility. When a walking aid matches your natural stature, your center of gravity remains centered over your base of support while taking strides. A properly fitted cane prevents dangerous compensatory habits like hunching your spine, tilting your pelvis, or hiking your shoulder upward. The universal clinical standard positions the top of the cane handle level with the user’s wrist crease when standing completely upright with relaxed shoulders.
Locating the Wrist Crease and Greater Trochanter
Two primary anatomical landmarks determine the target height of any mobility stick. The most accessible landmark is the distal wrist crease, which is the small skin fold where your hand meets your forearm. When you let your arms hang loosely at your sides, the cane handle should align directly with this horizontal wrist line. This placement guarantees that your arm is neither jammed upward into your shoulder socket nor hyperextended downward toward the floor.
Physical therapists also reference the greater trochanter as an alternative verification landmark. This bony prominence sits at the upper outer portion of your thigh bone near the hip joint. Locating the greater trochanter can be tricky for some individuals, but the top of the cane handle should level out right at this hip bone line. Both the wrist crease and the trochanter should align at approximately the same vertical height when you maintain an upright standing posture.
The Critical 15 to 20 Degree Elbow Bend
A slight flexion in the elbow joint is essential for proper shock absorption and joint offloading. When your hand rests comfortably on the cane grip, your elbow should form an angle between 15 and 20 degrees. This gentle bend acts like a natural suspension spring as your body transfers weight into the shaft. If your arm is locked completely straight, every impact against the ground sends jarring vibrations straight into your wrist, elbow, and shoulder joints.
Conversely, an excessive elbow bend exceeding 20 or 30 degrees signals that your cane is set too high. Excessive flexion forces your biceps and shoulder girdle into continuous isometric contraction, leading to rapid muscle exhaustion. A cane that sits too high also prevents your arm from fully extending during weight transfer, reducing your stability when balance falters. Maintaining the recommended 15 to 20 degree angle balances structural support with muscle efficiency during everyday walking.
Step-by-Step Measurement Procedure at Home
Measuring your target cane height requires careful setup to ensure total accuracy. Always wear your everyday walking shoes before taking any measurements, because different soles alter your standing height by half an inch to two inches. Stand as straight as comfortably possible on a flat, firm surface with your feet roughly shoulder-width apart. Look straight ahead rather than down at your feet, as looking downward tilts your torso forward and skews the numbers.
Enlisting a friend or family member makes this measurement process much more precise. Let your arms hang loosely and naturally at your sides with your shoulders completely relaxed. Have your helper use a flexible tape measure to calculate the exact distance from the floor up to your wrist crease. Record this measurement to the nearest half-inch, as this number represents your ideal total cane height from rubber tip to top grip.
If an assistant is unavailable, you can measure an existing adjustable cane to verify the fit yourself. Stand in your standard posture next to the walking aid while it rests vertically on the floor. Check whether the grip lines up with the crease of your relaxed wrist without forcing you to shrug your shoulder. If the handle rests higher or lower than the wrist joint, adjust the telescoping shaft before putting any weight onto the device.
Adjusting Telescoping Aluminum Canes
Modern aluminum canes offer quick pin-based height adjustments to fit a broad spectrum of user heights. For example, the REHAND Walking Cane for Men & Women – Foldable features 8 height settings spanning from 31 inches to 38 inches, accommodating users from 5 feet to 6 feet 5 inches tall. These models utilize dual spring-loaded push-button brass detent pins that snap securely through pre-drilled holes in the tubular shaft. Each adjustment hole typically alters the overall height in precise one-inch increments.
Securing the adjustment joint is vital to prevent wobbling or sudden hardware slippage under load. Premium models like the PELEGON Folding Cane for Men and Women incorporate both a push-button mechanism and a secondary twist-lock collar tested to support up to 300 pounds. Tightening this secondary silencing collar compresses the joint sleeve and eliminates annoying shaft clicking as you stride. Always verify that both push pins fully protrude through the shaft holes before trusting the cane with your weight.
Sizing and Trimming Traditional Hardwood Canes
Solid wooden walking sticks require a permanent cutting process because they lack telescoping pins. To size a hardwood cane, first measure your target floor-to-wrist distance while wearing your typical walking footwear. Remove the factory rubber tip from the bottom of the wooden shaft by twisting and pulling firmly. Mark the target length along the shaft, measuring down from the highest point of the handle grip.
Use a fine-tooth handsaw or miter box to make a clean, straight cut across the marked wood shaft. Sand the cut edge smooth to prevent splinters and ensure a flat surface for the rubber ferrule to seat against. Reinstall a snug-fitting replacement rubber tip containing an internal steel washer, which stops the cut wood from punching through the rubber base. Recheck your standing elbow bend to confirm you achieved the required 15 to 20 degree angle.
Contralateral Hand Placement and Proper Gait Mechanics
Holding your walking cane on the correct side of your body is just as critical as setting the proper height. Unless a medical doctor or physical therapist specifically instructs otherwise, always hold the cane in the hand opposite your injured, weak, or painful leg. This contralateral placement mirrors natural human biomechanics, where your opposite arm naturally swings forward with the stepping leg. Holding the cane on the unaffected side widens your base of support and prevents awkward lateral swaying.
A contralateral cane allows you to offload roughly 15 to 25 percent of your body weight away from a damaged joint. Move the walking stick forward at the exact same time as your affected leg, planting both surfaces simultaneously. As you step through with your stronger leg, press down into the cane grip to absorb downward force and reduce joint stress. This synchronized movement preserves a fluid, natural walking cadence while keeping your pelvis stable and level.
How Handle Geometry Influences Working Height
The shape and contour of a cane handle noticeably affect how your hand rests on the device and changes the effective working height. Offset canes, such as the Medline Aluminum Offset Walking Cane for Seniors, curve the neck forward to center downward force directly over the vertical shaft. This curved offset geometry directs pressure through the strongest part of your palm and provides exceptional stability for post-surgical joint recovery. The comfortable foam grip on an offset cane also cushions the thenar eminence against jarring impacts.
Ergonomic palm-contoured grips, like the wide TPR and PP handles found on the REHAND Walking Cane – Foldable, Adjustable, distribute pressure broadly across the entire palm surface. These wider designs prevent localized nerve compression in the carpal tunnel and reduce finger cramping for people living with arthritis. Traditional T-handles, featured on compact designs like the supregear Folding Cane, 5-Level Adjustable Height, offer ambidextrous utility but require slightly tighter grip tension. Always measure your height with your hand placed directly over the load-bearing center of your specific handle style.
Base Selection and Ground Traction Stability
The type of base attached to your cane dictates how securely the shaft interacts with different floor surfaces. Traditional single-point canes provide excellent agility and lightweight swing speed, but they require precise vertical alignment to maintain full rubber contact. Articulating multi-point bases, such as the SteadiGrip base on the HurryCane Freedom Edition Foldable Walking Cane, utilize a WhisperFlex pivot mechanism that conforms to angled ground surfaces. This flexing pivot design maintains consistent traction whether you are stepping across flat linoleum, ramps, or uneven outdoor pavement.
Self-standing quad bases provide an extra layer of convenience by remaining upright when you release the handle to grab items. Quad pivot bases on models like the REHAND Walking Cane – Foldable, Adjustable eliminate the need to bend over and pick up a fallen stick from the floor. However, users must ensure that wide quad prongs do not create tripping hazards when clearing narrow door frames or stepping over thresholds. Inspect rubber treads regularly to verify that deep traction siping remains intact and free of embedded debris.
Packing Folding Canes for Travel and Transit
Folding canes provide outstanding convenience for users who only need intermittent walking support or who travel frequently by car, train, or airplane. Many collapsible models fold down to ten or fourteen inches, allowing them to tuck neatly into totes, vehicle glove compartments, or airline bags. If you frequently pack your mobility gear for flights, consulting a detailed carry-on packing guide helps ensure your folded cane stows effortlessly alongside other travel essentials.
Internal elastic cords hold folding cane sections securely aligned when extended for walking. Before putting your full weight on a folded mobility stick, always verify that each aluminum joint sleeve has snapped fully into place without gaps. The high-tension inner shock cord ensures the segments lock tight, but joint connections should still be checked for grit or loose tolerances. A reliable hook-and-loop strap keeps the collapsed sections bundled tightly together whenever the cane is stowed away.
Stair Navigation Mechanics and Step Safety
Negotiating staircases requires strict adherence to physical therapy sequencing to prevent painful missteps or sudden falls. The universal golden rule for stairs is simple to remember: go up with the good leg and down with the bad leg. When ascending stairs, grip the sturdy wall handrail with one hand and hold your cane in the other hand. Step upward first with your unaffected, stronger limb, then bring both your cane and your weaker leg up to meet it on the step.
Descending stairs reverses this mechanical sequence to ensure your stronger leg safely controls your downward descent. Lower the cane tip onto the step below first, followed immediately by your weaker, recovering leg. Once both the cane and your injured limb are firmly planted, step down onto the same step with your strong leg. Never position a broad quad base or large pivot tip partially off the edge of a stair tread, as an unstable base edge can slip instantly under pressure.
Physical Signs Your Cane Height Needs Readjustment
Your body will quickly display unmistakable warning signals if your walking cane is adjusted to the wrong height. Persistent aching in your shoulder, neck stiffness, or an elevated shoulder blade usually points to a cane handle that sits too high. A cane that is adjusted too high also causes your elbow to flare outward, reducing your ability to exert downward stabilizing pressure. You might also notice that your cane tip strikes the ground awkwardly late in your stride.
Conversely, leaning forward excessively or suffering from lower back spasms usually means your cane is set too low. An undersized cane forces your lumbar spine into continuous flexion, accelerating spinal fatigue and worsening balance instability. If you find yourself slouching forward or taking choppy, uneven steps, pause immediately and check your handle alignment. Readjusting your telescoping pin by just one single inch can eliminate muscle strain and restore an upright, dignified walking posture.
Knowing When to Upgrade to Bilateral Mobility Support
A walking cane is designed exclusively for unilateral support and minor balance assistance, offloading up to twenty-five percent of your body weight. If you experience progressive neurological balance deficits, severe bilateral knee osteoarthritis, or frequent near-fall episodes, a single cane is no longer sufficient. Individuals who feel unsteady while holding a cane often compensate by leaning heavily to one side, which further destabilizes their gait.
When single-arm assistance fails to provide adequate confidence and stability, transitioning to a standard medical walker or rollator is necessary. Walkers provide bilateral upper-extremity support, creating a wider, symmetrical base that accommodates greater weight offloading and prevents lateral falls. If you are uncertain whether your current mobility aid provides adequate protection, schedule a formal gait assessment with a licensed physical therapist or physician. A mobility clinician can evaluate your walking mechanics, verify your cane height, and prescribe the safest mobility aid for your personal recovery needs.





Write Your Review
No reviews yet. Be the first to share your experience!