


Proper hiking posture and downhill knee stability depend heavily on having your gear dialed to the exact terrain ahead. Knowing how to adjust leki pole length transforms a cumbersome pair of walking sticks into an integrated biomechanical support system that absorbs jarring impact on descents and drives momentum on steep ascents. Whether navigating rocky switchbacks or loose alpine scree, an incorrect pole height forces awkward wrist angles and overworks your upper shoulders. Hikers who pair dependable poles with hiking clothing designed for knee strain often discover that minor trail adjustments yield massive reductions in joint fatigue over high-mileage days.
Modern LEKI designs rely on distinct engineering systems, ranging from external Speed Lock Plus lever clamps to internal Super Lock twist mechanisms. Dialing in the correct height requires more than merely guessing; it demands understanding the standard ninety-degree elbow baseline, respecting the structural stop lines on each aluminum or carbon shaft segment, and balancing clamp tension to prevent sudden collapses under full body weight. Learning the mechanical nuances of your specific model guarantees reliable performance across diverse backcountry environments.




Complete Guide to Adjusting LEKI Pole Length Across All Locking Systems
Achieving the optimal length on your trekking poles requires aligning mechanical adjustment with personal biomechanics. When hiking poles sit at the proper height, they transfer impact forces away from your knees into the stronger muscles of your upper back and shoulders. Understanding how different LEKI locking assemblies function ensures you can make fast, reliable adjustments whether standing at the trailhead or descending an exposed mountain pass.
The Fundamental 90-Degree Elbow Baseline for Flat Ground Sizing
The standard reference point for sizing any trekking pole starts on level terrain while wearing your standard trail footwear. Stand upright with your shoulders relaxed and your elbows tucked close to your torso. Bend your elbow to form a clean ninety-degree right angle, positioning your forearm parallel to the flat ground. Your hand should rest comfortably on the grip without lifting your shoulder or dropping your elbow.
With your arm positioned at this right angle, the pole tip should touch the ground directly beside your foot. If your forearm angles upward toward your chest, the pole is set too long and will place unnecessary tension on your shoulder joints. Conversely, if your forearm angles downward, the pole is too short and will cause you to stoop forward while walking. Establishing this baseline provides the neutral starting measurement from which all terrain adjustments flow.
Adjusting LEKI Speed Lock Plus and Speed Lock 2 Cam Lever Systems
External lever locks represent the most common adjustment mechanism found on modern outdoor models like the LEKI Makalu Cork Lite Trekking Poles-Stone Blue and the LEKI Khumbu Lite Trekking Poles – Orange. To modify the length, flip the external lever open until it releases its clamping pressure on the shaft. Once the cam lever is fully open, slide the telescoping lower shaft section up or down to reveal the printed centimeter measurement markers. Snap the lever firmly back against the shaft to lock the chosen setting in place.
Proper clamping tension is essential to prevent unexpected shaft collapse under axial downward body weight. If the lever closes too loosely without resistance, or if the pole section slips when loaded, open the lever and turn the integrated thumb dial clockwise to tighten the clamp collar. You should feel firm mechanical resistance during the final third of the lever closing arc. Never force the lever shut with excessive tool pressure, as finger-tight calibration provides ample holding power without cracking the composite collar.
Single-pole walking staffs such as the LEKI Wanderfreund High Fives Trekking Pole also utilize Speed Lock Plus levers for fast adjustments between sixty and one hundred twenty centimeters. The dual-lever configuration lets hikers compress the shaft down to packable dimensions for travel or extend it quickly when stepping onto uneven ground. Always inspect the cam lever before beginning a hike to ensure that temperature fluctuations have not loosened the tension screw.
Operating LEKI Super Lock Internal Twist Mechanisms
Traditional telescoping models such as the LEKI Voyager Trekking Poles – Blue – White and the compact LEKI Super Micro Trekking Pole feature the internal Super Lock system, commonly known as SLS. This mechanism relies on an internal expansion plug that expands against the interior shaft wall when twisted. To unlock the section, hold the upper shaft firmly with one hand while turning the lower section counter-clockwise. Once loose, slide the pole section smoothly to your desired centimeter mark.
To secure the internal lock, rotate the lower section clockwise until you feel the internal wedge engage and tighten firmly. The Super Lock design provides exceptional holding force when properly locked, but it requires mindful handling during setup. Avoid over-tightening the shaft past hand resistance, as excessive torque can jam or strip the threaded expansion wedge. A snug, firm twist is all that is required to achieve complete axial stability.
If an internal twist lock spins freely without catching, the expander plug may have vibrated loose from its internal threading. To resolve this issue, pull the lower shaft completely out of the upper section to inspect the nylon expanding bolt. Turn the plastic expander clockwise by hand until it begins to flare slightly, then reinsert it into the shaft and twist to tighten. Keeping the shaft tubes clean and dry prevents moisture from causing internal slippage.
Understanding Push-Button Folding Systems and Fixed-Length Models
Dedicated trail running poles such as the LEKI Ultratrail FX.One Trekking Poles- Grey Light differ fundamentally from telescoping hiking poles because they feature a fixed overall length. Instead of telescoping shafts with variable measurements, these folding poles deploy via an internal tension cord and lock with a spring-loaded push button. Because they do not offer dynamic length adjustments on the trail, runners must choose their correct fixed size, such as one hundred twenty or one hundred twenty-five centimeters, before purchasing.
To assemble a folding push-button pole, let the connected carbon sections drop freely toward the ground. Pull the upper section firmly downward away from the grip until the brass or aluminum locking button clicks outward with an audible snap. To collapse the pole for transport, depress the button and slide the shaft backward into its compact fourteen-inch folded profile. Recognizing whether your pole is fixed or adjustable prevents costly sizing errors before heading into the backcountry.
Terrain-Specific Length Modifications for Steep Climbs and Descents
While the ninety-degree elbow angle serves as the standard flat-ground benchmark, dynamic mountain trails require periodic adjustments to maintain efficiency. When tackling sustained uphill climbs, the ground rises in front of you with every stride. Shortening both poles by five to ten centimeters allows you to plant the tips without over-reaching or elevating your arms above heart level. This shortened setup keeps your center of mass moving forward and recruits your latissimus dorsi muscles for efficient propulsion.
Steep descents present the opposite mechanical challenge because the trail drops away beneath your feet. Lengthening your poles by five to ten centimeters allows you to plant the tips lower down the slope while keeping your torso upright. This extended reach provides a stable forward brake, absorbing heavy deceleration forces that would otherwise stress your quadriceps and patellar tendons. Hikers carrying balanced supportive internal frame hiking backpacks will appreciate how this added length prevents jarring downhill impact and maintains steady balance.
On sidehill traverses where you hike along a steep slope for extended distances, asymmetrical adjustments prove exceptionally helpful. Shorten the uphill pole to match the elevated bank, while lengthening the downhill pole to bridge the drop-off. Alternatively, poles equipped with extended foam grip sleeves, such as the Aergon Air cork handles, allow you to choke down on the uphill side without opening the mechanical locks. This technique saves valuable trail time on undulating backcountry routes.
Distributing Extension Between Shaft Sections and Respecting Stop Markings
Three-section telescoping poles feature both a middle and a lower adjustable segment marked with numerical centimeter increments. For maximum structural rigidity and balanced swing weight, you should distribute your adjustments equally across both telescoping sections. If you need a total pole height of one hundred twenty centimeters, adjust both the middle and lower shafts to the one hundred twenty centimeter mark. Extending one section fully while leaving the other collapsed creates uneven leverage that can cause shaft flutter and premature joint wear.
Every adjustable pole segment features a clear printed line labeled “STOP” or “MAX” near the bottom of the tube. This mark represents the minimum safe insertion depth required for the locking collar to support your body weight. Never extend any shaft section beyond this line under any circumstances. Over-extending past the limit removes the overlapping internal support, creating a severe failure risk where the aluminum or carbon tube can snap or bend under moderate lateral force.
Setting Single Hiking Canes and Ergonomic Grip Alignment
Single walking staffs like the LEKI Wanderfreund Makalu Trekking Pole and the LEKI Legend Black Carbon Trekking Pole require a distinct height measurement compared to dual trekking poles. Because these poles feature cane-style Aergomed handles designed for downward palm pressure, they function best when sized to your resting wrist crease. Stand upright with your arms hanging naturally at your sides and adjust the pole so the top curve of the grip aligns with your wrist joint.
This sizing method creates a gentle fifteen-degree bend in your elbow when your palm rests on the ergonomic handle. The shorter overall setup allows travelers and trail walkers to bear downward weight directly through the center of the shaft without lifting the shoulder. The Wanderfreund Makalu adjusts between ninety and one hundred twenty centimeters, offering ample range for stability across moderate nature trails and urban cobblestones alike. Sizing a cane-style pole too long forces the shoulder into awkward abduction, compromising long-term joint comfort.
Calibrating Wrist Straps and the Shark Trigger System
Proper strap setup is just as critical as shaft length for transferring body weight effectively without hand fatigue. Most traditional LEKI hiking poles feature the Lock Security Strap Soft system, which adjusts easily by pulling the top webbing tab upward. To use the strap properly, insert your hand upward from beneath the loop and grip the handle with the strap resting across the base of your palm. This upward entry distributes downward pressure across the strap fabric rather than forcing you to squeeze the grip tightly.
Trail running models take a different approach with the specialized Trail Trigger Shark grip system. These poles utilize an integrated mesh hand harness that clicks directly into a quick-release loop at the top of the handle. To adjust this setup, cinch the hook-and-loop strap around your hand until it sits snugly without restricting blood flow. Pressing the top release button ejects the harness instantly, giving runners maximum efficiency at hydration stations without requiring strap readjustments.
Troubleshooting Shaft Slippage, Silt Accumulation, and Field Maintenance
Telescoping poles that gradually lose height while hiking usually suffer from fine trail dust or moisture accumulation inside the shaft joints. When dirt particles settle between the aluminum sections, they act like tiny ball bearings that reduce the friction needed for cam locks to hold. To fix this problem, unlock both levers or twist locks, pull the shaft segments completely apart, and wipe the inner and outer surfaces clean with a dry cloth. Never apply oil, WD-40, or grease to the shafts, as lubricants completely destroy the friction required for secure locking.
Temperature changes can also cause unexpected slippage, particularly when moving from warm afternoon valleys into freezing alpine altitudes. As aluminum and carbon materials contract in sub-freezing weather, clamping collars can lose their calibrated holding force. If your pole begins collapsing in cold conditions, open the Speed Lock lever and turn the thumb screw clockwise by a quarter turn. This small adjustment restores the firm mechanical pressure necessary to support your full body weight on steep terrain.
After hiking through rain or crossing deep streams, always disassemble your poles and allow the individual sections to dry completely before storing them in your gear closet. Leaving wet aluminum shafts assembled causes oxidation and galvanic corrosion, which can permanently freeze twist locks or weaken tube walls. Inspecting the locking collars and wiping away trail silt after every major trip ensures that your adjustment mechanisms operate smoothly for seasons to come.
Tip Selection and Ground Clearance Adjustments
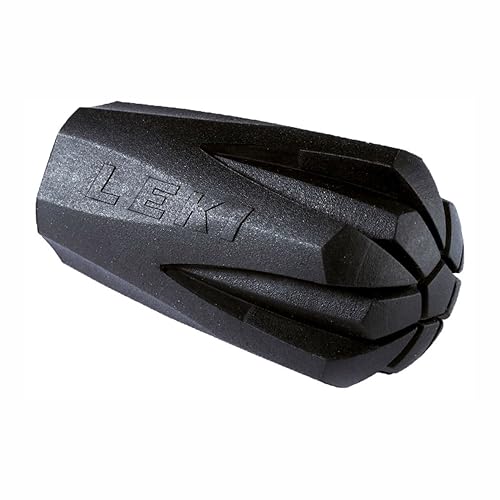
The type of tip installed on your pole subtly alters its effective length and ground engagement across different trail surfaces. Standard carbide flex tips bite aggressively into dirt, gravel, and ice, allowing you to use the exact printed centimeter measurements on the shaft. However, when walking on pavement, asphalt, or slick indoor flooring, bare metal tips skitter and vibrate uncomfortably. Installing accessories like the LEKI Rubber Walking Tip provides essential traction and dampens trail vibration on hard surfaces.
Because thick rubber pavement tips add roughly one to two centimeters of height to the bottom of the pole, you may need to shorten the lower shaft slightly to maintain your ninety-degree elbow angle. These vulcanized rubber boots slide directly over the existing carbide tips and can be removed quickly when transitioning back to dirt paths. Matching your tip choice to the terrain protects the underlying carbide from premature wear and ensures that your measured pole height remains ergonomically sound.
Taking a few moments at the trailhead to dial in your pole height and calibrate clamp tension pays massive dividends in comfort and stability. By establishing your neutral ninety-degree elbow angle on flat ground and adapting your settings for steep ascents and descents, you protect your joints and maximize energy efficiency on every backcountry mile. Always verify your lock tension with a firm downward push before stepping onto technical terrain to ensure reliable support wherever your adventure leads.








Write Your Review
No reviews yet. Be the first to share your experience!