


Proper hiking pole deployment directly impacts how well trail gear absorbs punishing descent forces and provides balanced points of contact over uneven rocks. Learning how to assemble leki pole mechanisms properly ensures that locking hardware will not slip unexpectedly when transferring upper body weight during steep alpine descents. Beyond maintaining balance across loose scree and slick river crossings, a properly tuned pole offloads significant compressive stress from the knees, ankles, and lumbar spine. Hikers managing chronic joint fatigue frequently pair dependable pole stability with supportive hiking pants for knee strain to protect connective tissue and maintain efficient forward cadence across demanding terrain.
Leki manufactures backcountry equipment across several distinct mechanical designs, ranging from ultra-compact folding shafts to multi-stage telescoping aluminum and carbon fiber configurations. Setting up these trekking poles correctly requires understanding whether your specific model relies on external Speed Lock cam levers, internal Super Lock friction expanders, or push-button tension cords. Dialing in proper clamp tension and section alignment before leaving the trailhead prevents unexpected collapse under load, eliminates annoying shaft vibration, and protects precision tubing from excessive wear. Taking a few moments to master proper assembly ensures you gain maximum stability and safety from your trekking investment on every backcountry journey.



Comprehensive Guide to Assembling, Adjusting, and Tuning Leki Trekking Poles
Learning how to assemble leki pole hardware correctly is essential for preventing sudden slippage, optimizing trekking cadence, and protecting your joints on steep mountain trails. Leki designs outdoor poles with three primary mechanical systems: external lever cam clamps, rapid-deploy folding tension cords, and internal friction expansion plugs. Understanding how these mechanical assemblies function ensures you can deploy your gear in seconds and trust it under heavy downward force.
Identifying Your Leki Locking Mechanism and Shaft Architecture
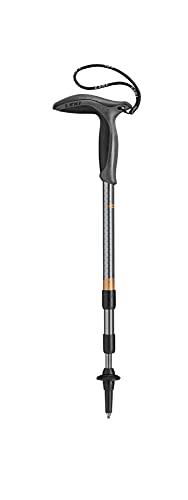
Before attempting to adjust or assemble your equipment, you need to identify the exact locking hardware engineered into your shaft segments. Telescoping hiking poles like the LEKI Makalu Cork Lite Trekking Poles-Stone Blue and LEKI Wanderfreund Makalu, Unisex utilize external Speed Lock clamps that rely on a lever flap and a knurled tension wheel. These external lever clamps wrap around the outer shaft diameter and squeeze the upper tube tightly against the inner tube.
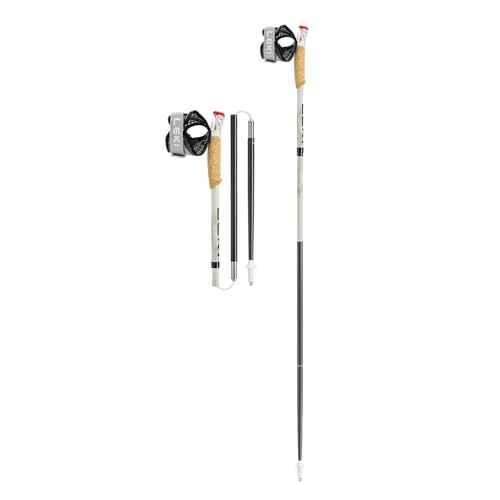
Folding models like the LEKI Ultratrail FX.One Trekking Poles- Grey Light take a completely different design approach by using internal tension cords and a spring-loaded push-button catch. These collapsible shafts break apart into three compact segments measuring roughly fourteen and a half inches for rapid storage inside running vests or backpacks. Instead of sliding telescoping tubes into one another, folding models lock into place when an internal cable pulls the joint ferrules together under uniform mechanical tension.
Traditional telescoping models such as the LEKI Voyager Trekking Poles – Blue – White and LEKI Super Micro Trekking Pole feature the internal Super Lock system, commonly referred to as an SLS twist lock. This design relies on an internal threaded expander wedge that flares outward against the inner tube walls when you rotate the shaft sections in opposite directions. Knowing which system your pole uses determines whether you must flip an external lever, tension an internal cord, or rotate the shaft to achieve a rigid lock.
Assembling Folding and Push-Button Leki Z-Poles
Assembling a folding Leki pole requires extending the inner tensioning cord until the internal mechanical catch engages securely. Start by undoing any hook-and-loop storage straps and allowing the loose lower segments to dangle downward freely under their own weight. Guide the aluminum or carbon joint ferrules into their corresponding receiving tubes so the shaft forms a continuous line.
Once the lower segments are roughly aligned, grip the upper shaft section directly beneath the handle with one hand and hold the lower telescoping segment with the other. Pull the lower shaft section firmly downward and away from the grip until the internal cord tensions the joints. Continue pulling firmly until you hear a distinct metallic click and see the spring-loaded push-button emerge through the small hole in the shaft wall.
When the push-button fully pops out, test the rigidity of the pole by applying gentle downward pressure against the floor. The segments should feel completely solid without any axial wiggle or loose rattling along the connecting ferrules. To collapse the pole at the end of your run or hike, firmly press the push-button inward while sliding the lower section back toward the grip to release tension.
Operating and Adjusting Leki Speed Lock Cam Levers
Leki Speed Lock Plus and Speed Lock 2 mechanisms provide fast, dependable adjustment that can be operated easily even while wearing heavy winter gloves. To assemble or adjust a pole featuring this system, such as the LEKI Wanderfreund High Fives Trekking Pole or the LEKI Legend Black Carbon Trekking Pole, begin by lifting the cam lever completely open until it points away from the shaft. This releases the clamping collar and allows the inner shaft section to slide smoothly up or down.
Slide the lower shaft to your desired numerical measurement, then press the lever back down against the shaft to engage the clamp. If the lever closes too easily without noticeable mechanical resistance, the collar is too loose and the pole may collapse under your weight. Open the lever again and turn the textured plastic thumbscrew dial clockwise by a quarter turn to increase the clamping pressure.
Close the lever firmly until you feel solid resistance that requires deliberate thumb pressure to snap flush against the shaft collar. Do not over-tighten the thumbscrew to the point where you must force the lever shut with two hands, as extreme excessive torque can strain the composite clamp collar. Once adjusted properly, the clamp will hold its friction setting across temperature changes without slipping.
Engaging and Troubleshooting Super Lock SLS Twist Systems
Operating an internal Super Lock pole like the LEKI Super Micro Trekking Pole (Single) involves rotating the shaft segments to activate an internal expanding wedge. Hold the upper section near the grip with your non-dominant hand and grasp the lower segment just below the joint with your dominant hand. Rotate the lower segment counter-clockwise several turns to loosen the internal expander plug and free the shaft for extension.
Extend the section to your desired height, ensuring you do not pull the tube past the printed stop mark on the shaft. Once positioned, rotate the lower segment clockwise while holding the upper section stationary until you feel the internal expander bite into the shaft wall. Continue twisting with firm hand force until the joint feels completely tight and will not rotate any further.
If the shaft spins continuously without tightening, the internal expander plug has likely backed off its threaded bolt or accumulated fine trail dust. Pull the lower segment completely out of the upper tube to inspect the colored plastic expander wedge. Gently expand the wedge by hand so it creates light contact friction, slide it back into the upper tube, and rotate clockwise again to engage the threads.
Determining Proper Pole Height and Biomechanical Sizing
Achieving the correct height setting is essential for offloading impact from your knees and stabilizing your center of gravity across uneven trails. Stand upright on a flat indoor floor wearing your normal hiking footwear and let your upper arms hang naturally at your sides. Bend your elbow to create a clean ninety-degree angle between your bicep and forearm, keeping your wrist parallel to the ground.
Adjust your pole sections so that the top of the grip rests comfortably in your palm while maintaining that ninety-degree elbow bend. On three-section telescoping poles, distribute the extension equally between the middle and lower sections rather than extending one section to its absolute limit. Balancing the extension across both sections maintains uniform structural stiffness and minimizes shaft vibration during hard pole plants.
When carrying heavy backcountry gear in an internal frame hiking pack, proper pole height becomes even more critical for spinal alignment and balance. Shorten both poles by five to ten centimeters when tackling sustained steep climbs so you do not push your shoulders backward. Lengthen your poles by five to ten centimeters when navigating long descents to provide earlier forward ground contact and offload braking forces from your quadriceps and knees.
Wrist Strap Configuration and Trigger Shark Engagement
Using hiking pole wrist straps properly transfers your downward body weight through your skeletal frame rather than forcing your grip muscles to work continuously. To enter a traditional Leki PAS strap or Aergon strap, bring your hand up through the bottom of the fabric loop from underneath. Grasp the contoured grip with your palm resting directly over the webbing where it meets the handle.
Adjust the strap tension by pulling upward on the top strap tail to release the internal wedge, sliding the webbing to length, and pulling down firmly to lock the wedge in place. The strap should fit snugly across the back of your hand so you can open your fingers without dropping the pole. This supportive configuration reduces forearm fatigue over long trail miles and prevents hand cramping.
On performance models featuring the Trigger Shark system, such as the LEKI Unisex Adult Sports Ski Poles Silver S/M/L and LEKI Leki Sports Unisex Adult Ski Poles, Silver, the strap is worn as a mesh harness that clicks directly into the grip head. Align the small loop on the harness with the receiver hook on the grip and push downward until it snaps locked. To detach in a split second, simply press the thumb button on top of the grip and slide your hand upward.
Installing Baskets, Tips, and Walking Pads
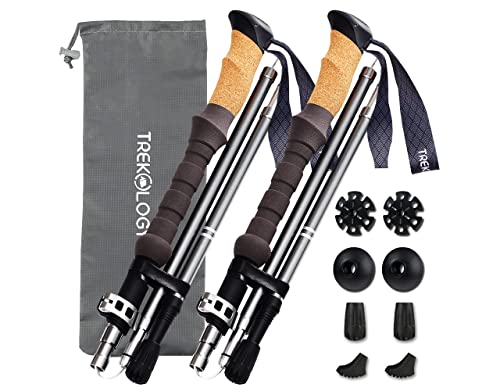
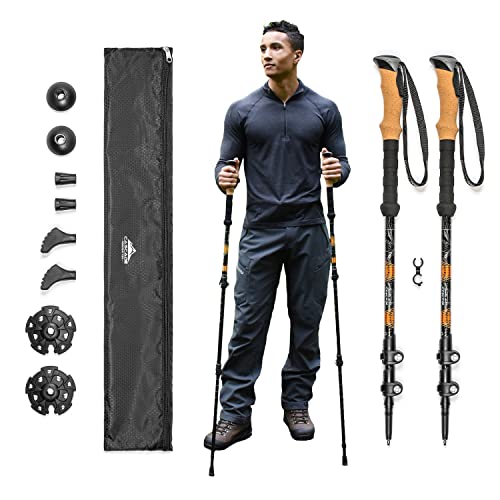
Leki hiking poles come equipped with modular tip assemblies designed to handle diverse terrain from loose scree to paved roads. The base of the shaft features a durable flex tip housing a tungsten carbide point that bites securely into rock, gravel, and dirt. On soft forest trails, low-profile trekking baskets prevent the pole tip from sinking too deeply into mud or wedging between narrow roots.
To install or swap baskets, align the center hole of the basket with the flex tip collar and push it firmly upward until it seats past the retaining ridge. Rotate the basket clockwise by hand to ensure the internal threads or retention clips lock completely into position. When transitioning to paved fitness paths or hard asphalt, slip vulcanized rubber walking pads directly over the carbide tips to eliminate harsh vibration and trail clatter.
Hikers traveling fast in variable weather often pair versatile tip setups with breathable lightweight trail pants to maintain full leg mobility across mixed surfaces. Inspect your carbide tips periodically to confirm the metal inserts have not worn flat against the plastic sleeve. Replace worn flex tips by soaking the lower plastic housing in hot water to loosen the factory bond, pulling the old tip off with pliers, and pressing a new replacement firmly onto the bare shaft.
Maintenance, Silt Removal, and Storage Practices
Backcountry dust, fine river silt, and moisture inevitably find their way inside telescoping tubing and locking collars during wet hiking trips. After returning from a rainy outing or crossing silty glacial streams, completely disassemble your poles by sliding every section apart. Wipe down the exterior of each inner tube and the interior of the outer collars with a clean, dry microfiber cloth.
Never apply petroleum-based lubricants, silicone spray, or grease inside your hiking pole shafts or onto internal locking components. Lubricants destroy the friction necessary for Speed Lock clamps and Super Lock expanders to hold firm under axial loads, causing hazardous collapse on the trail. If an internal expander or lever collar becomes stiff, rinse it with warm tap water to wash out grit and allow it to dry thoroughly before reassembly.
Store your poles completely dry and leave external lever clamps slightly unlatched during the off-season. Storing aluminum shafts while wet can trap moisture inside the sealed tubes, leading to white aluminum oxide buildup and galvanic corrosion that permanently fuses the sections together. Leaving the cam levers loose prevents prolonged mechanical tension on the composite collars, preserving their structural clamping elasticity for future seasons.
Pre-Hike Verification and Safety Load Testing
Before heading onto a technical mountain trail, always perform a physical load verification test on level ground. Stand next to your fully assembled poles, place both hands firmly on top of the grips, and lean your full upper body weight straight down onto the shafts. If either section slips downward by even a fraction of a millimeter, immediately readjust the tension dial or tighten the twist mechanism before trusting the gear on a slope.
Pay close attention to the printed stop lines on each adjustable segment and verify that no section is extended past the maximum safety threshold. Extending an aluminum or carbon section beyond its stop mark reduces the overlap inside the joint collar, drastically increasing the risk of catastrophic shaft bending or shear breakage when bearing weight. A quick ten-second inspection before every hike ensures your gear will reliably support your footing through high-consequence mountain terrain.





Write Your Review
No reviews yet. Be the first to share your experience!