


Trekking poles endure relentless punishment across rocky scree, wet river crossings, and hard-packed alpine trails where reliable grip is essential for balance. When carbide flex tips wear down flush against their plastic housing or snap after catching in deep granite fissures, your poles quickly lose their ability to bite into slick terrain. Understanding %how to replace leki pole tips% restores dependable downhill braking, protects aluminum and carbon fiber shafts from direct ground impact, and prevents accidental slips on technical descents. Pairing maintained trekking poles with proper gear, such as knee support trail pants, helps hikers offload joint strain while navigating challenging mountain grades.
Modern trekking poles rely on factory-pressed interference friction fit assemblies that can seem intimidating to remove without damaging expensive lower shaft sections. Knowing whether your setup requires a standard plastic flex tip, an antishock assembly, or slip-on rubber pavement protectors makes the entire swap straightforward. With basic household tools, controlled hot water application, and correct shaft diameter measurements, you can refresh your poles in minutes and ensure solid trail traction for your next backcountry excursion. Taking the time to properly inspect and service your tips also prevents premature shaft splintering and extends the working life of your hiking gear.


Complete Guide to Replacing Leki Trekking Pole Tips and Protectors
Replacing worn or damaged trekking pole tips is one of the most effective ways to restore grip and extend the operational life of your outdoor gear. Factory Leki flex tips rely on an unglued press-fit friction sleeve that secures tightly over the tapered lower shaft of aluminum or carbon fiber poles. Over hundreds of trail miles, tungsten carbide points can grind down against abrasive granite, or the protective plastic flex housing can shear when wedged between jagged boulders. Understanding the proper thermal extraction technique allows you to remove worn sleeves cleanly without compromising shaft integrity. Once you understand the basic mechanics of the friction bond, swapping tips takes only a few minutes at your workbench.
Identifying Your Leki Tip Style and Shaft Diameter
Before attempting any removal, you must determine whether your poles utilize standard press-fit flex tips, integrated antishock assemblies, or temporary rubber surface protectors. Traditional models utilize the LEKI Flexible Carbide Tips One Color One Size, which features a durable plastic sleeve designed to flex up to thirty degrees under lateral trail stress without snapping the shaft. Newer antishock poles require specialized hardware, such as the LEKI DSS Replacement Flextip – Gray – 14 mm or its narrower twelve-millimeter counterpart. Attempting to force a standard flex tip onto a suspension pole or mounting the wrong diameter will result in loose fittings and trail failure. Taking a caliper measurement of your lower shaft section ensures you order the exact replacement hardware designed for your specific pole model.
Lower shaft diameters on trekking poles vary depending on whether the pole is constructed from ultralight carbon fiber or high-strength tempered aluminum. Standard Leki flex tips generally fit lower sections with a twelve-millimeter taper, while heavier-duty trekking and antishock variants often feature fourteen-millimeter lower sections. Aftermarket accessory bundles like the 12 Pack Trekking Pole Accessory Set Compatible provide aftermarket replacement options with twelve-millimeter inner diameters that suit many mainstream outdoor poles. If you are unsure about your pole dimensions, removing the existing tip first provides an unobstructed view of the shaft taper. Matching your replacement component to the exact lower shaft diameter prevents slippage when bearing full downward body weight on steep descents.
Essential Tools and Workspace Preparation for Tip Removal
Setting up the proper workspace and gathering standard household tools makes pole maintenance efficient and prevents cosmetic damage to your shafts. You will need a heat-safe container or shallow pot filled with boiling water, a pair of heat-resistant work gloves, a clean shop towel, and a standard adjustable wrench or combination pliers. Having a sturdy workbench or flat countertop allows you to brace the pole securely during the extraction process. Avoid using open flames, blowtorches, or high-temperature industrial heat guns that can scorch composite resins or melt internal locking collars. Controlled thermal expansion using hot water softens the nylon polymer sleeve while keeping the underlying metal or carbon fiber shaft completely safe.
Proper preparation also includes clearing any dried mud, trail debris, or road grime from around the tip junction. Submerging dirty tips into hot water can wash grit into the lower shaft seam, potentially scoring the surface during removal. Inspecting the pole sections beforehand allows you to loosen and remove the lower telescoping segment entirely from the upper assembly. Working with only the lower shaft segment makes handling much easier and prevents accidental heat exposure to upper lever locks or foam grip extensions. A clean, organized workspace ensures that you can move swiftly from heating to pulling before the plastic cools and contracts.
The Hot Water Submersion Method for Safe Extraction
The hot water immersion method is the safest, most widely recommended procedure for releasing factory-pressed trekking pole flex tips. Bring a small pot of water to a rolling boil on the stove, then carefully dip the lower plastic sleeve into the water so the seam is completely submerged. Allow the tip to soak for approximately two to three minutes so the heat can penetrate the nylon collar and expand the material. Because nylon plastic expands at a faster rate than aluminum or carbon composite shafts, the internal friction grip loosens dramatically. Keep the water level below any printed measurement markings or secondary lock collars to protect external finishes.
Once the immersion time is complete, put on your heat-resistant gloves and pull the lower pole shaft out of the boiling water. Wrap a dry towel firmly around the heated plastic tip to secure your grip and prevent burns. Pull the tip directly away from the shaft in a straight, axial motion without applying harsh bending force. If the sleeve resists hand pulling, slide an open-end wrench adjusted to the diameter of the shaft directly above the tip collar and tap it downward with a mallet. The tip should slide off smoothly, revealing the clean tapered end of the pole shaft.
Critical Precautions to Avoid Shaft and Lock Damage
Applying improper force during tip removal can lead to permanent structural damage on both aluminum and carbon fiber trekking poles. You must avoid twisting the flex tip vigorously with pliers while pulling, as twisting can shear carbon fiber layers or score aluminum tubing. Lateral prying against the edge of a table or workbench can introduce bend fatigue or crush thin-walled lower segments. If the tip refuses to budge during your initial attempt, simply submerge it back into boiling water for another two minutes to reheat the plastic thoroughly. Patience during thermal softening is far cheaper than replacing a broken lower shaft section.
Hikers should also ensure that internal locking mechanisms or external cam clamps are fully disengaged or removed before applying significant mechanical force. If you leave the lower section clamped tightly inside the mid-shaft, vigorous pulling can stress the locking cams or strip internal expansion plugs. Storing extra replacement components in durable pack compartments alongside your regular trail essentials, such as lightweight hiking pants and foul-weather gear, ensures you are prepared for unexpected gear maintenance. Keeping extra tips on hand prevents ruined hiking trips when sharp rocks crack a tip housing deep in the backcountry. Always inspect the bare shaft carefully for cracks, gouges, or splintering before proceeding to the installation phase.
Installing and Seating New Carbide Flex Tips
Installing a new flex tip requires clean surfaces and direct downward axial force to achieve a permanent mechanical hold. Begin by wiping the exposed shaft taper with isopropyl alcohol to remove any residual dirt, mineral deposits, or manufacturing oils. Do not apply glue, epoxy, or silicone lubricants to the shaft, as factory flex tips rely strictly on a dry interference press fit. Adding adhesive makes future tip replacements nearly impossible and can degrade carbon composite resins over time. Dry friction ensures that the sleeve stays locked during rigorous hiking while still allowing future thermal removal.
Slide the replacement flex tip onto the tapered shaft end by hand until it makes firm contact with the inner stop ridge. To seat the tip completely, place a scrap piece of wood or a thick rubber mat on a solid floor to protect your flooring. Hold the pole vertically with both hands on the lower shaft and firmly strike the carbide tip against the protected surface several times. Your downward body weight drives the tapered shaft deep into the nylon sleeve, creating a rock-solid mechanical lock. Verify that the tip is straight and fully seated with no visible gap between the shaft collar and the sleeve housing.
Servicing Dynamic Suspension System and Antishock Tips
Trekking poles equipped with built-in impact absorption require dedicated replacement assemblies that match their internal suspension geometry. Components like the LEKI DSS Replacement Flextip – Gray – 12 mm house an integrated Dynamic Suspension System directly above the carbide point. This integrated mechanism is designed to absorb peak impact forces at contact, reducing jarring strain on wrists, elbows, and shoulders during continuous descents. Because the suspension module is integrated directly into the replacement tip, replacing it refreshes both the ground point and the shock-absorbing elastomer in a single operation. Hikers managing chronic joint fatigue often rely on this suspension setup to soften ground strikes along rocky mountain trails.
When installing DSS antishock hardware, selecting the precise diameter is vital because the elastomer mechanism requires correct shaft support. LEKI manufactures these assemblies in both twelve-millimeter and fourteen-millimeter configurations to match specific lower shaft diameters. Always ensure that you thread a trail basket onto the built-in threading directly above the DSS unit before taking the poles onto technical terrain. The manufacturer specifically notes that DSS tips must always be used with an attached basket to prevent the suspension joint from penetrating deep into rock crevices. Failing to install a basket leaves the flexible suspension elastomer vulnerable to pinching and lateral shear damage.
Selecting Slip-On Protectors, Fitness Paws, and Smart Tips
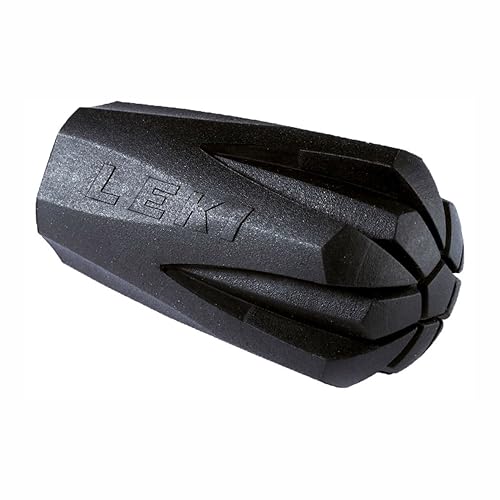
Carbide tips excel on dirt, gravel, and ice, but walking on paved sidewalks, tarmac, or slick rocky slabs requires specialized rubber covers. Standard slip-on options like the LEKI Rubber Walking Tip slide snugly over bare carbide points to provide grip and dampen vibration on asphalt. For fitness walkers and Nordic walking enthusiasts, the LEKI Rubber Fitness Walking Tip provides an extended contact area that promotes an efficient forward stride. These rubber accessories also prevent unsightly scratches on indoor surfaces and protect sensitive outdoor stone from trail scarring. Slipping protective rubber covers over metal points also complies with transport guidelines when storing poles in transit luggage.
Hikers who frequently lose friction-fit rubber caps on muddy trails often prefer threaded designs such as the TrailBuddy Screw-On Rubber Tips for Walking Sticks. These protectors feature internal threads that screw securely onto compatible tip bodies, significantly reducing the likelihood of leaving rubber caps behind in deep mud. Additionally, multi-surface products like the Leki Smart Tip 2.0 Pad integrate an extendable point that switches between rubber pavement contact and metal terrain grip with a simple lever adjustment. Regardless of style, premium rubber covers incorporate embedded steel washers at the base to stop sharp carbide spikes from punching through the rubber during aggressive downhill plants. Replacing worn rubber caps before the internal metal washer breaches ensures your pole points stay secure and protected.
Basket Integration and Field Maintenance for Longevity
A complete tip assembly requires compatible baskets to prevent pole shafts from sinking into soft mud, loose scree, or deep winter snowbanks. Modular kits such as the 12 Pack Trekking Pole Accessory Set Compatible include fourteen-millimeter mud and snow baskets alongside protective rubber boots and grooved carbide tips. Smaller low-profile mud baskets are ideal for three-season backpacking through dirt and loose gravel where wide baskets might snag on trail brush. Wide powder baskets spread downward force across fluffy snow, keeping your poles functional when snowshoeing or traversing alpine passes. Inspecting basket threads before each outing ensures they remain firmly locked against the flex tip collar.
Budget-friendly aftermarket protectors like the Hiking Pole Tips, 12Mm / 0.5In Non Slip Easy offer shock absorption and anti-skid engraving for extended high-mileage hikes. The vulcanized rubber in products like the LEKI Walking Rubber Tip resists abrasion on rough city streets and cobblestones during international travel. Periodically inspecting your rubber accessories allows you to replace them before the internal metal washer wears through and exposes the underlying carbide. After completing any tip or basket swap, take a moment to clean trail silt from the lower shaft to prevent locking collar slippage. Routine maintenance of your tips and accessories ensures reliable stability, protects your joints, and keeps your hiking poles performing across varied terrain.
Performing a final bench verification confirms that your new tips are completely secure before you head out into the backcountry. Lean your full upper body weight onto both assembled poles against a firm, slip-free floor to check for unwanted movement or loose tolerances. If the flex tip shifts or twists during downward loading, repeat the vertical strike procedure to seat the internal taper deeper onto the shaft. Once fully seated, your newly installed flex tips and protective rubber covers will provide dependable traction, quiet trail performance, and superior joint support on every trail you tackle.








Write Your Review
No reviews yet. Be the first to share your experience!