


Navigating rocky descents and steep trail grades places heavy repetitive strain on your lower joints. Learning how to size hiking poles correctly transforms these simple sticks into powerful extensions of your upper body that actively absorb braking forces. When you adjust the shaft height to match your specific biomechanics, your arms, shoulders, and chest take over a significant portion of the workload that would otherwise crush your quadriceps. Pairing an ergonomic pole setup with supportive gear like knee support trail pants can help keep your knees stable during long mountain descents.
A mismatched pole length does the opposite by encouraging awkward posture, cramping your wrists, and increasing trail fatigue. Setting your gear to the right height depends on whether you walk along flat valley floors, climb steep switchbacks, or pick your way down loose talus fields. Modern telescoping and folding poles offer quick external levers to dial in exact measurements within seconds. Understanding the mechanical baseline and adjusting for trail gradient will keep you moving efficiently across every mile.


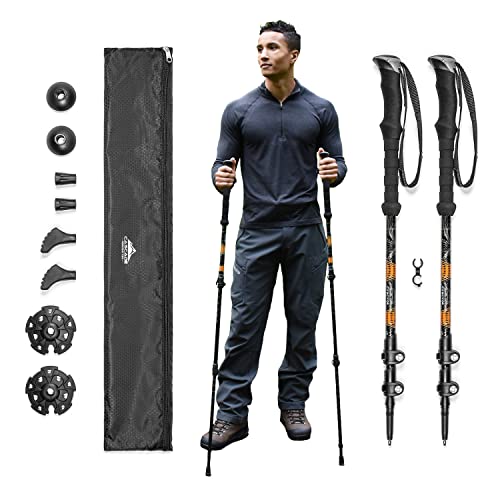


The Engineering and Biomechanics of Sizing Hiking Poles
Dialing in the correct height on your trekking poles is essential for maximizing balance, preserving energy, and reducing joint impact across rugged terrain. An improper adjustment forces your upper body into awkward postures, leading to shoulder fatigue and wrist strain while reducing stability. Sizing your poles accurately ensures that your skeletal frame supports your body weight efficiently through every phase of your stride.
The 90-Degree Elbow Angle: The Gold Standard Sizing Baseline
The foundation of all hiking pole adjustments begins with the universal 90-degree elbow rule on flat ground. Stand upright on a level surface while wearing the trail shoes or boots you plan to hike in. Hold the grips naturally with relaxed shoulders, letting the tips touch the floor beside your feet. Adjust the shaft length until your forearm forms a right angle with your upper arm, remaining completely parallel to the ground.
This perpendicular elbow bend positions your arm muscles at their optimal biomechanical resting lengths. When your elbow sits at ninety degrees, you can plant the pole forward and immediately generate downward leverage without joint strain. Setting the poles too tall causes an upward shoulder shrug that creates intense muscle tension over long trail days. Setting them too short makes you bend forward, throwing your center of gravity off balance and straining your lower back.
Adjusting Shaft Length for Varied Trail Gradients
A single height setting will not serve you well once the trail deviates from flat terrain. As you begin a sustained uphill climb, shorten each pole by five to ten centimeters, or two to four inches, depending on the grade. Shortening the shafts prevents you from reaching upward with tired shoulders to plant the tips into rising slopes. This compact height lets you push down through the grips, engaging your chest and back muscles for upward propulsion.
Steep descents present the opposite biomechanical challenge and require you to lengthen your poles by five to ten centimeters. Lengthening the shafts lets you plant the tips further down the slope before taking a step, providing solid forward support. This brace transfers braking forces away from your patellar tendons and quadriceps into your upper body. Hikers managing knee irritation find that extending their poles on descents provides vital joint relief.
Rolling terrain with frequent short ascents and descents can make stopping to adjust mechanical locks tedious. Models like the Cascade Mountain Tech Trekking Poles and Foxelli Carbon Fiber Trekking Poles feature extended secondary EVA foam grips beneath the handle. These lower foam sleeves let you choke down on the shaft instantly on steep pitches without touching the locks. On off-camber trails, holding the uphill pole on the lower sleeve while keeping your downhill hand on the primary grip preserves balance.
Telescoping Poles Versus Folding Z-Poles: Sizing Mechanics
Telescoping poles and folding Z-poles approach height adjustment through distinct mechanical configurations. Three-section telescoping designs feature two sliding joints that allow a broad adjustment range, typically expanding from 24 to 54 inches. When adjusting a telescoping pole, you should extend both the middle and lower sections equally rather than maxing out one section. Distributing the extension evenly across both joints maintains structural rigidity, balances swing weight, and protects the lower tubing.
Folding Z-poles, such as the Trekology Trek-Z Hiking Trekking Poles, combine fixed-length folding segments with an adjustable upper telescoping section. These models generally offer an adjustment range of twenty centimeters, meaning you must choose the appropriate base chassis size before buying. Trekology provides a 100 to 120-centimeter size for heights from 4’11” to 5’10”, and a 115 to 135-centimeter size for 5’5″ to 6’5″. If your height sits between sizes, consider your torso length and downhill reach requirements.
Single-pole collapsible models like the A ALAFEN 7075 Aluminum Collapsible Ultralight offer a continuous adjustment scale from 43.3 to 49 inches for heights between 5’3″ and 6’2″. Printed measurement markings along the adjustable segment allow you to record your ideal settings for quick reproduction. Sizing your pole accurately while wearing flexible trail apparel, such as lightweight hiking pants, ensures that your stride remains completely fluid across changing terrain without snagging on excess gear.
Wrist Strap Loading Mechanics and Grip Technique
Proper wrist strap setup is just as critical to effective sizing as the physical shaft length. Many beginners feed their hands down through the top of the loop, which pinches the webbing and offers zero skeletal support. The correct technique requires you to slide your hand upward from underneath the loop and bring your palm down over the handle. This upward entry cradles the wrist in the strap webbing, distributing your downward weight evenly.
When the strap is adjusted to the correct tension, you do not need to squeeze the handle tightly to transfer force into the pole. A relaxed grip prevents forearm cramping, blister formation, and ulnar nerve compression over long trail days. The strap should hold the grip securely against your palm when you push downward, yet release easily if you stumble. Natural cork handles mold to your hand over time, while EVA foam wicks sweat during hot summer ascents.
Terrain conditions dictate when you should intentionally unthread your hands from the wrist straps. While straps provide substantial energy savings on standard trails, you should remove your hands whenever navigating steep Class 3 or Class 4 rock scrambles. If you slip while scrambling with hands trapped inside the loops, the shafts can act as levers that injure your wrists. Releasing the straps allows you to drop the poles immediately and catch yourself with open hands.
Lever Lock Calibration and Preventing Sudden Shaft Collapse
External cam lever locks have largely replaced older internal twist-lock expander plugs due to their superior holding strength and simple field serviceability. A lever lock works by squeezing a composite collar around the outer tubing, clamping down securely onto the inner shaft. If the lock thumbscrew is too loose, the pole will slip under axial load, collapsing unexpectedly when you place your weight onto the grip. Temperature swings between warm afternoons and chilly mornings can cause hardware to contract, requiring quick adjustments.
To calibrate clamp tension, open the lever completely and tighten the metal thumb-screw clockwise by a quarter turn at a time. Close the lever firmly; you should feel distinct resistance beginning halfway through the swing, requiring a positive thumb push to snap shut. Avoid over-tightening the screw with excessive force, as forcing an overly tight lever can crack the collar or strip threads. Once shut, test the connection by leaning your full upper-body weight onto the handle over a firm surface.
Reliable clamping security becomes doubly critical when carrying heavy loads over multiday routes. Backcountry travelers carrying heavy gear in framed load-bearing backpacks rely heavily on rigid downward pole support to stabilize shifts in pack momentum across river crossings and scree fields. A sudden clamp failure under a heavy pack can easily trigger an uncontrolled fall, making a pre-hike load test essential. Taking thirty seconds at the trailhead to confirm lock tension eliminates slippage concerns before descents.
Matching Pole Height to Ultralight Shelter Pitching
Ultralight backpackers often rely on their trekking poles as structural uprights for non-freestanding tents and minimalist tarp shelters. Pitching an A-frame or pyramid shelter requires dialing in specific pole heights, typically between 115 and 125 centimeters, to achieve proper canopy tension. If your poles are sized incorrectly during setup, the shelter fabric will sag, reducing wind stability and allowing condensation to collect. Three-section telescoping poles with printed centimeter markings make pitching these shelters remarkably fast and repeatable.
Shelter designs vary in whether they seat the pole tip or the grip handle into the apex reinforcement. Tents that accept the tip in a reinforced grommet require sturdy tungsten carbide tips that will not slip out of alignment under wind. Shelters that seat the grip into the apex pocket benefit from rounded handle heads that distribute upward tension without damaging the canopy. Always confirm that your external cam locks are fully tightened before tensioning guy-lines to prevent slippage.
Common Sizing Mistakes and Ergonomic Red Flags
One of the most frequent mistakes hikers make is pulling a telescoping shaft past the designated stop indicator line. Every adjustable section features a printed STOP or MAX marking that shows the minimum tube overlap required for structural safety. Extending a shaft beyond this boundary leaves insufficient tubing inside the collar, creating a weak pivot point that can bend or snap under lateral force. If you consistently pull past the stop line, you need longer poles.
Another common sizing error involves locking one telescoping section completely closed while extending the other section to its maximum length. This uneven configuration concentrates mechanical stress entirely on a single joint collar, increasing shaft flex and creating an awkward, top-heavy swing weight. Matching the measurement lines on both upper and lower telescoping shafts ensures that the internal overlap remains balanced, maximizing rigidity and extending hardware life. Symmetrical adjustment also preserves your natural arm pendulum rhythm.
Hikers also frequently forget to account for their footwear stack height when measuring their poles indoors. Measuring your pole length while barefoot or in thin socks can leave your shafts two to three centimeters too short when wearing thick backpacking boots. Persistent elbow stiffness, numbness in your outer fingers, or lower back fatigue are clear signals that your sizing requires adjustment. Stop on the trail, assess your elbow angle, and make small two-centimeter corrections.
Field Maintenance, Silt Removal, and Travel Guidelines
Maintaining the mechanical integrity of your adjustable hiking poles requires regular inspection and cleaning after wet or dusty outings. Fine trail silt, sand, and glacial flour can work their way past locking collars, scouring the anodized aluminum tubing and causing friction locks to slip. After hiking in wet or muddy conditions, pull all shaft sections completely apart, wipe away dirt with a clean dry cloth, and allow them to dry thoroughly. Never apply petroleum-based lubricants to shaft tubing, as slippery residues cause locks to slide.
Storing damp aluminum poles fully assembled can trigger galvanic corrosion, causing white aluminum oxide powder that fuses the telescoping tubes together permanently. Carbon fiber poles, like the Foxelli Carbon Fiber Trekking Poles, resist corrosion but still require clean joints to prevent grit from scratching the composite weave. When packing for air travel to a distant hiking destination, remember that the Transportation Security Administration prohibits trekking poles with metal carbide tips in domestic carry-on baggage. You must pack your collapsible poles securely inside checked luggage to avoid checkpoint confiscation.
Practical Principles for Trail-Ready Sizing
Sizing your hiking poles accurately is an active trail skill that adapts to terrain, grade, and gear configurations. By establishing your baseline at a ninety-degree elbow bend, shortening on climbs, and lengthening for descents, you protect your knee joints and optimize your aerobic efficiency. Take the time to verify your cam lever tension, insert your hands upward through the straps, and equalize your shaft extensions before every adventure. With properly calibrated poles, you can tackle steep switchbacks and rugged miles with complete confidence.







Write Your Review
No reviews yet. Be the first to share your experience!