


Steep downhill trails put punishing pressure on knees, hips, and leg muscles, which makes reliable trekking poles vital gear for maintaining balance. A sudden shaft collapse under your body weight can disrupt your rhythm, cause painful joint jarring, or even trigger a dangerous fall on loose scree. Knowing how to tighten leki poles ensures that your gear maintains its designated height even when carrying a heavy multiday pack. Proper tensioning creates a rigid, supportive platform that transfers braking forces into your upper body and protects your lower joints throughout high-mileage backcountry outings.
Many outdoor enthusiasts pair their trekking hardware with specialized clothing, such as knee-supporting hiking pants, to maximize joint stability on demanding descents. Locking mechanisms can loosen gradually due to trail vibrations, temperature shifts, or accumulated trail grit within the telescoping aluminum shafts. Taking a few moments to inspect the cam levers or internal expansion plugs before hitting the trail prevents unexpected slippage. This guide walks through the exact mechanical adjustments needed for different locking styles so you can hike with complete confidence.




Complete Guide to Adjusting and Tightening LEKI Trekking Poles
Establishing the core mechanism differences is the first step in restoring pole stability. LEKI manufactures poles with different locking technologies developed across multiple generations of hiking hardware. Most modern models utilize external lever clamps known as Speed Lock or Speed Lock Plus, while classic models rely on internal Super Lock twist expanders. Understanding which mechanism your pole features determines the exact mechanical approach required to restore dependable clamping friction.
Understanding LEKI Locking Mechanisms: External Cam Levers vs. Internal Twist Locks
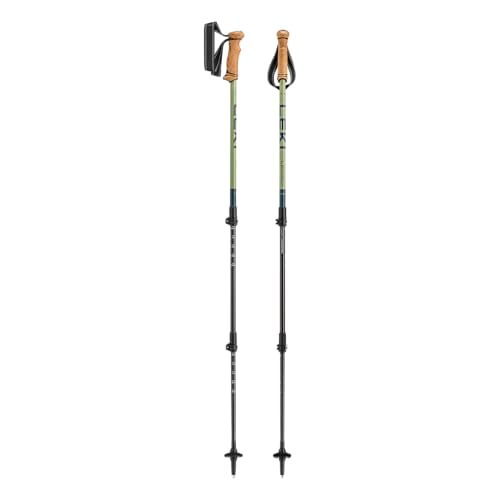
External lever systems, such as the Speed Lock Plus found on the LEKI Legacy Lite Trekking Poles – Denimblue, clamp down onto the outer surface of telescoping shaft segments. These systems rely on an integrated tension dial or thumb screw that sets the clamping force before the lever closes flat against the aluminum tubing. When the lever snaps shut, it compresses the outer collar around the inner shaft, preventing vertical movement under axial loads. This design allows hikers to inspect and adjust holding tension quickly, even while wearing heavy winter gloves on exposed ridges.
Internal twist-lock designs use an expanding nylon wedge called an expander plug threaded onto a central metal spindle inside the shaft. Rotating the shaft sections in opposite directions drives the wedge outward against the inner walls of the aluminum tube. The resulting friction holds the telescoping sections firmly in place during vertical descents. While internal expanders create a sleek pole profile without exterior snag points, they are more susceptible to trail dust, moisture, and user error during initial tensioning.
How to Tighten LEKI External Cam Levers (Speed Lock and Speed Lock Plus)
Adjusting an external cam lever starts by flipping the lever fully open into its released position. You must never attempt to turn the plastic thumb screw or tension wheel while the lever remains clamped shut against the shaft collar. Turning the adjustment screw while the mechanism is closed can strip the delicate plastic threads or fracture the clamp housing. Once the lever swings open freely, you gain clear access to the knurled tension wheel on the opposite side of the clamp.
Rotate the tension wheel clockwise in small increments of one-quarter to one-half turn to increase holding power. After each minor adjustment, swing the lever back down against the shaft to test the mechanical resistance. You should feel noticeable resistance during the final third of the lever stroke before it snaps firmly flush against the pole body. If the lever closes effortlessly with barely any finger pressure, open it again and tighten the wheel another quarter turn.
Avoid over-tightening the screw to the point where closing the lever requires painful force or two hands. Excessive clamping pressure strains the molded composite collar, potentially warping the plastic housing or causing hairline fractures in sub-freezing weather. The ideal tension allows you to snap the lever shut using firm thumb pressure while ensuring the shaft cannot slip under heavy downward force. Finding this balance preserves the longevity of the hardware while maintaining maximum trail safety.
Troubleshooting and Tightening LEKI Internal Twist-Lock Poles (Super Lock System)
Internal twist-lock poles require a different tactile technique because the friction mechanism operates hidden inside the aluminum tube. To tighten a classic twist-lock pole, hold the upper shaft firmly with one hand while gripping the lower section with the other. Turn the lower section clockwise toward the lock direction until you feel the internal expander bite into the tube wall. Continued rotation should produce firm resistance within two or three complete rotations.
If the shaft spins freely without catching, the nylon expander plug has likely backed off its threaded spindle or become caked with trail dust. To fix a free-spinning twist lock, pull the two shaft sections completely apart to expose the internal mechanism. Inspect the colored plastic expander plug at the top of the inner shaft to verify it remains seated on its metal screw. Turn the expander clockwise by hand until it expands slightly, then carefully reinsert it into the mating shaft tube.
Once reinserted, the pre-expanded plug should create gentle friction against the inner walls as you slide it to your preferred length. Turn the shaft firmly in the clockwise direction until the expander locks completely and prevents further rotation. Never use pliers or metal tools on the plastic expander plug, as gouging the nylon material will ruin its ability to grip smooth aluminum. If the plug continues to slip despite manual expansion, replacing the inexpensive nylon wedge assembly will restore factory performance.
The Downward Axial Weight Test: Verifying Lock Security Before Hikes
Never head into backcountry terrain without verifying the clamping force of your poles on flat, level ground. To perform a reliable axial load test, adjust both poles to your standard walking height and lock the mechanisms securely. Place the tips onto a firm, non-slip surface such as packed soil, a rubber mat, or low-pile carpet. Grasp the grips firmly, keep your elbows close to your torso, and lean your upper body weight downward directly through the shafts.
A properly adjusted pole will support your applied downward force without shortening or slipping even a fraction of an inch. If either shaft segment collapses under your weight, open the corresponding clamp immediately and increase the tension. Repeating this simple test before every hike eliminates the frightening hazard of sudden pole collapse during steep rock step-downs. Hikers wearing lightweight hiking pants and carrying loaded backpacks rely on this baseline stability to move confidently across rugged mountain terrain.
Cleaning Shaft Silt and Preventing Corrosion Between Aluminum Sections
Fine trail dust, silt, and trapped moisture represent the primary causes of unexpected clamp slippage and jammed poles. When fine grit enters the junction between telescoping tubes, it acts as a dry lubricant that prevents cam collars and expansion plugs from gripping. Furthermore, moisture trapped inside aluminum tubing causes white aluminum oxide powder to form over time. This galvanic oxidation can seize telescoping shafts permanently or coat the internal surfaces in slippery debris.
Preventing these mechanical issues requires periodic disassembly and basic cleaning after wet or dusty outings. Pull all three shaft sections completely apart by sliding them past the marked stop lines. Wipe down the exterior of each inner tube with a dry microfiber cloth to remove all dust, mud, and residue. Use a dry paper towel rolled onto a slender rod to swab out the interior of the outer tubes.
Crucially, you must never apply lubricating sprays, oils, grease, or silicone formulas to trekking pole shafts or internal expanders. Lubricants destroy the mechanical friction required for both external cam clamps and internal expansion wedges to hold weight safely. If you encounter stubborn corrosion, scrub the affected aluminum gently with a fine scouring pad without using chemical solvents. Allow every section to air-dry completely in a climate-controlled room before reassembling and storing your poles.
Proper Sizing and Gradient Adjustment to Prevent Mechanical Stress
Setting your poles to the correct height protects the locking mechanisms from unnatural lateral shear forces that cause slippage. On flat ground, adjust the pole length so your elbows rest at a crisp 90-degree angle when holding the grips with the tips on the ground. Sizing poles too long forces you to plant them at awkward forward angles, which increases bending moments on the clamp collars. Maintaining the classic 90-degree benchmark keeps downward force aligned axially through the strongest axis of the aluminum tubing.
When ascending steep switchbacks, shorten each pole section by five to ten centimeters to maintain ergonomic climbing leverage. Shortening the poles prevents you from overreaching and straining your shoulders while pushing your body weight upward. Conversely, lengthen the shafts by five to ten centimeters when descending steep mountain terrain. Longer poles allow you to contact the trail ahead of your descent without bending forward awkwardly at the waist.
Always distribute length adjustments evenly across both telescoping sections rather than extending a single section to its absolute limit. Never pull any shaft section past the printed maximum extension line or stop mark. Extending a tube beyond the stop mark leaves insufficient overlap inside the outer shaft, making the junction vulnerable to severe bending or catastrophic snapping. Balancing the extension across both sections provides maximum structural overlap and keeps the locking collars operating within their optimal stress parameters.
Strap, Grip, and Accessory Maintenance for Complete System Stability
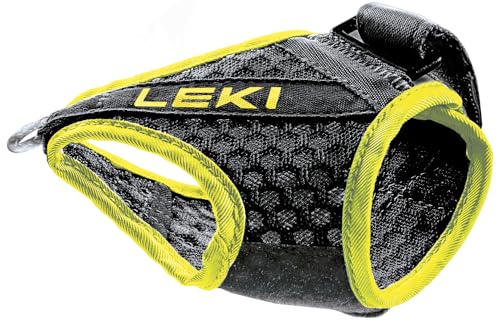
A secure locking clamp works hand in hand with properly adjusted wrist straps to provide effortless energy transfer on the trail. Many modern trail running and Nordic walking poles feature click-in strap systems such as the LEKI Shark Frame Strap Mesh – Black/Yellow or the Leki NW Trigger Shark Silver M/L/X. These breathable mesh straps encompass the hand cleanly to eliminate pressure points, allowing you to push backward without clenching the grip tightly. Keeping the hook-and-loop closure snug ensures that your downward body weight transfers directly through the strap structure rather than fatiguing your forearm muscles.
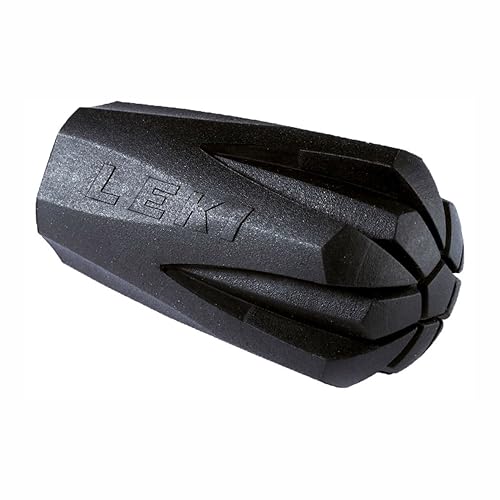
Down at the trail interface, inspecting your tips and baskets ensures that your poles maintain traction on varying surfaces. The LEKI Flexible Carbide Tips One Color One Size and LEKI Carbide Flextip are engineered to flex up to 30 degrees without damaging the shaft if caught between rocks. Adding a LEKI Trekking Basket 2.0 Trekking Plate, Black prevents the lower shaft from sinking excessively into mud or scree crevices. On pavement or slick rock slabs, slipping on protective covers like the LEKI Rubber Walking Tip, LEKI Rubber Fitness Walking Tip, or LEKI Walking Rubber Tip prevents vibration and protects sensitive trail surfaces.
Some models even accommodate specialized attachments such as the Leki Photoadapter do rękojeści Aergon to convert your trekking pole into a stable camera monopod. Regardless of which accessories you attach, maintaining correct tension across the locking collars remains the foundation of your pole system. Regularly checking clamp tightness, keeping shafts clean of grit, and testing holding force before each outing ensures your poles deliver unwavering support across thousands of backcountry miles.
Field Repairs and Emergency Adjustments for Slipping Pole Collars
Sudden lock slippage in the middle of a remote backcountry trail requires quick, practical field intervention. When an external Speed Lock lever refuses to hold tension on the trail, check whether cold mountain temperatures have caused the plastic collar to contract and loosen. A quick quarter-turn tightening of the knurled dial using your thumb or a flat edge like a coin or pocket knife screwdriver usually restores immediate clamping friction. Always open the lever before adjusting the dial to prevent stripping the screw threads while on the trail.
If an internal twist-lock mechanism fails during a hike and will not tighten, trail silt or fine sand is the most common culprit. Separate the two offending shaft sections and wipe down the exposed nylon expander plug and inner tube with a clean bandana or shirt sleeve. Blow firmly into the hollow outer tube to clear out loose dirt particles that prevent the expansion plug from gripping the metal wall. Reinsert the section, expand the plug slightly by hand until it creates light friction, and turn the shaft clockwise until it locks firmly.
Carrying spare hardware or backup expander plugs on multiday wilderness expeditions offers valuable peace of mind. Small mechanical parts weigh virtually nothing in a repair kit but can save a trek from becoming a painful ordeal if a plastic collar cracks or a screw vibrates loose. Inspecting your poles before you leave trailhead parking ensures that minor adjustments happen under ideal conditions rather than during heavy rain or sub-freezing summit winds. Taking proactive care of your locking mechanisms guarantees that your trekking poles remain dependable companions across thousands of elevation changes.








Write Your Review
No reviews yet. Be the first to share your experience!