


Steep downhill switchbacks and uneven backcountry terrain place intense repetitive force on knee joints, ankles, and lumbar muscles. Dialing in proper pole length transforms those jarring descents into controlled, balanced steps by transferring kinetic load up into the chest, arms, and lats. When hikers ask what size leki poles do i need, the answer centers on establishing an exact biomechanical baseline where the forearm rests comfortably parallel to the ground. Pairing an accurate setup with supportive hiking pants for joint relief provides a comprehensive approach to managing downhill fatigue and preserving joint integrity on long trail days.
Selecting the correct shaft length does more than improve balance; it eliminates shoulder strain and prevents unnatural wrist flexing during hours of sustained propulsion. Carrying heavy backcountry gear inside structured load-bearing backpacks shifts your center of gravity, making proper pole height even more crucial for steady foot placement. Whether configuring fixed-length folding carbon shafts for trail running or multi-section telescoping aluminum poles for variable alpine passes, understanding sizing mechanics ensures your upper body works seamlessly with your stride.





Complete Sizing Guide for LEKI Trekking Poles and Walking Staffs
Establishing the correct pole size is essential for maximizing stability, preserving knee health, and maintaining natural walking mechanics on the trail. When pole shafts are set too long, your shoulders ride upward, creating severe trapezius tension and awkward rearward planting angles. Conversely, poles set too short cause you to hunch forward on descents, reducing balance and increasing spinal loading. Finding the right setting depends on your overall height, footwear stack height, arm proportions, and the specific adjustment mechanics of your pole model.
The 90-Degree Elbow Angle: The Gold Standard Sizing Rule
The fundamental benchmark for sizing any dual trekking pole setup is the ninety-degree elbow angle on flat terrain. To perform this measurement correctly, stand upright on a level floor while wearing the trail running shoes or hiking boots you wear in the backcountry. Let your upper arms hang naturally along your torso, then bend your elbows so your forearms extend straight forward parallel to the ground. Your hands should grip the handle comfortably while the pole tip rests flat on the floor directly adjacent to your feet.
When viewed from the side, the angle between your upper arm and forearm should form a clean right angle. If your elbow angle is acute and your hands sit higher than your elbows, the shaft is set too long and will cause premature shoulder fatigue. If your forearms angle downward toward the floor, the shaft is too short and will force you to stoop during forward strides. Maintaining this ninety-degree baseline ensures optimal leverage when pushing off and provides maximum shock dissipation into the major muscle groups of your upper body.
Remember to account for the sole thickness of your footwear during initial calibration. Thick cushioned trail runners or mountaineering boots can add anywhere from one to two inches of height compared to bare feet. Adjusting your poles without your hiking shoes on will consistently result in poles that feel slightly too short on the trail. Calibrating your baseline height with your typical trail shoes ensures your arm geometry remains mechanically sound from the first mile.
Hiker Height to Pole Length Sizing Chart and Formulas
If you cannot hold the poles in person before buying, mathematical formulas provide a highly reliable estimate for your baseline pole length. A widely accepted guideline is to multiply your total height in centimeters by 0.68 to determine your ideal flat-ground pole length. For example, a hiker who is 175 centimeters tall (approximately 5 feet 9 inches) multiplies 175 by 0.68 to arrive at an initial target length of 119 centimeters. Rounding to the nearest five-centimeter mark suggests setting an adjustable pole right at 120 centimeters for level trail sections.
Standard height categories correspond to predictable pole lengths across recreational hiking. Hikers under 5 feet 2 inches typically require pole lengths between 100 and 110 centimeters. Those between 5 feet 3 inches and 5 feet 8 inches generally operate best within the 110 to 120 centimeter range. Individuals between 5 feet 9 inches and 6 feet tall usually dial their shafts between 120 and 125 centimeters, while hikers over 6 feet 1 inch require 130 to 135 centimeters of extension.
Individual anatomical proportions can shift these numerical estimates up or down by several centimeters. Hikers with longer torsos and shorter arms often need slightly longer poles than their total height would suggest. In contrast, hikers with longer arms relative to their height often find that their ideal ninety-degree elbow bend occurs at a lower measurement. Use the mathematical formula as a reliable starting point, but always refine the setting using your actual elbow bend.
Adjustable Telescoping Poles: Sizing Standard vs. Compact Models
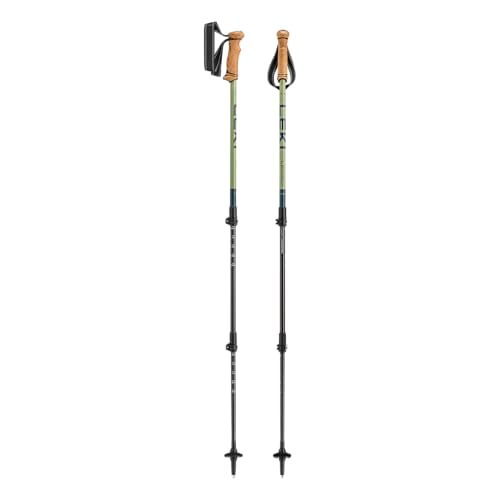
Telescoping poles offer significant adjustability, but choosing the right sizing variant prevents unnecessary pack weight and awkward swing dynamics. Models like the LEKI Makalu Cork Lite Trekking Poles-Stone Blue and standard LEKI Legacy Lite Trekking Poles – Denimblue feature a full 100 to 135 centimeter working range. This standard configuration easily accommodates hikers from roughly 5 feet 2 inches up to 6 feet 4 inches, providing generous length for descending steep alpine slopes. It also collapses down to roughly 26 inches for transport on exterior pack straps.
Shorter backpackers and day hikers often prefer compact variations, such as the LEKI Legacy Lite Trekking Poles – Denimblue in its 90 to 125 centimeter build. Choosing a compact edition eliminates redundant upper shaft length, reducing both scale weight and swing weight during repetitive arm movements. Compact poles also pack down smaller to approximately 25.2 inches, making them easier to secure onto smaller rucksacks. Hikers who pair their setup with lightweight hiking pants for mobility appreciate the streamlined, low-bulk feel of compact shafts when moving through tight brush.
When adjusting three-section telescoping shafts, always balance the extension between the middle and lower segments. Extending the lower shaft completely while leaving the middle shaft fully collapsed alters the pole balance and puts disproportionate flex on the thinnest section. Instead, align both segments to identical centimeter marks printed along the aluminum shafts. Dual Speed Lock Plus levers secure both sections firmly, ensuring symmetric rigidity and balanced vibration damping along the entire length.
Fixed-Length Folding Z-Poles: Selecting Precise Sizes for Trail Running
Fixed-length folding poles present a distinct sizing challenge because they offer zero mechanical adjustability once deployed. Specialized race equipment like the LEKI Ultratrail FX.One Trekking Poles- Grey Light comes in discrete five-centimeter increments ranging from 105 to 135 centimeters. Because these carbon fiber poles separate into three compact 14.5-inch sections at the push of a button, you must select the exact length before you head to the trailhead. Sizing errors cannot be compensated for by sliding an internal shaft or tightening a lever clamp.
The dedicated Trail Trigger Shark grip system on these models further emphasizes the need for exact sizing. This setup connects the hiker hand directly to the pole grip via a form-fitting mesh strap that clips directly into the handle mechanism. Because the hand is locked into a fixed pivot position, you cannot slide your grip upward or downward on the handle to accommodate an improper shaft length. Choosing the wrong size quickly leads to strained triceps or excessive wrist extension during fast descents.
If your height calculation places you directly between two fixed lengths, consider your predominant trail terrain and primary athletic goals. Runners tackling steep, sustained mountain ascents often prefer rounding down to the shorter size to maintain a compact, rapid climbing cadence. Conversely, athletes prioritizing stability on long downhill sections or wide logging roads frequently round up to gain extra forward reach. Testing your stride mechanics with an adjustable pole set to both candidate lengths is the safest way to finalize your decision.
Walking Staffs and Cane Handles: Sizing Single Poles for Balance
Single walking poles and cane-style staffs operate under completely different biomechanical rules than dual trekking poles. Products like the LEKI Wanderfreund High Fives Trekking Pole and LEKI Legend Black Carbon Trekking Pole feature horizontal cane-style grips designed for downward palm pressure. These ergonomic grips, known as Multimed and Aergomed designs, are built to bear substantial vertical weight directly through the palm heel. Sizing these single staffs to ninety degrees at the elbow is often too high and can push the shoulder into an awkward elevated shrug.
The proper baseline height for a walking cane staff requires placing the top of the handle roughly level with your wrist crease when your arm hangs relaxed at your side. When you rest your palm on top of the cane handle, your elbow should form a gentle fifteen to twenty-degree bend. This slight flexion allows your triceps and shoulder stabilizers to absorb vertical impact without hyperextending your arm. Both the Wanderfreund (adjustable from 60 to 120 centimeters) and Legend Carbon (adjustable from 90 to 120 centimeters) provide ample range for finding this stable posture.
Shorter walkers or individuals needing an ultra-portable walking aid can look toward specialized compact options like the LEKI Super Micro Trekking Pole or LEKI Super Micro Trekking Pole (Single). Sized specifically for smaller statures, the Super Micro adjusts from 66 to 90 centimeters using an internal Super Lock twist mechanism. It collapses down to an ultra-compact 18.1 inches, fitting neatly into travel luggage or day totes. Sizing a micro staff follows the same wrist-crease rule to ensure safe, solid load transfer on paved paths and cobblestones.
Dynamic Terrain Adjustments: Shortening for Climbs and Lengthening for Descents
Your ninety-degree baseline measurement serves as your flat-ground foundation, but real trails require dynamic length adjustments. When climbing steep switchbacks, planting a flat-ground length forces you to raise your hands excessively high and push downward with compromised leverage. Shortening your poles by 5 to 10 centimeters (approximately 2 to 4 inches) lowers your hand placement relative to the upward-sloping grade. This adjustment keeps your elbows closer to your center of mass and engages your larger latissimus dorsi and pectoral muscles for uphill propulsion.
Steep descents present the reverse mechanical challenge and require lengthening your poles by 5 to 10 centimeters. As you step downward over rock ledges and roots, you need your pole tips to contact the ground ahead of your descending foot without pitching your torso forward. Lengthening the shafts allows you to plant the tips solidly on lower shelves while keeping your spine upright and your balance centered. This extended reach absorbs severe braking forces that would otherwise slam into your patellofemoral joints and quadriceps.
When crossing angled sidehills where one side of the trail drops away steeply, asymmetrical adjustments or grip extensions become invaluable. Rather than adjusting your locking mechanisms every time the trail curves, poles equipped with extended foam sleeves offer a faster solution. The Aergon Air cork grip on models like the Makalu Cork Lite includes a low-profile foam extension down the upper shaft. You can simply slide your uphill hand down onto the lower foam sleeve while gripping the downhill pole handle normally, maintaining balanced posture across off-camber slopes.
Strap Ergonomics and Grip Design: How Hand Entry Alters Effective Length
How you interface with the pole grip directly changes your effective working height and upper body comfort. The correct technique requires inserting your hand upward through the bottom opening of the wrist strap loop before grasping the handle. Resting the base of your palm across the taut webbing allows your body weight to transfer directly into the strap rather than requiring a tight grip. This upward insertion lowers your hand slightly, aligning your palm perfectly with the contoured palm swell of Evocon Cor-Tec or Aergon Air cork grips.
Grasping the pole by reaching down through the top of the strap is a widespread mistake that compromises sizing and stability. Top-down entry pinches the webbing awkwardly against your wrist and forces your hand higher up on the grip head. This mistake effectively shortens your usable pole length by two to three centimeters and prevents the strap from supporting your wrist under load. It also causes intense forearm pump and blister-inducing friction on hot summer hikes because you must constantly grip the handle with maximum hand pressure.
Managing strap tension properly also helps stabilize gear balance when carrying gear in budget-friendly hiking daypacks. A correctly tensioned strap keeps the pole swinging naturally in rhythm with your arm without requiring active muscular effort to retrieve it after each plant. If the strap is too loose, the pole drags or pivots erratically, disrupting your cadence and making the pole feel improperly sized. Taking two minutes to adjust the tool-free strap wedge ensures that your measured pole height translates directly into effortless forward motion.
Locking Mechanism Calibration and Sizing Line Verification
Accurately reading and securing the measurement lines on your pole sections prevents dangerous slippage during high-impact descents. LEKI shafts feature clear centimeter markings laser-etched along the middle and lower aluminum or carbon tubes. Never extend any shaft section beyond the indicated “STOP” or “MAX” marking line. Exceeding this line leaves insufficient shaft overlap inside the clamping collar, which can cause the joint to bend or snap under lateral trail stress.
The external Speed Lock Plus cam system relies on adequate clamp tension to hold your chosen height setting under full body weight. Over time, trail vibrations and temperature fluctuations can loosen the plastic thumb wheel on the cam lever. To verify proper tension, open the lever clamp, tighten the thumb screw clockwise by a quarter turn, and snap the lever shut. The lever should close with firm thumb resistance and leave a solid impression without requiring excessive force.
On twist-locking models like the Super Micro, the internal Super Lock (SLS) expander plug requires proper directional torque. Turn the lower shaft counter-clockwise to loosen, set your desired centimeter height, and turn clockwise until the internal expander bites firmly against the inner tube wall. If fine silt or road dust penetrates the joint, wipe the bare aluminum sections completely dry before reassembling. Never apply grease or spray lubricants to telescoping joints, as oils destroy the mechanical friction needed to keep your sizing secure.
Practical Verification and Final Trail Checks
Before heading out on a multi-mile backcountry trek, perform a simple two-minute home load check to verify your chosen sizing. Stand in your trail shoes, set both poles to your calculated centimeter mark, and lean your full upper body weight straight down onto the grips. Your forearms should remain steady at ninety degrees, and the locking collars must not slip a fraction of an inch under downward force. If the shafts slide downward, tighten the external cam screws immediately before setting foot on uneven mountain terrain.
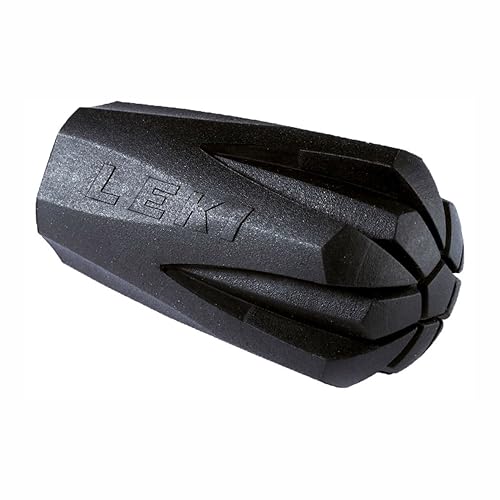
Terrain surfaces also dictate whether you should size with bare carbide tips or slip-on rubber protectors. Adding accessories like the LEKI Rubber Walking Tip or LEKI Walking Rubber Tip adds roughly half an inch of height while protecting asphalt trails and dampening road vibration. On natural dirt, mud, and slick granite, removing the rubber tips allows the sharp carbide flex tips to bite securely into the terrain. Dialing in your exact pole length according to your footwear, terrain, and stride transforms your trekking poles into seamless extensions of your body.








Write Your Review
No reviews yet. Be the first to share your experience!