


Packing a hydration reservoir next to down insulation, spare trail layers, and sensitive electronics often causes immediate hesitation before heading outdoors. Many hikers, trail runners, and endurance athletes reasonably wonder is the bladder waterproof when subjected to heavy backpack compression, vigorous trail movement, and shifting gear loads. A dependable hydration reservoir relies on non-porous thermoplastic films and welded seams that inherently contain liquid, but external sealing points demand careful attention. Understanding where water bladders excel at containment and where mechanical seals can potentially fail ensures your pack stays dry on demanding excursions.
Water containment involves both the physical film of the reservoir and the protective structure of your backpack sleeve. Hikers often pair their gear with a hiking backpack with cooler compartments to protect their fluids and prevent temperature transfer during warm summer treks. While manufacturers engineer durable, food-grade materials to prevent leaks, external factors like unseated quick-disconnect valves and bite valve wear can introduce moisture to your pack. Evaluating how these containment systems function helps you maintain dependable, mess-free hydration across every outdoor adventure.





Understanding Reservoir Waterproofing and Leak Prevention
The direct answer to whether a water bladder is waterproof depends on whether you examine the reservoir membrane itself or the complete active hydration system. The flexible film of a modern reservoir is completely impermeable to water, meaning moisture cannot pass through the body fabric under normal conditions. However, every water bladder features access openings, drink tube connection points, and bite valves that rely on mechanical pressure seals. If any component is improperly seated or subjected to excessive strain, fluid can escape into your backpack.
Reservoir Film Impermeability vs. Mechanical Seal Vulnerabilities
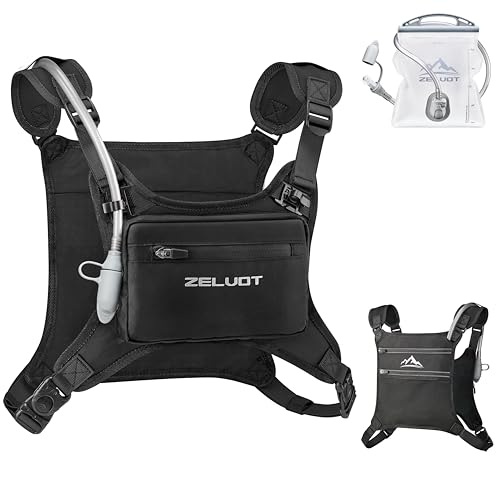
Modern hydration bladders use non-porous, food-grade polymer materials such as thermoplastic polyurethane (TPU) or polyethylene vinyl acetate (PEVA). These synthetic materials do not absorb moisture, weep fluid, or allow water molecules to permeate through their walls. Options like the Zelvot running vest feature food-grade bladders crafted from BPA-free and PVC-free formulations, while the ECOHUB tactical hydration vest utilizes heavy-duty PEVA material. Under ordinary hydrostatic pressures generated inside a backpack, these flexible walls provide an absolute barrier against fluid transfer.
Mechanical closure points represent the primary vulnerability where containment failures actually occur. While the film body remains impermeable, every hydration reservoir requires filling portals, drink hose attachment ports, and dispensing valves to function. These access points rely on friction, silicone gaskets, threaded collars, or compression clamps rather than continuous solid film. When moisture escapes inside a pack, the issue almost universally traces back to an unseated gasket, cross-threaded cap, or misaligned slider rather than porous bladder fabric.
Perimeter integrity relies on radio-frequency (RF) welded seams that fuse polymer sheets at the molecular level. Quality manufacturers bond these edges using high-frequency electromagnetic energy, creating seams that match or exceed the tensile strength of the surrounding sheet. This welded perimeter prevents blowout failures when a packed backpack puts external pressure on the reservoir. Recognizing that the reservoir walls and welded seams are waterproof directs your maintenance attention toward the mechanical interfaces where leaks actually initiate.
Are Backpack Hydration Compartments Truly Waterproof?
A frequent point of confusion among trail enthusiasts involves the difference between a waterproof bladder and a waterproof backpack sleeve. Many hikers assume the dedicated hydration compartment in a daypack acts as a watertight containment vault that protects the rest of their gear. In reality, most pack sleeves use water-resistant nylon or polyester fabrics designed to organize gear rather than retain standing water. If a reservoir experiences a major leak, water will seep through structural seams and saturate gear stored in adjacent compartments.
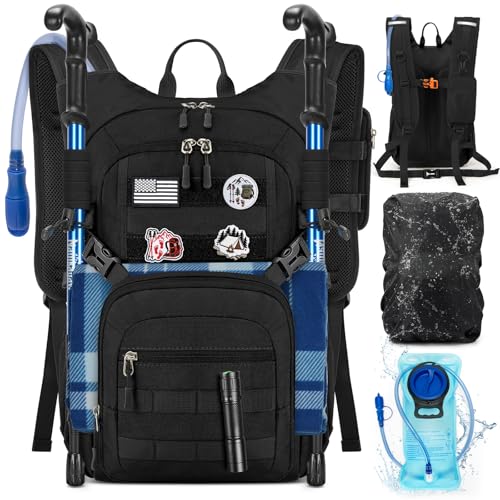
Backpack designs frequently incorporate water-resistant exterior fabrics and specialized coatings to deflect outside precipitation. The TILYMOL hiking backpack uses rip-stop fabric with water-resistant properties, while the RAINSMORE tactical backpack features 900D Oxford fabric alongside a stowed rain cover. Similarly, budget-friendly hiking backpacks often use durable coated textiles that shed light rain showers. However, external water resistance does not make an internal divider impervious to a pressurized reservoir leak that pools at the bottom of the pack.
Internal moisture migration presents severe risks to cold-weather insulation, spare clothing, and sensitive electronics. When water escapes a reservoir inside an unsealed compartment, gravity channels the pooling fluid straight toward the base of the backpack. Down sleeping bags and mid-layers lose their loft and insulating value rapidly when saturated with escaped water. Placing sensitive items inside silicone dry sacks or separate waterproof liners provides essential secondary protection regardless of your bladder construction.
Comparing Closure Architecture: Slide Seals vs. Screw Caps
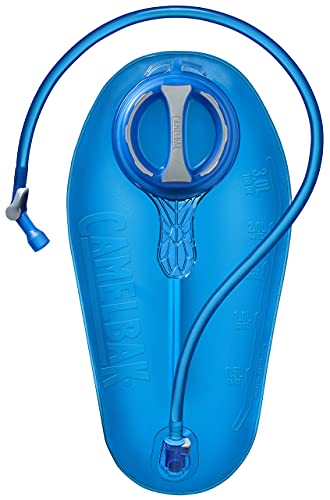
Closure design directly dictates how easily a hydration bladder maintains a watertight seal during rugged movement. Slide-top systems work by folding the open top of the polyurethane reservoir over a plastic retaining guide before sliding a rigid bar across the fold. This folding action creates a continuous linear seal that distributes pressure evenly across the top opening. Slide closures allow users to open the entire top of the bladder for quick filling at natural streams and thorough drying after trips.
Threaded wide-mouth screw caps represent the alternative standard seen on models like the GreenTaya and RAINSMORE hydration systems. These wide openings allow quick filling at sinks and make dropping large ice cubes into the reservoir remarkably easy. A circular silicone O-ring or molded gasket inside the cap seals against the rigid collar when tightened down. If you accidentally cross-thread the cap or allow dirt to settle onto the gasket, water will gradually seep past the threads when the pack flexes.
Operating conditions in dusty or sandy environments impact each closure mechanism differently. Grit lodged inside the track of a slide-top seal can prevent the slider from fully engaging, which creates small gaps where water escapes under pressure. With screw caps, sand particles resting against the perimeter gasket prevent a flush seal and damage the soft rubber over time. Wiping the sealing surfaces clean before closing your reservoir preserves the waterproof barrier in backcountry environments.
Bite Valve Dynamics and Lockout Switch Reliability
A bite valve serves as the active endpoint of your hydration system, balancing rapid fluid delivery with leak-free retention. High-grade bite valves feature medical-grade silicone sheaths with a precision slit that remains closed under static water pressure. Biting down on the flexible sheath deforms the opening, allowing water to flow freely into your mouth during brisk physical exertion. Models like the Zelvot running vest feature high-flow bite valves engineered for seamless hands-free sipping during intense training sessions.
Static line pressure and external contact can cause bite valves to weep or drip unexpectedly on the trail. If your backpack rests on the bite valve or if a shoulder strap pinches the silicone tip, the slit can open slightly and trigger an active siphon. Siphoning allows gravity to drain fluid continuously out of your bladder, soaking your exterior clothing or pack exterior. Mechanical vibrations during trail running or rough mountain biking can also coax small droplets past a worn valve slit.
Dedicated manual shutoff switches eliminate accidental siphoning by blocking fluid flow before it reaches the flexible silicone tip. Models like the RAINSMORE hydration pack utilize 360-degree rotating bite valves with dedicated shutoff mechanisms to stop unwanted leaks. Other designs rely on push-pull collars that lock the fluid pathway closed when not in active use. Engaging the mechanical lockout whenever you take off your pack or transport it inside a vehicle prevents accidental water discharge.
Quick-Disconnect Couplings and O-Ring Seal Integrity
Quick-disconnect mechanisms allow users to detach the drinking tube from the base of the reservoir with the press of a button. An integrated auto-shutoff valve inside the port springs closed immediately upon detachment, preventing water from gushing out of the filled bladder. This feature permits hikers to pull the reservoir from their pack for trail refills without unthreading the drink hose from shoulder harness loops. It streamlines trail stops significantly while keeping the rest of your pack organization intact.
The small elastomeric O-ring seated on the male connector stem creates the waterproof barrier between the hose and reservoir body. If this tiny ring becomes dry, cracked, flattened, or nicked by trail debris, water will seep around the base connection. Because the quick-disconnect port sits at the lowest point of the reservoir, leaks here result in steady dripping directly into the bottom of your pack sleeve. Even a microscopic tear in the O-ring material permits water to bypass the seal under pack weight.
Inspecting and maintaining this critical connection point prevents unexpected equipment failure during long backcountry days. Before inserting the hose fitting, check the O-ring for proper seating inside its groove and wipe away any grit or lint. The connection should engage with a distinct mechanical click that signals complete locking of the retaining clips. Periodically applying a microscopic smear of food-grade silicone grease keeps the rubber pliable and ensures an effortless, watertight seat.
Condensation vs. Active Leaking: Identifying Moisture Sources
Hikers frequently mistake thermal condensation for an active reservoir puncture or seam failure. When you fill a water bladder with ice-cold mountain stream water or ice cubes on a hot summer afternoon, the temperature difference is substantial. Warm, moisture-laden air inside your backpack comes into contact with the chilled exterior of the polymer film. This interaction causes atmospheric moisture to condense directly onto the outer bladder walls, producing a noticeable layer of wetness.
Condensation can dampen adjacent backpack fabric and make you believe your bladder is leaking through its seams. Utilizing an insulated sleeve, such as the Diaz Sport insulated cooler bag, creates a thermal barrier that mitigates exterior sweating. The aluminum insulation keeps the reservoir cold for extended hours while isolating chilled surfaces from ambient pack humidity. Insulated sleeves also prevent ambient body heat from warming your drinking supply during grueling mid-day climbs.
Differentiating between surface condensation and a genuine reservoir leak requires simple visual and tactile observation. Condensation creates a uniform, fine mist or light dampness across the entire surface area of the cold reservoir walls. In contrast, an actual seam failure or puncture generates an active, localized stream of droplets that pools rapidly in one spot. If wiping the reservoir dry with a cloth results in immediate reappearance of water at a specific point, you are dealing with a leak.
Step-by-Step Pre-Trip Leak and Pressure Testing Protocol
Performing a structured leak test at home prevents catastrophic water damage to expensive equipment out on remote trails. Begin by visually inspecting the empty bladder under bright light, examining welded edges and fold lines for signs of material fatigue or stretching. Check the bite valve for tiny tears in the silicone sheath and confirm that the drink hose seats securely over its barbed fittings. Any visible cracking or stiffness in the plastic indicates it is time to replace worn components.
Fill the bladder to its maximum capacity with room-temperature tap water, seal the closure securely, and dry the outside with a towel. Place the full reservoir flat on a clean sheet of dry paper towels or cardboard on your kitchen counter. Apply moderate, sustained downward pressure with both hands across the center of the bladder to simulate backpack compression. Inspect the paper towel for any damp spots around the perimeter welds, slide closure, and bottom hose connection.
Complete the inspection by elevating the reservoir and testing the entire length of the drink tube under static hydrostatic head. Open the bite valve shutoff lever, check for uncommanded drips while holding the valve downward, and then engage the lockout. Shake the hose gently to confirm the valve retains fluid securely under movement before releasing pressure. Passing this three-stage protocol guarantees that your hydration system is completely watertight before you pack your gear.
Backpack Integration and Preventing Pack Pressure Failures
Improper pack loading is one of the leading external causes of bladder failure and sudden in-pack leaks. When a full water reservoir is crammed into a compartment alongside rigid tent poles, camp stoves, or trekking pole tips, sharp edges can abrade the film. Utilizing framed packs for trail stability helps isolate the hydration sleeve from heavy, shifting gear in the main storage volume. Securing the bladder to top suspension loops, as seen in the TILYMOL pack, prevents it from slumping and bunching at the base.
Burping excess air out of the reservoir is an essential trail habit that stabilizes your load and reduces internal burst pressure. After filling and sealing your bladder, invert it so the hose port or air pocket sits at the highest point. Draw on the bite valve until all residual air is evacuated and fluid reaches your lips. Removing trapped air flattens the reservoir profile, prevents annoying sloshing sounds on the trail, and stops internal air bubbles from over-pressurizing the seals under load.
Route your drinking hose carefully through the dedicated hydration port to avoid pinching or kinking the flexible tubing. Kinked hoses restrict water flow and create back-pressure against the quick-disconnect junction when you attempt to drink. Many daypacks and running vests feature integrated hose clips along the shoulder straps to keep the bite valve accessible and secure. Fastening the hose prevents it from snagging on branches or dragging in trail dirt during technical scrambles.
Material Temperature Thresholds and Sanitation Guidelines
Exceeding material temperature limits can compromise the structural integrity of your reservoir and destroy its watertight properties. Thermoplastic polyurethane and PEVA films soften under high heat, which weakens welded seams and deforms rigid plastic fittings. Never pour boiling water into a hydration bladder, as extreme thermal shock can cause immediate seal delamination. Most manufacturers recommend keeping liquid temperatures below 120 to 140 degrees Fahrenheit to protect the bonded polymer structure.
Chemical maintenance also plays a direct role in maintaining long-term leak-proof performance across all reservoir components. Harsh chemical solvents and high concentrations of household bleach can degrade flexible silicone bite valves and dry out rubber O-rings. Instead, clean your gear with warm water, mild dish soap, sodium bicarbonate, or specialized cleaning tablets designed for outdoor hydration gear. Gentle sanitation maintains polymer elasticity and prevents micro-fissures from forming around high-flex stress points.
Drying your bladder completely before long-term storage preserves both sanitation and mechanical seal resilience. Trapped moisture fosters black mold and mildew colonization that can penetrate soft silicone valves and compromise closure gaskets. Hang the bladder open using a dedicated drying rack or kitchen utensil to allow air circulation through all interior corners. Storing your clean, dry hydration bladder flat in a cool closet or even inside your freezer prevents microbial growth between trail excursions.
Understanding Multi-Layer Leak Barriers in Personal Gear
The term bladder leak protection also appears frequently outside outdoor hydration gear when describing specialized personal care apparel. Products such as Battewa incontinence underwear for men incorporate multi-layer textile barriers designed to contain fluid and prevent external leaks. These garments use five distinct fabric layers to provide liquid absorption, moisture wicking, odor containment, and leak-proof security for daily confidence. While serving a completely different purpose than drinking reservoirs, both applications center on dependable fluid containment under physical movement.
Both hydration gear and protective apparel rely on continuous barrier membranes paired with skin-safe, non-irritating materials. In protective briefs, breathable waterproof laminates trap moisture internally while maintaining dry contact with the skin to prevent rashes. In outdoor bladders, food-grade TPU keeps drinking water contained without leaching chemicals or plastic tastes into your supply. Appreciating these functional distinctions clarifies product search results and ensures you select the correct equipment for your specific needs.
Practical Summary for Trail Reliability
A quality hydration bladder is inherently waterproof across its durable film walls, but keeping your gear completely dry requires vigilant seal management. Verifying that slide closures are fully aligned, screw caps are threaded evenly, and quick-disconnect fittings are clicked into place prevents trail mishaps. Taking a few moments to inspect O-rings and engage bite valve lockout switches stops unwanted drips before they can reach sensitive clothing or electronics. Pairing a reliable reservoir with a well-designed backpack gives you complete confidence in your hydration system across every mile.
Trail readiness ultimately comes down to consistent pre-trip testing, thoughtful pack organization, and gentle post-trip sanitation. By treating mechanical sealing components with care and burping excess air before hitting the trail, you eliminate common leak risks. Whether you are running mountain ridgelines with an ultralight vest or tackling multi-day alpine routes, a properly maintained bladder delivers effortless, leak-free hydration throughout your journey.



Write Your Review
No reviews yet. Be the first to share your experience!