


Navigating neighborhood sidewalks, uneven gravel paths, or steep nature trails requires dependable balance and joint stability. When a support staff is either too tall or too short, it quickly creates unnecessary shoulder tension, wrist strain, and awkward walking posture. Learning how to measure a walking stick cane correctly ensures that your body maintains a natural, upright alignment while taking pressure off your lower back and knees. Finding that optimal height makes every outing significantly more comfortable, whether you prefer a classic carved wooden staff or a modern telescoping alloy cane.
Many recreational walkers also pair their mobility aids with supportive gear like trail clothing designed for knee joint relief to reduce lower-body fatigue during extended outings. The primary secret lies in understanding how different handle shapes, rubber ferrules, and personal footwear choices alter your standing geometry. A properly fitted walking cane or hiking staff acts as an effortless extension of your arm rather than an awkward obstacle. Taking a few precise measurements before your purchase or before trimming a wooden shaft guarantees lasting stability across diverse surfaces.






Mastering Walking Stick and Cane Measurement for Balance and Posture
Finding the exact height for a walking aid directly influences your posture, joint comfort, and walking efficiency. When a stick is improperly proportioned, every step forces your upper body to compensate by either hiking your shoulder or hunching your spine forward. Establishing an accurate measurement ensures that your arm rests in an ergonomically neutral position while transferring ground impact away from your joints. Whether you use a carved wooden staff or an adjustable folding cane, measuring correctly turns a simple stick into an effective balance tool.
The sizing process depends on whether you intend to use the stick as a standard walking cane for daily balance or as a tall staff for trail exploration. Daily walking canes follow precise orthopedic measurement principles based on your arm length and standing wrist height. In contrast, outdoor hiking staffs provide greater overall length to accommodate uneven trail grades and steep hillside descents. Clarifying your primary environment before taking measurements helps you select the right sizing framework and prevent postural fatigue.
The Biomechanical Difference Between Canes and Hiking Staffs
A standard walking cane serves primarily as a single-point balance aid designed for level walking surfaces and indoor environments. When properly fitted, the handle of a walking cane aligns with the crease of your wrist while your arm hangs naturally at your side. This positioning creates a slight 15-to-20-degree bend at the elbow when you grasp the handle. This subtle flexion allows your arm muscles to absorb mild downward shock without elevating your shoulder or locking your elbow.
Traditional hiking staffs follow a distinct biomechanical strategy tailored for off-pavement terrain and elevation changes. A hiking staff generally measures between 50 and 55 inches for an average adult, reaching somewhere between the sternum and the shoulder. This taller profile allows you to grip the shaft lower down when ascending steep slopes and grasp the top when stepping down off rock ledges. Using a staff that is too short on a downhill trail forces your torso into an aggressive forward lean.
Step-by-Step Measurement for Everyday Balance Canes
Measuring for a daily walking cane requires only a flexible tape measure, a flat floor, and a partner to assist you. Put on the specific walking shoes or trail sneakers that you wear most frequently during your daily routine. Footwear with thicker midsoles or rugged trail lugs can easily add an inch or more to your standing height. Standing in bare feet or stocking feet will cause you to size your cane too short, resulting in chronic slouching.
Stand completely upright against a flat wall with your feet roughly shoulder-width apart and your arms hanging loosely at your sides. Relax your shoulders completely, taking care not to pull them upward toward your ears or allow your chest to cave inward. Have your partner locate the small crease on the inside of your wrist where your hand meets your forearm. Measure straight down from that specific wrist crease to the floor surface directly beside your heel.
The resulting distance in inches represents your ideal total walking cane height from the floor to the top of the handle. When you hold a cane set to this exact height, your elbow naturally settles into that recommended 15-to-20-degree angle. If you must measure without an assistant, step on the end of a tape measure and pull it taut up to your wrist crease while keeping your shoulders level. Double-check this number twice to ensure consistent results before making alterations.
Calculating Proper Length for Outdoor Hiking Staffs
Outdoor hiking staffs require a more expansive measurement approach because trail surfaces fluctuate constantly in grade. For walking on relatively flat dirt trails, the standard guideline is the 90-degree elbow rule. Stand in your standard hiking boots, hold your upper arm tight against your torso, and bend your elbow forward until your forearm rests parallel to the ground. The distance from the palm of your hand to the floor represents your baseline trail walking height.
Many wilderness hikers prefer adding several inches to this baseline figure to accommodate steep backcountry gradients. A staff that reaches your sternum, typically around 50 to 55 inches, provides extra purchase when stepping downward off large boulders or crossing loose shale. On steep ascents, you simply slide your hand down the shaft below the main grip to maintain an efficient pushing angle. This dynamic hand placement makes a taller wooden staff remarkably versatile across variable wilderness terrain.
Adjusting Telescoping and Multi-Section Sticks
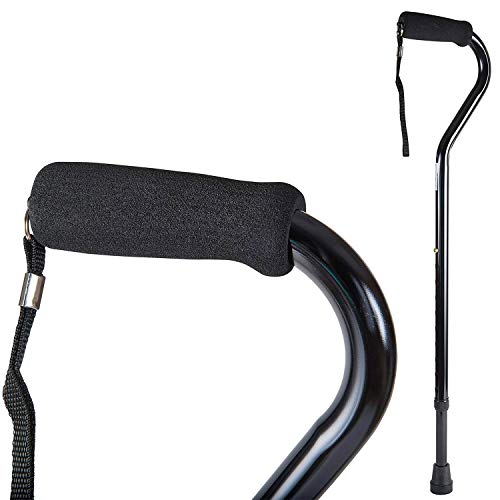
Adjustable walking sticks and canes offer immediate flexibility, allowing users to fine-tune length without sawing wood. Many modern aluminum balance canes, such as the DMI adjustable walking stick, utilize a push-button brass pin system adjusting from 30 to 39 inches in 1-inch increments. These models feature a threaded locking collar just below the adjustment holes that tightens down to stop the internal shaft from rattling or slipping during weight transfer. Other models, such as the REHAND foldable canes, feature multiple height settings to fit users between 5 feet and 6.5 feet tall.
For outdoor travel, multi-section trekking poles like the CLINE folding staff collapse from 53 inches down to a compact 13 inches using internal tension cables and locking cams. These compact models slip effortlessly into daypacks or luggage, making them an ideal choice for travelers seeking a packable gear setup for carry on travel. When assembling a multi-section folding pole, ensure each alloy segment seats fully into its corresponding ferrule joint before tensioning the top lock. Any gap between folding sections will alter the overall stick length and weaken structural integrity under load.
How to Cut and Trim a Solid Wooden Walking Stick
Customizing a handcrafted wooden walking stick made from natural hardwoods like hickory, oak, or sweet chestnut requires deliberate preparation before making a cut. Because wooden sticks cannot be lengthened once trimmed, you must verify your wrist-crease or trail measurement multiple times while wearing footwear. Never attempt to trim a wooden walking stick from the top handle end, as this destroys the carved handle geometry and weakens the structural grain. All sizing cuts must be executed at the bottom tip of the shaft.
Before cutting the timber shaft, remove the existing rubber ferrule or metal cap from the base of the stick. Measure the internal socket depth of the rubber ferrule, which typically ranges from three-quarters of an inch to a full inch. You must subtract this ferrule base thickness from your total cut calculation so the installed tip does not make the stick taller than intended. Mark your desired cut line cleanly around the circumference of the wooden shaft using a pencil and masking tape to prevent splintering.
Secure the wooden stick firmly in a padded clamp to prevent vibration and grain tear-out while cutting. Use a fine-tooth handsaw to create a clean, square cut perpendicular to the shaft axis. After sawing, chamfer the outer edge of the cut end slightly using medium-grit sandpaper so the rubber ferrule slides on smoothly without binding. Apply a thin coat of boiled linseed oil or wood sealer to the exposed end grain to prevent moisture intrusion before tapping the ferrule back into place.
Handle Geometry and How Grip Style Affects Stick Height
The shape and angle of a walking stick handle directly affect where your hand sits relative to the shaft, subtly changing your effective measurement. Traditional derby handles and classic tourist crooks feature horizontal resting platforms where the heel of your palm supports downward weight. On these designs, the top of the handle corresponds directly to your wrist crease measurement. Because derby handles distribute weight across a broad surface area, they minimize palm fatigue during prolonged neighborhood walks.
Offset handles and ergonomic palm-contour grips, such as those found on REHAND canes, position the hand directly over the vertical axis of the shaft. This configuration centers your body weight over the cane tip, which significantly reduces wrist strain and lateral torque. Staff knobs, carved ball tops, and extended foam trekking sleeves present a different grip dynamic entirely. Extended ribbed EVA foam or cork sleeves let you shift your grip up or down by several inches without adjusting mechanical pins, accommodating rolling terrain smoothly.
Ferrules, Rubber Tips, and Pivot Bases: Added Height Factors
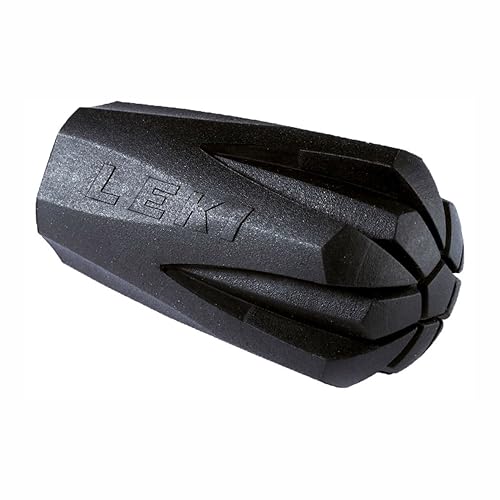
Traction hardware installed at the base of your walking stick plays an important role in overall length and stability. A standard slip-on rubber ferrule adds between half an inch and three-quarters of an inch of height depending on the thickness of its base pad. Quality rubber ferrules incorporate an internal metal washer that prevents the sharp bottom edge of a shaft from punching through the rubber over time. When replacing a worn ferrule, verify that the new tip base thickness matches the original component to maintain consistent sizing.
Pivoting quad bases and multi-prong rubber foot assemblies, such as those found on REHAND all-terrain canes, add substantially more vertical height than simple rubber caps. These rotating bases frequently raise the bottom of the cane shaft by one to two full inches above the pavement. If you swap a standard slim rubber tip for an all-terrain pivot base, you must shorten your adjustable cane by at least one notch to compensate. Failing to adjust for base height will force your wrist and elbow into excessive flexion.
Common Measurement Errors and Postural Consequences
The most frequent error people commit when sizing a walking stick cane is measuring while wearing socks or standing barefoot. A typical pair of walking shoes adds between one-half inch and one and a half inches of sole stack height. If you measure without shoes, your stick will end up noticeably short when you walk outdoors. A stick that is too short forces you to stoop forward, placing continuous strain on your lumbar spine and causing early lower-back exhaustion.
Another widespread mistake is allowing the shoulders to elevate or hunch during the measuring process. If you tense up or pull your shoulders toward your ears while checking your wrist crease, your recorded measurement will be falsely high. A walking stick that is too long forces your elbow into a tight angle and pushes your shoulder girdle upward with every contact phase. Over time, this unnatural posture leads to trapezius cramping, shoulder impingement, and severe neck fatigue on longer walks.
Trail Technique, Clothing, and Stride Coordination
Operating a correctly measured walking stick requires coordinating your arm movement with your natural walking cadence. For everyday balance, carry the cane in the hand opposite your weaker or less stable leg, moving the stick forward simultaneously with that leg. This contralateral gait creates a wide, triangular base of support that offloads joint impact naturally. Pairing this balanced rhythm with comfortable outdoor apparel like flexible lightweight hiking pants allows your hips and knees to move freely without fabric binding across uneven terrain.
When transitioning from level sidewalks to steep outdoor inclines, your body position and hand placement must adapt accordingly. On uphill climbs, shorten your forward reach and plant the stick closer to your lead foot to propel your body upward without overextending your shoulder. When hiking downhill, plant the stick slightly ahead of your stride to provide a reliable brake, bending your knees to absorb impact smoothly. Palming the top knob of a wooden staff or utilizing the wrist strap of an alloy pole helps secure your grip during descent deceleration.
Final Verification Checklist for Posture and Stability
Before heading out for a daily stroll or setting off down a rugged footpath, conduct a fast standing posture check. Stand upright with your regular walking shoes on, rest your hand comfortably on the grip, and let your arm hang naturally. Your shoulder should remain completely relaxed and level with your opposite shoulder, showing zero upward lift or downward slouching. Your elbow should display that gentle 15-to-20-degree bend for a cane, or rest near a 90-degree angle for a trail pole on flat ground.
Finally, inspect the mechanical integrity of your walking stick to guarantee safety on varied walking surfaces. For adjustable metal models, confirm that locking rings are tightened securely against the shaft and that spring pins are seated cleanly within their adjustment holes. For wooden walking sticks, check that the rubber ferrule is firmly seated without wobbling and that the timber shows no hairline splits along the grain. Taking these few seconds to verify your measurements and equipment delivers confident, stable, and joint-friendly mobility on every journey.






Write Your Review
No reviews yet. Be the first to share your experience!