


Negotiating uneven footpaths, steep descent trails, or cracked city sidewalks requires steady foot placement and dependable balance. An ill-fitted staff quickly leads to aching shoulders and persistent lower back strain when the shaft length does not match your natural body proportions. Learning how to adjust walking stick height ensures your frame remains upright while your upper body absorbs impact smoothly. Proper sizing transfers descending force away from overworked knee joints, allowing you to walk with upright dignity and renewed confidence across any terrain.
Many walkers overlook how footwear thickness, handle geometry, and ground conditions influence their ideal setup. Pairing a properly sized stick with comfortable, flexible hiking apparel allows full hip mobility without catching fabric on the shaft. Whether you carry a traditional handcrafted wooden staff or a modern multi-segment aluminum walking cane, dialling in the right height makes an immediate difference. A thoughtful adjustment protects your joints from repetitive fatigue and turns an awkward balance aid into an effortless extension of your arm.




Essential Principles for Sizing and Adjusting Your Walking Stick
Achieving the right stick height is the single most important factor for comfort, stability, and joint preservation. When a stick sits at the correct level, your shoulder stays relaxed, your elbow maintains an efficient angle, and downward pressure distributes evenly through your arm into the ground. A mismatched height forces awkward compensations that strain the neck, bend the spine unnaturally, and compromise footing. Understanding how to set your gear correctly transforms each stride into a balanced, energy-efficient movement.
Sizing for Level Walking: The Ninety-Degree Elbow Rule
For everyday neighborhood walking, paved paths, and level terrain, the standard measurement relies on a ninety-degree elbow bend. Begin by standing upright on a flat surface while wearing your typical walking shoes or trail sneakers. Let your arms hang naturally at your sides with your shoulders relaxed and your chest open. Bend your elbow so your forearm extends forward parallel to the ground, creating a right angle at the joint.
The distance from your wrist crease down to the floor represents your ideal overall walking stick length. When holding the handle in this posture, the top of the grip should rest directly beneath your wrist joint before your fingers curl around it. This position ensures your arm muscles can push downward effectively without hiking your shoulder upward. It also prevents downward slouching, keeping your posture tall and your center of gravity stable.
Sizing for Mountain Trails: Why Hiking Staffs Require Additional Height
Traditional full-length hiking staffs and backcountry trail sticks serve a very different biomechanical function than standard walking canes. While a walking cane targets level pavement stability, a trail staff must manage steep ascents, sudden downhill drops, and rocky stream crossings. For backcountry use, most outdoor enthusiasts prefer a staff that reaches between chest and shoulder height, typically measuring fifty to fifty-five inches.
This extra length allows for versatile hand positioning as the slope steepness shifts underneath your boots. Rather than adjusting mechanical collars every few minutes, you can simply choke your grip downward when climbing up a steep incline. Conversely, you can place your palm firmly over the rounded top knob when navigating steep downhill descents. This dynamic reach gives you the leverage needed to brace against sudden drops before your knees take the full brunt of the impact.
Adjusting Push-Button Telescoping and Folding Mechanisms
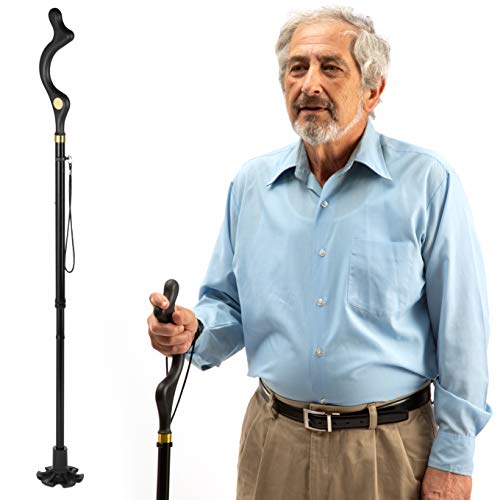
Many modern collapsible walking sticks and folding canes utilize spring-loaded push-button pins set along an aluminum alloy shaft. Products like the Medical king walking cane and the SupreGear folding cane feature multiple pre-drilled adjustment holes along their lower segments. To adjust these models, depress the small brass or steel detent pin and slide the internal tube up or down until the pin clicks securely into the desired hole.
Always confirm that the spring-loaded pin pops completely through the adjustment opening rather than lodging halfway inside the wall. If your cane features a threaded anti-rattle locking nut near the adjustment joint, loosen it before moving the pin and tighten it firmly clockwise afterward. On folding models held together by internal shock cords, verify that each tube joint seats completely inside its mating ferrule before bearing weight. A joint that is only partially seated can buckle suddenly when subjected to downward pressure.
Operating Twist Locks and Lever Cam Clamps on Telescoping Poles
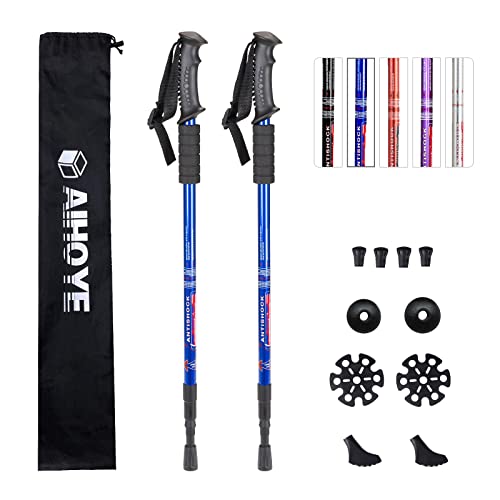
Trekking poles and adjustable hiking sticks, such as the Aihoye aviation aluminum poles, typically employ either internal twist-lock expanders or external lever cam clamps. External lever clamps are widely favored for backcountry travel because they provide visible, positive locking force that resists slipping under heavy loads. To adjust a lever-cam model, flip the lever open, slide the telescoping shaft section to the printed measurement marking, and snap the lever shut.
If the shaft slips downward when you lean on it, open the lever and turn the knurled tensioning thumb screw clockwise by a half-turn before closing the latch again. For poles featuring internal twist mechanisms, hold the upper shaft steady while twisting the lower section counterclockwise to loosen the internal expander plug. Extend the section to your target length and rotate it clockwise until you feel firm resistance, avoiding overtightening that could crack the internal plastic wedge.
Equalizing Multi-Section Telescoping Poles for Maximum Strength
Telescoping poles that feature three separate shaft segments require balanced extension across all sections rather than pulling a single section out to its maximum limit. Extending one section to its extreme end places tremendous mechanical leverage on a single joint, increasing the risk of structural bowing or shaft failure. Instead, distribute the required length evenly between the middle and lower shaft tubes to preserve overall structural rigidity.
Most manufacturers print graduated centimeter or inch markers directly along each telescoping section to simplify equal adjustment. Never pull any shaft section beyond the printed stop or maximum indicator line, as leaving insufficient tube overlap inside the joint invites catastrophic breakage under trail stress. When packing your gear into luggage for travel, collapsing all sections fully keeps the hardware protected and saves vital space. Travelers planning flights often check carry on luggage space guidelines to verify whether compact folding poles fit comfortably within overhead compartment restrictions.
Trimming and Sizing Traditional Wooden Walking Sticks
Handcrafted solid wood staffs made from hickory, oak, chestnut, or sweet hazel cannot be adjusted with the push of a button. Sizing a one-piece wooden stick requires a permanent cut, which means measuring carefully before picking up a hand saw. Put on your standard hiking boots, stand on a level floor, and hold the stick naturally while having a partner mark the timber shaft at floor level.
Always trim the excess wood from the bottom tip of the stick rather than cutting near the carved handle or grip zone. Deduct the thickness of your replacement rubber ferrule base, which typically adds between one-half and one full inch of overall height once seated. After cutting the shaft cleanly with a fine-toothed hand saw, bevel the cut edge slightly and seal the raw exposed grain with boiled linseed oil or clear spar urethane to prevent ground moisture from causing rot or cracking.
Biomechanical Consequences of an Incorrect Stick Height
Setting your walking stick at an incorrect height creates subtle biomechanical imbalances that compound with every mile you walk. A stick that is adjusted too high forces your elbow into an acute angle and causes your trapezius muscles to elevate your shoulder constantly. This repetitive tension frequently leads to neck stiffness, upper back muscle spasms, and hand fatigue from holding the grip at an awkward elevation.
Conversely, a walking stick that sits too low encourages a forward-leaning stoop that places excessive shear force on your lower lumbar spine. You end up bending at the waist rather than walking tall, which restricts lung expansion and reduces the balance stability the stick is intended to provide. Finding that exact sweet spot where your arm rests naturally at ninety degrees allows your body weight to transfer cleanly down through your skeletal frame.
Modifying Stick Length for Steep Uphill and Downhill Slopes
While a fixed setting works well on flat ground, steep mountain topography demands tactical height adjustments to maintain forward momentum and stability. When ascending a steep hill or climbing up tall stone steps, your stick plants on ground that is higher than the surface your boots occupy. Shortening an adjustable stick by two to three inches prevents your shoulder from lifting above chest level, allowing you to push down efficiently with your triceps.
When facing long, steep descents, the opposite adjustment is necessary to protect your lower joints from punishing impact forces. Lengthening your stick by two to four inches allows you to plant the ferrule further down the trail before stepping down with your lead foot. This early contact lets your upper body brake your downward momentum smoothly, offloading significant pressure from your knees, hips, and ankle joints.
Handle Ergonomics and Wrist Strap Tensioning
Handle geometry interacts directly with your stick height to determine overall grip comfort and wrist alignment. Ergonomic palm grips, contoured derby handles, and classic tourist crooks distribute downward palm pressure across a broad surface area, preventing nerve compression in the hand. Models with palm-shaped grips, such as the Vaunn medical cane, reduce wrist strain during long neighborhood walks by keeping the joint in a neutral, uncocked posture.
Wrist straps also play a vital functional role by supporting your downward weight without requiring a white-knuckle squeeze on the handle. To tension a strap correctly, slide your hand upward through the bottom of the loop and pull down over the webbing so the strap rests snugly across the back of your wrist. This configuration allows you to push down into the strap webbing with your wrist bones, giving your fingers a relaxed resting grip while preventing the stick from dropping down a hillside.
Ferrule Traction and Tip Compatibility Across Surfaces
The type of tip installed at the bottom of your walking stick alters its effective working height and dictates your traction on various surfaces. Heavy-duty rubber ferrules add approximately one-half to one inch of height to the shaft, which must be factored into your initial sizing calculation. A wide, multi-prong or pivoting base, like that found on the Honeybull folding cane, keeps full contact on uneven angled pavement while allowing the stick to stand independently.
When transitioning from urban sidewalks to backcountry dirt paths, swapping rubber feet for bare carbide or hardened steel spikes provides aggressive bite into hardpack soil, mud, and trail ice. However, bare metal spikes should never be used on slick indoor tile, polished hardwood, or smooth granite rock slabs, where they can skate unpredictably and cause sudden falls. Inspect your rubber ferrules regularly to ensure the internal shaft end has not punched through the rubber tread, which indicates an immediate need for replacement.
Structural Load Limits and Safe Balance-Assist Boundaries
Walking sticks and recreational hiking poles are engineered as balance-assist devices rather than certified medical crutches or primary weight-bearing appliances. While heavy-duty models like the Rehand adjustable walking cane boast robust aluminum frames rated to support up to 350 pounds of balance support, they are designed to assist stability rather than bear full airborne body weight. Understanding this boundary ensures you use your gear within its intended physical parameters.
Active older adults and trail hikers who need subtle balance confidence benefit immensely from having that reliable third point of ground contact. Before stepping onto challenging trails, always conduct a static weight test by leaning firmly down on the handle on a solid, level surface to verify that locking pins and cam levers remain completely immovable. Regular inspection of timber grain, aluminum locking sleeves, and rubber tread depth guarantees that your adjusted walking stick performs safely and reliably on every journey.






Write Your Review
No reviews yet. Be the first to share your experience!