


A reliable hiking staff provides indispensable trail stability, absorbing joint pressure on steep descents and steadying your balance across loose scree. When an adjustment mechanism slips unexpectedly or a worn ferrule loses traction on hard rock, knowing how to fix leki walking stick components ensures you stay safe in the backcountry. Routine trail wear often leads to loose internal expanding plugs, worn lever clamps, or blunted carbide points that compromise stability. Pairing a properly maintained pole with trail apparel designed for joint comfort can drastically reduce downhill physical fatigue during long days outdoors.
Most common trekking stick malfunctions stem from dirt accumulation inside the telescoping shafts, loose tension screws, or degraded rubber pads. Learning proper mechanical inspection and replacement techniques keeps your balance aid functioning without compromising structural safety under sudden downward loads. Rather than discarding an expensive walking stick, simple adjustments to the locking collars and timely replacement of tip assemblies restore dependable ground purchase. Addressing minor slippage or tip wear before setting out preserves your balance confidence on unpredictable mountain pathways.


Practical Guide to Diagnosing and Repairing Your LEKI Walking Stick
A walking stick is a critical tool for maintaining balance and offloading joint impact across rough terrain. When a walking stick suddenly collapses under weight or fails to grip the trail surface, a trekker faces immediate balance hazards. Fortunately, most common malfunctions affecting single walking staffs and telescoping poles can be corrected with basic maintenance and compatible replacement parts. Understanding the mechanical anatomy of your gear allows you to restore reliable locking tension and traction before your next outdoor outing.
Diagnosing Shaft Slippage Across Twist and Lever Locking Systems
Sudden shaft collapse is the most frequent issue hikers encounter when using adjustable walking sticks on steep descents. The primary cause typically depends on whether the stick utilizes internal twist expanders or external cam-lever clamps. Internal systems rely on an expanding plastic plug that grips the inside wall of the upper aluminum tube. External lever clamps rely on external compression around a slotted outer sleeve.
To identify why a shaft collapses, separate the telescoping sections completely and inspect the locking components for trail grime or structural wear. An internal expander covered in fine trail dust or mineral buildup will fail to create friction against the inner tube wall. If you use an external lever clamp, loose mechanical tension is usually caused by a slack adjustment thumbscrew. Inspecting the components while applying gentle downward pressure reveals whether the problem stems from surface contamination or insufficient mechanical torque.
Restoring Internal Twist-Lock Expanders Without Damaging the Tubing
Internal twist mechanisms require clean, dry contact between the expanding plastic collar and the inner aluminum shaft wall. Pull the lower shaft section completely out of the upper section to expose the threaded expansion bolt and plastic spreader nut. Wipe the plastic expansion plug with a dry, lint-free cloth to remove all loose grit, moisture, and aluminum residue. If residue clings stubbornly to the threads, rinse the plastic plug in warm soapy water and let it air-dry completely before reassembly.
Never apply oil, grease, silicone spray, or penetrating lubricants to the internal shaft walls or expanding mechanism. Lubricants destroy the frictional resistance needed for the expander to bite into the inner metal tube, causing the shaft to slip under minimal downward pressure. If the plastic expansion collar is stripped or cracked from prolonged use, thread on a compatible replacement expander nut. Once the parts are clean and dry, slide the lower shaft back into the upper tube and turn it clockwise until the expander firmly bites.
Calibrating External Cam-Lever Clamps for Maximum Holding Power
External lever clamps provide rapid height adjustments, but trail vibrations can gradually loosen the tension dial over repeated outings. If the pole shaft slides inward when you lean forward, open the cam lever to release all clamping pressure. Locate the knurled dial directly opposite or adjacent to the lever hinge. Turn this tension dial clockwise a quarter turn with your fingers or a small flathead tool to increase clamping friction.
Close the lever to test the clamping resistance against the lower shaft section. The lever should close with firm thumb pressure without requiring excessive force that could warp the composite clamp housing. Avoid overtightening the tension dial, because excessive clamp pressure can crush thin-walled aluminum tubing or crack composite collars in freezing weather. When properly adjusted, the clamp holds securely without slipping when you plant the stick and press downward with your upper-body weight.
Replacing Worn Flex Tips and Carbide Spikes Using Controlled Heat
The lower tip of a walking stick endures immense friction against rocks, gravel, and frozen ground. Over time, carbide points can fracture, or the flexible plastic ferrule housing can split from severe trail impacts. Products such as LEKI Flexible Carbide Tips One Color One Size or the LEKI Carbide Flextip are engineered to flex up to thirty degrees without damaging the pole shaft. When the carbide crown wears flush with the plastic ferrule, replacing the entire flex tip assembly restores aggressive trail purchase.
Factory flex tips are secured to the bottom shaft via friction fit and heat-activated bonding resin. To remove a damaged tip safely, submerge the lower two inches of the pole tip in boiling water for approximately three to five minutes. The boiling water softens the internal adhesive and expands the plastic ferrule without scorching the metal shaft. Wrap the hot tip in a thick towel or use pliers to firmly pull and twist the tip straight off the metal end.
Clean any residual glue or oxidation from the exposed lower metal tenon using fine emery cloth or a dry rag. Slide your new flexible carbide tip onto the shaft taper, ensuring it aligns straight with the pole axis. Tap the newly installed tip firmly against a scrap block of wood or a protected floor to seat the ferrule securely. Allow the assembly to cool to room temperature before taking the stick onto rough trails, verifying that the tip does not rotate or wobble.
Selecting and Installing Rubber Ferrules for Pavement and Hard Rock
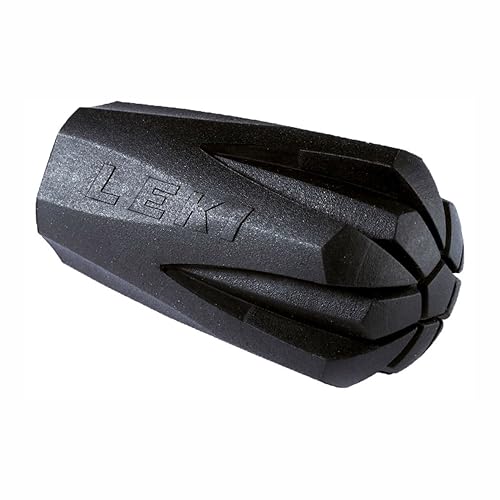
Carbide spikes provide biting traction in loose soil, mud, and trail ice, but they skitter dangerously across smooth asphalt, flat rock slabs, and finished indoor floors. Installing vulcanized rubber covers, such as the LEKI Walking Rubber Tip or angled LEKI Powergrip Pad, dampens ground vibrations and creates friction on hard surfaces. These rubber pads slip directly over the carbide spike, protecting delicate ground surfaces while shielding the metal point from premature blunting during neighborhood strolls. Also, using the LEKI Rubber Fitness Walking Tip expands the contact area to improve traction during brisk fitness walks on paved surfaces.
High-mileage walkers should carry spare tips, such as a bulk pack of universal 11 mm rubber ferrules like the 10 Pack Trekking Pole Tips, because rubber treads wear down quickly on abrasive concrete. When walking through mud or wet dirt, suction can easily pull an unreinforced rubber ferrule straight off the metal spike. Inspect the interior base of replacement ferrules to ensure they contain an embedded steel washer, which prevents the sharp metal tip from punching through the rubber bottom. Push the rubber ferrule firmly onto the flex tip with a slight twist to establish a snug mechanical grip before your walk.
Hikers transitioning from urban pathways to rugged mountain trails can stow their rubber pads inside their pack while traversing backcountry terrain. Pairing dependable footwear and breathable trail pants with accessible pole accessories allows you to adapt to changing ground conditions without stopping your stride. If you notice the bottom tread pattern smoothing out, swap the rubber ferrule immediately to avoid unexpected slipping on wet granite or rain-slicked crosswalks. Routine visual checks before each walk ensure your rubber feet maintain deep tread grooves for reliable pavement grip.
Unjamming Stuck Telescoping Shafts Without Bending the Metal
Telescoping walking sticks frequently become stuck after hiking in heavy rain, crossing sandy streams, or storing gear in damp basements. Moisture trapped inside the aluminum tubing causes surface oxidation, which creates white mineral crust that locks the inner expander against the outer wall. Forcing the stuck sections with bare hands can cause you to twist too hard, potentially denting the hollow tube or snapping the internal plastic mechanism. Taking a patient, systematic approach prevents accidental structural damage to the delicate metal tubing.
To break the oxidation bond, wrap rubber jar-opening pads or silicone grip sheets around both sides of the stuck joint for maximum hand traction. Have a partner grasp the upper section while you twist the lower section counterclockwise with steady, controlled rotational torque. If the joint refuses to budge, apply gentle localized heat using a hair dryer around the outer tube seam for two minutes. Aluminum expands when warmed, which often breaks the mineral seal and allows the internal expander to release smoothly.
Avoid using heavy pipe wrenches or metal pliers directly on the shafts, as metal tools crush and ovalize round aluminum tubing instantly. Once the sections slide apart, scrub the white mineral deposits off the metal using a dry scouring pad. Clean the inside of the outer shaft with a dry cloth wrapped around a long dowel or cleaning rod to prevent immediate re-jamming. Keeping the bare metal tubes bone-dry ensures smooth telescoping operation during future trail adjustments.
Evaluating Bent Shafts and Distinguishing Balance Aids from Medical Devices
A sudden slip on a rocky descent can cause a hiker to fall onto a planted walking stick, resulting in a bent shaft section. Aluminum shafts, typically crafted from heat-treated alloys like 7075 aluminum, possess impressive tensile strength but lose structural integrity once bent past their elastic limit. Attempting to bend a severely warped aluminum tube back into alignment work-hardens the metal, creating microscopic fractures that can cause sudden structural failure under future downward loads. Inspecting bent sections under good lighting reveals whether the tube wall has crimped or creased along the bend radius.
If an aluminum section has only a very slight deflection, gentle hand pressure over a curved knee might straighten it enough to telescope smoothly, but heavy downward force should be avoided. Carbon fiber shafts that exhibit cracks, splintering, or delamination cannot be repaired and must be retired immediately. Remember that recreational walking sticks, such as single staffs or compact models like the LEKI Super Micro Trekking Pole (Single), are designed specifically as non-medical balance-assist aids. They offload joint fatigue and stabilize footing, but they are never certified for non-weight-bearing medical rehabilitation or post-surgical crutch support.
Carrying heavy loads across remote terrain places elevated strain on every piece of equipment you rely on for physical support. Hikers hauling bulky gear or navigating deep mountain passes alongside heavy load carrying equipment must inspect pole shafts for structural bowing before trusting them on steep drop-offs. If a shaft section displays deep scratches, gouges, or permanent kinks, order a factory replacement section rather than risking a dangerous collapse in challenging terrain. Preserving structural integrity protects your joints from sudden impact when negotiating steep drop-offs.
Adjusting Handle Straps and Ergonomic Grips for Joint Comfort
An improperly adjusted wrist strap forces your fingers to grip the handle tightly, leading to palm cramping, blisters, and forearm fatigue over long trail miles. Modern walking sticks feature ergonomic handles, such as the rounded Aergon grip or classic walking handles, designed to support the palm comfortably during descents and uphill climbs. Inside the top of the handle, an internal wedge lock secures the nylon wrist strap in place. Understanding how this strap locking wedge operates enables rapid tension adjustments to match your hand size or glove thickness.
To adjust the strap length, pull the upper strap section upward firmly to pop the internal locking wedge out of its recess. With the wedge released, slide the nylon webbing through the handle channel to shorten or lengthen the loop until your hand rests naturally against the grip contour. Thread your hand up through the bottom of the loop so your palm rests directly over the strap junction against the handle body. Push the strap back down into the handle socket to seat the wedge, locking the strap length securely under tension.
Regularly wash sweat salts and dirt from foam or rubber handles using lukewarm water and mild dish soap to keep the grip supple. Natural cork grips also benefit from occasional gentle cleaning to prevent drying and chipping after exposure to prolonged sun and rain. Check the webbing strap for fraying along the edges, especially where it passes through the plastic anchor channel inside the grip head. Replacing worn straps before they snap prevents you from losing your stick when traversing steep or rocky mountain scree.
Establishing a Pre-Trail Inspection Routine and Storage Protocol
Preventative maintenance eliminates the vast majority of walking stick failures before you ever step foot onto the trailhead. After returning from a wet or muddy hike, pull all telescoping sections apart completely and wipe each tube down with a clean, dry cloth. Allow the individual shaft sections to air-dry disassembled overnight in a well-ventilated room before sliding them back together for storage. Storing assembled poles while damp traps moisture inside the shafts, initiating galvanic corrosion and mineral crust that locks the mechanisms tight.
When storing your sticks for the off-season, loosen all external cam levers and twist expanders to relieve continuous stress on internal springs and plastic collars. Leaving cam levers clamped tightly under tension for months stretches the composite collar material and reduces future clamping force. Store walking sticks in a dry closet away from extreme heat sources, direct sunlight, and humid garage environments. Inspect the rubber ferrules, carbide crowns, and basket threads periodically to ensure no components have developed hairline stress cracks during storage.
Perform a quick physical weight-bearing check prior to departing for every major backcountry trip. Extend your walking stick to your preferred trail height, lock all collars securely, and lean firmly downward against the handle on flat ground. If the shaft yields, slips, or emits clicking noises, re-clean the internal components and adjust the tension dial before packing your gear. Taking five minutes to inspect and maintain your walking stick ensures reliable balance assistance and effortless joint relief on every upcoming adventure.




Write Your Review
No reviews yet. Be the first to share your experience!