


Maintaining proper posture and reducing lower-body strain during a long walk requires more than just picking up any standard balance aid. An improperly sized stick forces your shoulder upward or causes you to hunch forward, placing unnecessary stress on your wrists, neck, and lumbar spine. Learning how to measure someone for a walking stick ensures the shaft provides dependable stability across pavement, gravel paths, and uneven forest roots. When the height matches the walker’s natural anatomy, each step transfers downward impact away from vulnerable joints and into the upper body. Hikers pairing their balance gear with hiking gear designed for joint relief often find that correct sizing makes a major difference on long descents.
Whether you are outfitting an active adult who wants subtle neighborhood balance support or a trail walker preparing for rocky paths, physical measurements establish the foundation for safety. Modern options range from adjustable aluminum designs by brands like Switch Sticks and DMI to traditional fixed-length hardwood staffs crafted from dense hickory or oak. Taking accurate standing measurements while wearing everyday walking shoes allows you to select or trim a shaft that encourages an upright stride without unnatural elbow elevation. A dependable balance aid should always feel like a natural extension of the arm rather than an awkward obstacle.


Practical Guide to Measuring and Sizing a Walking Stick
Finding the correct length for a balance aid is critical for achieving comfortable, fatigue-free movement. A stick that stands too tall forces the user to hike their shoulder upward, creating strain in the neck and upper back. Conversely, a stick that is adjusted too short causes persistent slouching and lower back fatigue. Taking deliberate measurements before choosing or cutting a stick ensures the shaft works in harmony with the walker’s natural gait.
Fundamental Difference Between Walking Sticks and Hiking Staffs
A frequent point of confusion stems from mixing the sizing rules for neighborhood balance aids with traditional wilderness hiking staffs. Everyday walking sticks and balance canes are designed primarily for flat surfaces and paved walkways. These balance aids rely on a low pivot point where the handle aligns near the wrist crease to keep the elbow bent at a relaxed angle. This geometry allows the user to press downward with skeletal support without straining the forearm.
Traditional hiking staffs serve a different functional purpose on backcountry trails. A woodland staff or single-piece hiking stick typically reaches from the sternum to the collarbone, often measuring between 50 and 55 inches. This extra height allows outdoor walkers to grasp the shaft at multiple heights as the trail gradient changes. On steep climbs, a hiker shifts their grip downward, while steep descents require gripping the top of the staff for braking support.
Understanding this distinction prevents sizing errors when purchasing gear online or cutting natural timber. Applying hiking staff heights to an everyday neighborhood walking stick causes shoulder discomfort within minutes. Choosing the right measurement standard depends directly on where and how the person intends to use the stick.
Preparing the Subject: Footwear, Stance, and Posture
Accurate measurements require setting up the subject in an upright, neutral standing position on a level floor. The individual should wear the exact footwear they plan to use most frequently with the stick. Walking shoes, running sneakers, and rugged hiking boots all feature different outsole thicknesses that alter standing height. Measuring someone in bare feet or thin socks will almost always produce a stick that finishes too short once outdoor shoes are worn.
The subject must stand naturally with their feet spaced shoulder-width apart to mirror a standard walking stance. Instruct them to let their arms hang naturally at their sides with shoulders relaxed rather than tensed or pulled back. Many people unconsciously stiffen their posture or lift their chin when being measured, which introduces artificial height into the calculation. A relaxed, natural posture guarantees that the stick supports everyday walking mechanics.
Having a second person take the physical measurement is essential for accuracy. If the subject bends over to read a tape measure, their shoulder drops and their elbow flexes, immediately throwing off the reading. The person being measured should look straight ahead at the horizon while the assistant marks the distance. This simple partner setup prevents common errors and ensures a reliable baseline measurement.
The Wrist-Crease Protocol for Standard Walking Sticks
The standard method for sizing a standard walking stick relies on locating the distal wrist crease. With the subject standing upright in their shoes and arms resting loosely at their sides, identify the horizontal skin fold where the hand meets the wrist joint. The distance from the floor surface straight up to this wrist crease represents the total height the walking stick should measure, including the handle and rubber ferrule.
When the person places their palm atop a handle positioned at wrist-crease height, their elbow will naturally flex between 15 and 20 degrees. Some recreational walkers prefer a slightly more pronounced elbow bend of approximately 20 to 30 degrees for greater downward leverage. This slight flexion acts like a natural shock absorber, allowing the arm to cushion downward impacts without jarring the shoulder. A locked, straight arm transmits shock directly into the collarbone, while an elbow bent past 45 degrees leads to rapid muscle fatigue.
To verify this measurement with a tape measure, place the bottom end of the tape flat against the floor right beside the shoe heel. Extend the tape vertically alongside the leg and note the reading at the center of the wrist crease. Record this measurement to the nearest quarter inch. This number should match the distance from the bottom of the rubber tip to the highest surface of the handle.
Sizing Full-Length Hiking Staffs for Trail Gradients
Sizing a traditional wooden hiking staff requires a different anatomical reference point than a balance cane. Instead of the wrist crease, trail staff measurements generally align with the user’s armpit, sternum, or shoulder line. For most adult walkers, a proper hiking staff measures roughly two to three inches below the shoulder, landing squarely at the center of the breastbone. In numerical terms, most adult staffs measure between 48 and 56 inches depending on user height.
Trail terrain is dynamic, featuring sudden ascents, slippery switchbacks, and loose gravel descents. A taller staff allows the user to reach ahead across rocky stream crossings or probe deep mud before committing their full weight. Many hikers prefer wearing lightweight hiking pants that offer flexible movement alongside a tall staff to maintain unrestricted mobility across steep terrain. The extended height of the staff provides a generous gripping zone that accommodates steep uphill scrambling.
To measure someone for a hiking staff, have them stand in their trail boots on level ground. Measure from the floor to their sternum, or roughly six inches below the chin. This vertical measurement gives the ideal overall staff height, providing enough length above the hand for downward bracing on descents. It also leaves sufficient shaft length below the hand when climbing steep inclines.
Adjusting Collapsible and Telescoping Models
Adjustable aluminum walking sticks offer substantial flexibility because they eliminate the anxiety of committing to a permanent cut. Models such as the Switch Sticks and DMI options utilize internal push-button pins paired with numbered adjustment holes along the aluminum tubing. These shafts generally provide height adjustments ranging from 32 to 37 inches or 33 to 37 inches in one-inch increments. This range comfortably accommodates the vast majority of individuals between 5 feet 2 inches and 5 feet 11 inches in height.
When setting an adjustable stick, depress the push-button and slide the inner tube until the handle aligns with the subject’s measured wrist-crease height. Always ensure the push-button fully clicks into the targeted adjustment hole before applying weight to the handle. Many models also include an exterior threaded tension ring or lock collar just below the joint. Tightening this collar firmly prevents mechanical clicking and stabilizes the telescoping section against lateral wobble.
Collapsible models offer significant travel convenience because they fold into compact sections that fit easily into luggage or backpacks. Travelers checking carry-on luggage dimensions appreciate that multi-section folding sticks collapse down to roughly 11.5 inches for simple packing. When reassembling a folding model, inspect the internal tension cord to ensure each aluminum section seats fully within its joint socket. Verifying joint alignment prevents unexpected collapse when bracing against sudden trail obstacles.
Custom Trimming Solid Hardwood Shafts and Installing Ferrules
Cutting a solid hardwood walking stick made of hickory, oak, chestnut, or hazel requires careful execution because wood cannot be restored once removed. Never cut a wooden walking stick from the top handle end, as this ruins the carved contour or tenon joint. All length adjustments must be made at the bottom tip of the shaft. Before making any cut, remember that the replacement rubber ferrule adds approximately one-half to three-quarters of an inch of height to the finished stick.
To trim the stick accurately, remove the original rubber tip and measure upward from the bottom of the wood. Subtract the thickness of the rubber ferrule base from your total cut line so the final assembled stick matches the target wrist-crease measurement. Wrap masking tape tightly around the shaft at the cut line to prevent wood grain splintering as the saw blade exits. Use a fine-tooth handsaw to produce a clean, square cut perpendicular to the shaft axis.
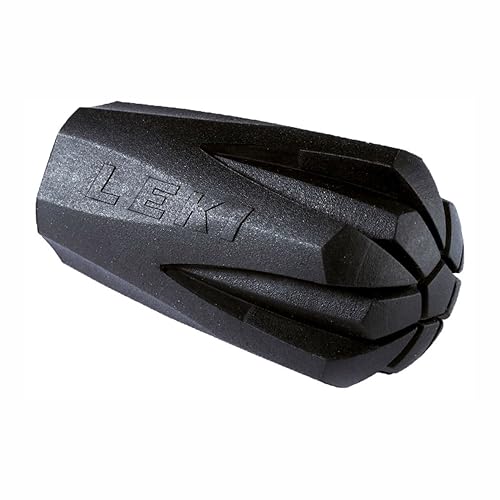
After cutting, chamfer the sharp outer edge of the wood base with medium-grit sandpaper so the rubber ferrule slides on smoothly without tearing. High-quality rubber ferrules feature an embedded metal washer at the internal base. This metal washer prevents the cut wooden shaft from punching straight through the rubber pad under heavy downward pressure. Press the ferrule firmly onto the tapered base, tapping it against a protected floor to seat it completely.
Grip Styles, Handle Geometry, and Height Calibration
Handle geometry plays an underappreciated role in how a walking stick fits the user’s hand and body. Traditional crook handles feature a continuous curve that places the palm slightly higher than the top of the wooden shaft. Derby handles, in contrast, provide a flattened, contoured horizontal grip that distributes downward palm pressure evenly across a broad surface area. An ergonomic derby handle helps prevent palm cramping and reduces muscle fatigue for walkers dealing with hand stiffness.
When measuring someone who uses a contoured palm-grip or orthotic handle, measure to the lowest resting point of the hand recess. An orthotic handle cradles the palm lower than a rounded knob or broad tourist handle. Failing to account for handle thickness can result in a stick that feels slightly too tall in active use. Always measure to the exact contact plane where the fleshy base of the user’s palm will bear down on the grip.
Grip material also influences hand comfort and security over long walking sessions. Painted and polished hardwood handles offer classic styling and a smooth feel, but they can become slick if hands sweat heavily. Porous natural cork or ribbed foam grips absorb moisture and provide higher tactile traction for outdoor trail use. Regardless of the material, a well-contoured handle allows the user to maintain a secure grip without clenching their fingers tightly.
Terrain Variations and Biomechanical Load Offloading
Once a stick is measured to the correct baseline height, understanding how to use it across diverse terrain maximizes joint protection. On level surfaces, the stick moves in tandem with the opposite foot to create a stable, four-point walking cadence. This rhythmic plant offloads downward impact forces from the knees and hips. It also encourages a steady, upright walking posture that keeps the chest open and breathing relaxed.
Negotiating steep downhill paths requires adapting your hand placement or leveraging a slightly longer shaft length. As the trail drops away, planting a standard-length stick forward forces the user to lean downward. Placing the palm firmly across the top dome of a derby handle or knob allows the hiker to brake their descent while keeping the spine upright. This braking action reduces shock loading on the quadriceps and knees during repetitive downhill steps.
Ascending steep inclines requires the opposite mechanical adjustment. Grasping a tall hiking staff several inches below its primary handle prevents the shoulder from hiking upward as the stick is planted on higher steps. This lower grip allows the arms to assist the leg muscles by pushing downward during forward steps. Matching your grip position to the trail angle keeps your center of gravity balanced over your base of support.
Verifying the Fit and Recognizing Safety Boundaries
After completing the measurement and adjusting or trimming the stick, conduct a practical movement test before heading out on long outings. Have the individual walk back and forth along a hallway or level walkway for several minutes at their normal pace. Observe their shoulders carefully from both the front and side profiles. If one shoulder dips or hikes upward during the stick plant, the height requires minor readjustment to achieve true postural symmetry.
It is equally important to understand the structural boundaries of recreational walking sticks and balance aids. Standard walking sticks and folding aluminum canes are designed for balance assistance and light joint offloading, supporting user weights up to 250 pounds when used as intended. They are not designed to serve as medical crutches or full weight-bearing orthopedic devices for non-weight-bearing recovery. Always inspect rubber ferrules for tread wear and verify mechanical push-buttons before relying on a stick for outdoor stability.





Write Your Review
No reviews yet. Be the first to share your experience!